How to share your base station with RTK2go NTRIP Caster


RTK2go is a free community NTRIP Caster created to allow you to publish your GNSS correction streams for others to use with their NTRIP Clients. It acts as a central hub, facilitating the real-time delivery of accurate corrections to RTK-enabled devices.
In this tutorial we will explain step by step what you need to do to connect
your base station to RTK2go. If you use a different caster, you can jump directly to
Step 2.
Required hardware:
- simpleRTK2B or simpleRTK3B series receiver
- RTK antenna
- WiFi NTRIP Master or 4G NTRIP Master or Ethernet NTRIP Master
- USB cable compatible with the USB port of your receiver for connecting to a PC
- a computer or laptop with internet connection
- Note: simpleRTK2B Lite is not compatible with 4G NTRIP Master.
SimpleRTK2B Budget will need a Shield for second Plugin Socket to use 4G NTRIP Master.
- Good to know: Both simpleRTK2B and 3B series receiver can be used as base station. SimpleRTK2B series receiver is a low-cost option which support L1 and L2 bands. SimpleRTK3B series receiver supports complete L1, L2 and L5 bands, which is a future proof option.
Required software:
- u-center (in case you have a simpleRTK2B series receiver)
How to share your base station with RTK2go?
Firstly, create a RTK2go account.
- Register using this link.
You will be asked to enter your name and e-mail address and mountpoint
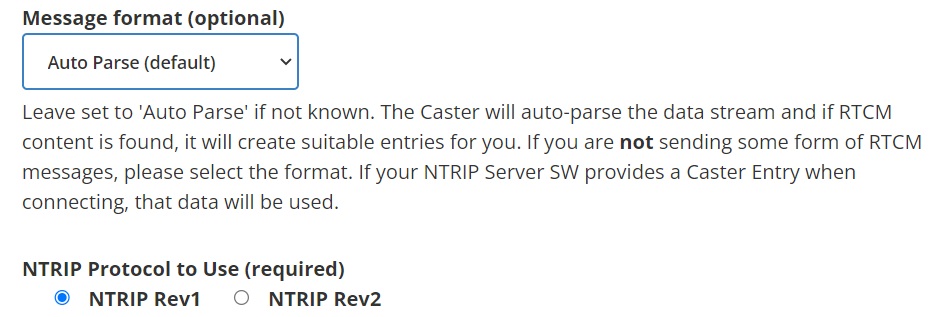
name. Leave the Message format to Auto Parse and NTRIP Protocol to Use to NTRIP Rev1. Other fields are optional.
- An automatic e-mail will be sent. You need to reply to the sender to confirm
your registration. - A few hours after your reply, you will get another e-mail to confirm that your
mountpoint is available.
Secondly, configure your receiver as base station.
simpleRTK2B series receiver
simpleRTK3B series receiver
simpleRTK2B series receiver
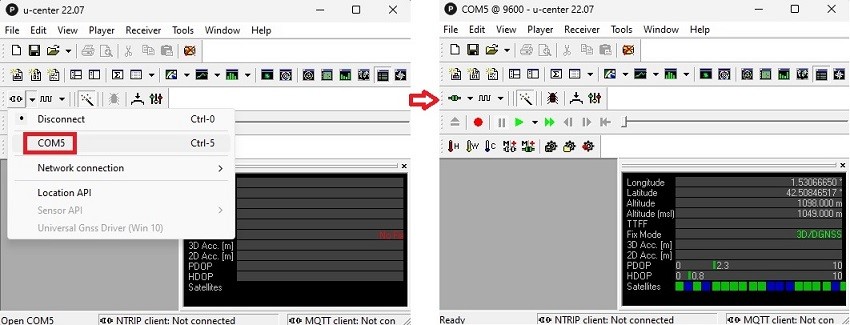
- Connect your receiver to the computer via the USB port labeled with POWER+GPS. Open u-center and connect your receiver via COM port.
- Download the configuration file by right clicking the mouse and “save link as” and upload it to your receiver:
If you don´t know how to check the firmware version and load a configuration file, have a look at this tutorial.
simpleRTK3B series receiver
- Connect your receiver to your computer via the USB port labeled with POWER+GPS.
- Open the web interface by typing 192.168.3.1 in your preferred web browser to configure your receiver as a base station.
If you don’t know how to do this, follow this tutorial.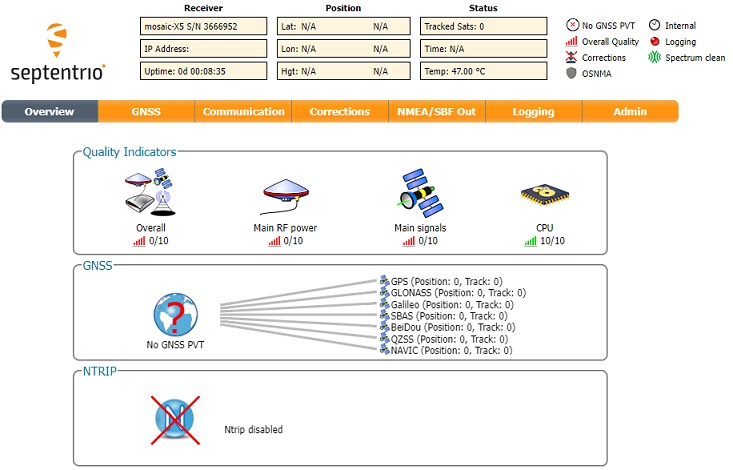
Thirdly, use a communication plugin to connect to NTRIP Caster.
WiFi NTRIP Master
4G NTRIP Master
Ethernet NTRIP Master
WiFi NTRIP Master
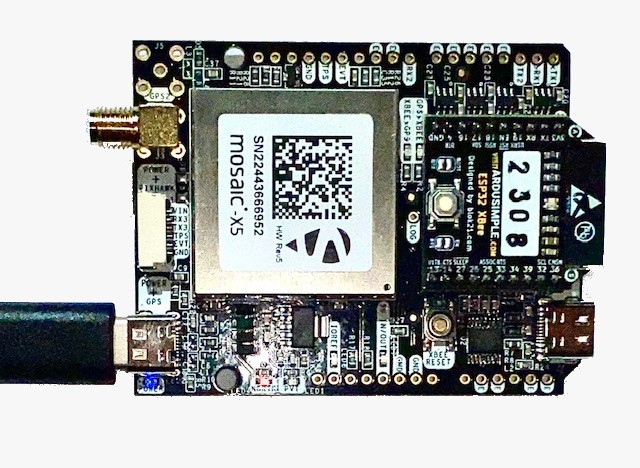
- Plug the WiFi NTRIP Master onto your receiver.
- Connect the WiFi hotspot created by WiFi NTRIP Master (name :ESP_XBee_xxxxxx).
- Open http://192.168.4.1/ on your web browser. If you don´t know how to do it, check the Hookup Guide.
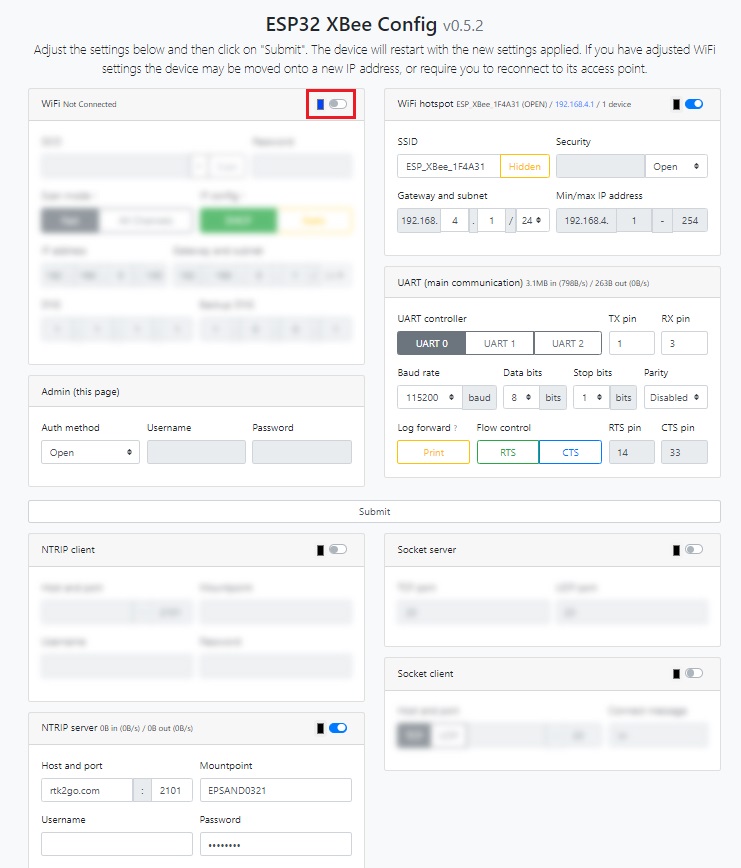
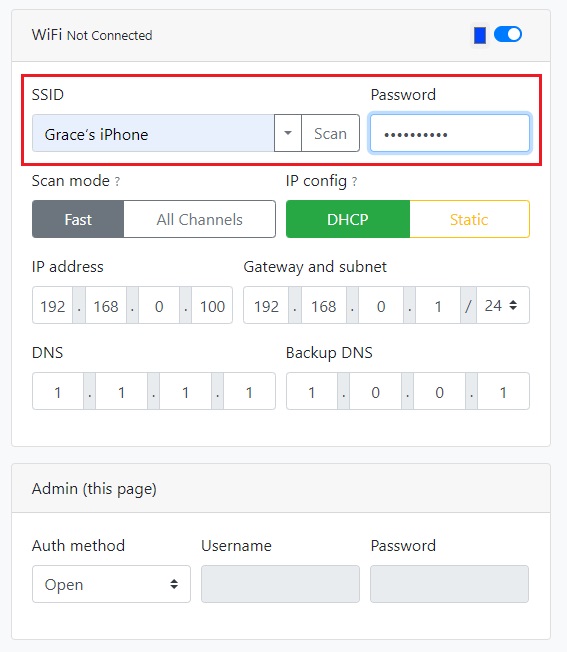
- Enable WiFi option. In the SSID type in the name and password of your WiFi or personal hotspot of your phone.
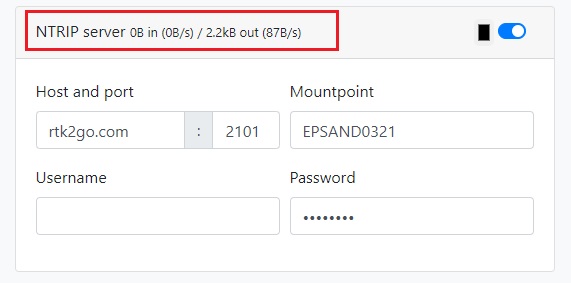
- Enable NTRIP server option. Fill in the information you get from step 1. Click Submit button and if everything is ok you will see an outstream of data like in the below picture. Press Submit.
4G NTRIP Master
- Plug the 4G NTRIP Master onto your receiver (You don´t need to introduce the SIM card and antenna yet).
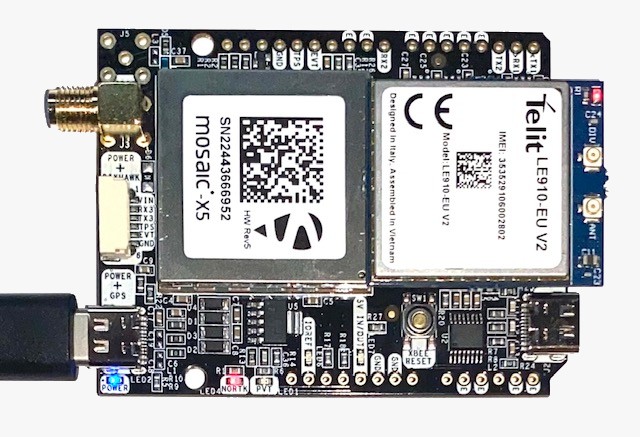
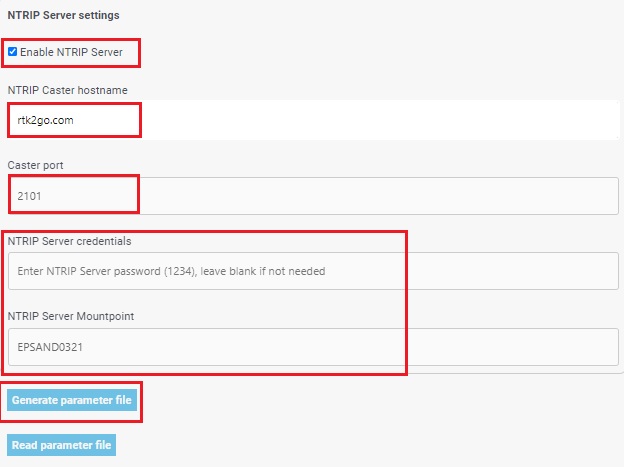
- Go to the Hookup Guide to generate your 4G NTRIP Master Parameters File. When creating the Parameters File, enable the NTRIP Server settings, fill in the information you get from step 1 and click Generate parameter file button.
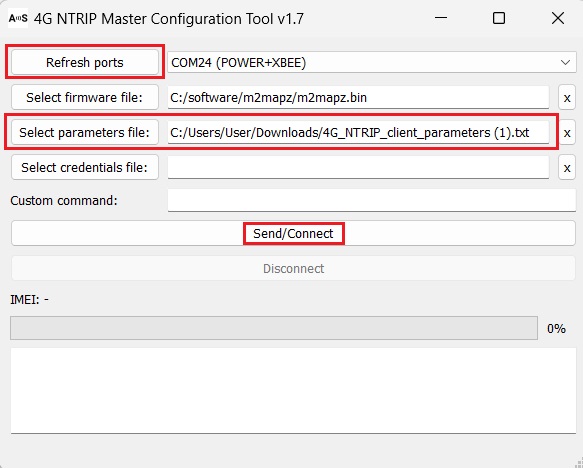
- Use the 4G NTRIP Master Configuration tool (you can download it from the Hookup Guide) to load the parameter file.
- Now you can install your SIM card and the 4G antenna.

Ethernet NTRIP Master
- Plug the Ethernet NTRIP Master onto your receiver.
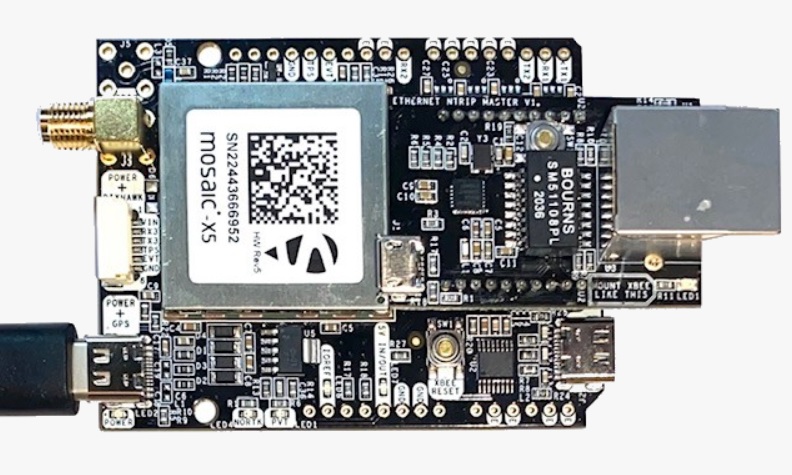
- Go to the Ethernet NTRIP Master Hookup Guide->Parameters and follow the steps to generate and load your Parameter File.
When creating the Parameters File, set the General settings as following image.
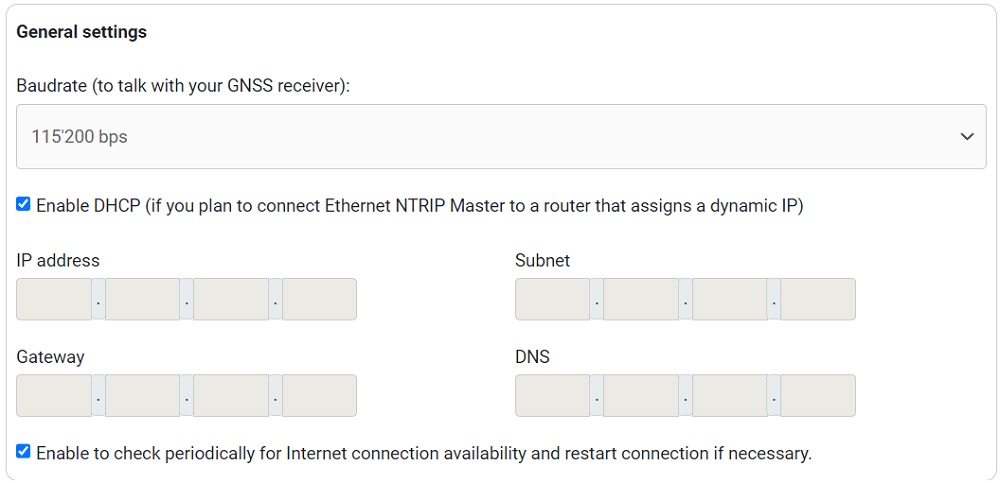
- Enable the NTRIP Server settings. Fill in the information you get from step 1. Click Generate parameter file button.
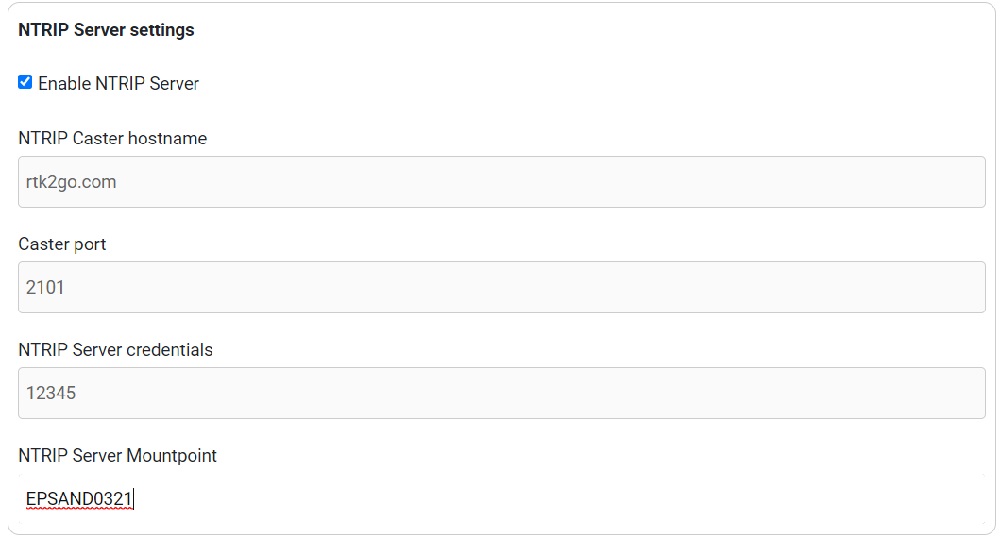
- Drag and drop the generated file on your Ethernet NTRIP Master flash drive. Make sure the name is “Ethernet_NTRIP_Master_parameters.txt”.
- Wait 10 seconds and restart your Ethernet NTRIP Master device by pressing the XBEE RESET button on your receiver(not the BOOT button on you Ethernet NTRIP Master). If you have a simpleRTK2B Lite, unplug the USB cable and replug it.
Fourthly, check the availability of your base station.
- Plug the RTK antenna to your receiver. Place the antenna in a location with good view of the sky, or near a window for testing the functionality.
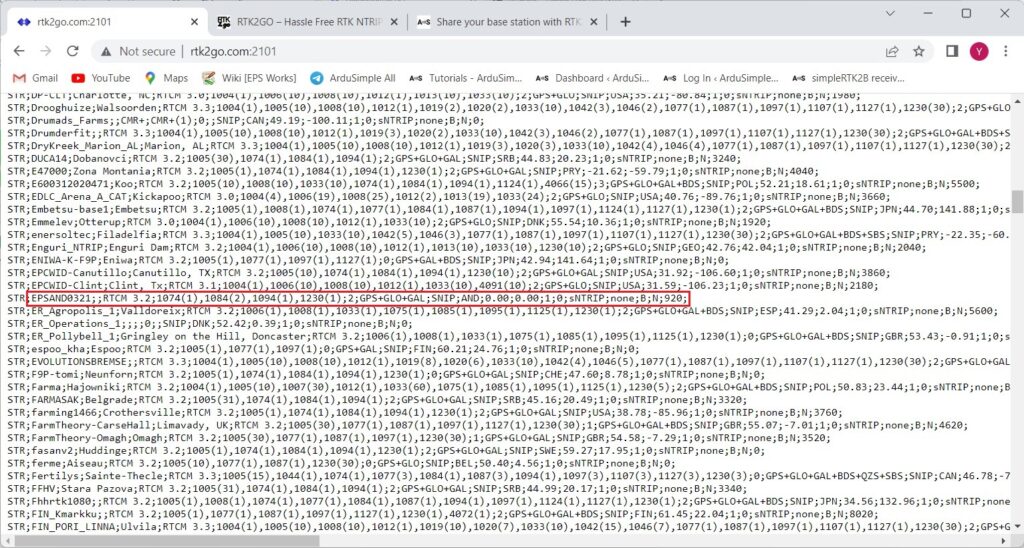
- To see that your mountpoint is publicly available, go to this webpage and search for your mountpoint name and you should see it together with additional information. It may take few minutes for the server to update.
Finally, use any NTRIP Client to connect to your mountpoint.
- To use any NTRIP Client to connect to your mountpoint, connect to the NTRIP Caster (RTK2go.com at port 2101).
- Enter your username and password (in case of RTK2go.com enter your email and the password ‘none’).
- Connect and confirm your device is getting a stream of RTCM data.
If you want to do this tutorial we have all the products in stock and ready to be shipped.
- simpleRTK2B or simpleRTK3B series receiver
- RTK antenna
- WiFi NTRIP Master or 4G NTRIP Master or Ethernet NTRIP Master
- USB cable
 and
and 

