How to use centimeter GPS with any Android app (mock location)

In this tutorial we will explain how to configure ArduSimple RTK receivers to be used as Mock location for Android smartphones/tablets in order to get centimeter position accuracy.
If you are not familiar with the term, mock location means that you cheat your Android device to use an external GNSS receiver as if it was its own internal one. This has the advantage that any GPS/GNSS app that works with your Android device can benefit of centimeter level accuracy.
In this tutorial we will use GNSS Master app which allows you to:
- Connect to your external GNSS receiver via USB Serial (OTG), Bluetooth, BLE and TCP/IP.
- Send corrections to your GNSS receiver from in-built NTRIP Client (V1 & V2), and PointPerfect.
- Use high accuracy position from your receiver directly with SW Maps, and with all other Android apps via Mock Location.
You can learn more about GNSS Master app here .
In this tutorial we will use ArduSimple RTK Handheld Surveyor Kit because it is pre-configured to send NMEA over Bluetooth and USB at the same time.
You can also check out this video where we describe how to use the RTK Portable Bluetooth kit with your phone to enhance its accuracy to centimeter level.
Required hardware:
- RTK Handheld Surveyor Kit
- Android smartphone/tablet with internet connection (make sure your device supports Bluetooth 2.0 or has USB OTG capabilities)
Required software:
- GNSS Master app (You can install it from the Google Play Store)
Firstly, install GNSS Master app and enable mock location in your Android Device.
This step only needs to be done once.
- Install GNSS Master app on your Android device from the Google Play Store. When you first open the app, you will be asked to allow certain permissions to GNSS Master.
- Location Permission
- Display Notifications
- Once you accept the permissions, the Status page will load, showing the current status of the app. We will configure it later.
- To enable mock locations in Android we will need to get Developer permissions. The procedure may vary slightly between different Android versions and smartphone models (you can Google your “Smartphone model + enable mock location” if you can’t find the exact options).
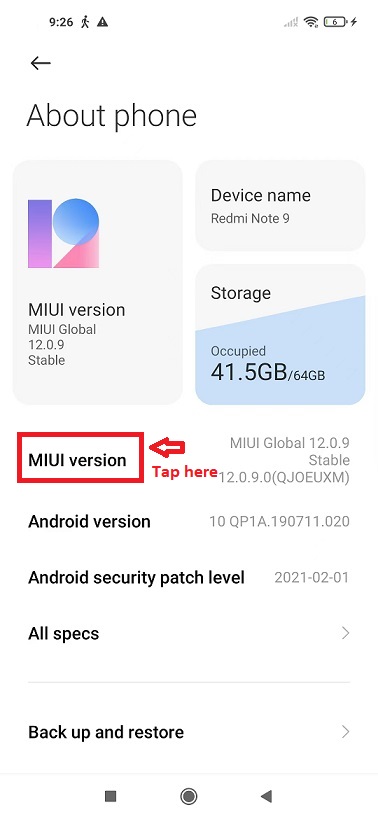
- On Android 4.1 and lower, the Developer options screen is available by default. On Android 4.2 and higher, you must enable this screen. To enable developer options, tap the Build Number, MIUI version or similar option 7 times.
- You can find this option in one of the following locations, depending on your Android version:
- Settings –> About Phone –> Build Number
- Settings –> System –> About Phone –> Build Number
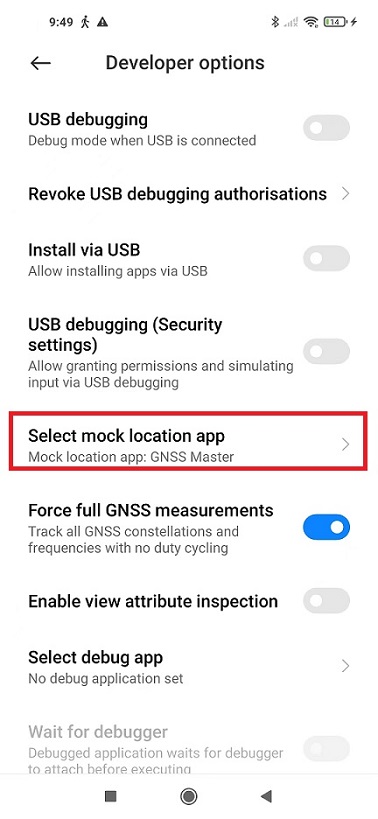
- Once you have access to Developer options, you can go to Settings –>Additional Settings and at the bottom you will find Developer options. In this big list, tap Select mock location app and select GNSS Master from the list.
- Connect the GNSS antenna to your device, in a location with good view of the sky, or near a window for testing the functionality.
Secondly, connect the RTK receiver to your Android device.
- Connect RTK receiver with your Android device with USB OTG cable.
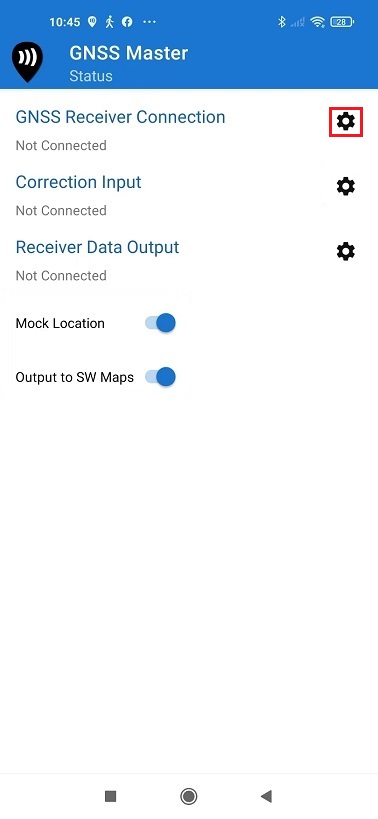
- Open GNSS Master app. Check Mock Location and Output to SW Maps.
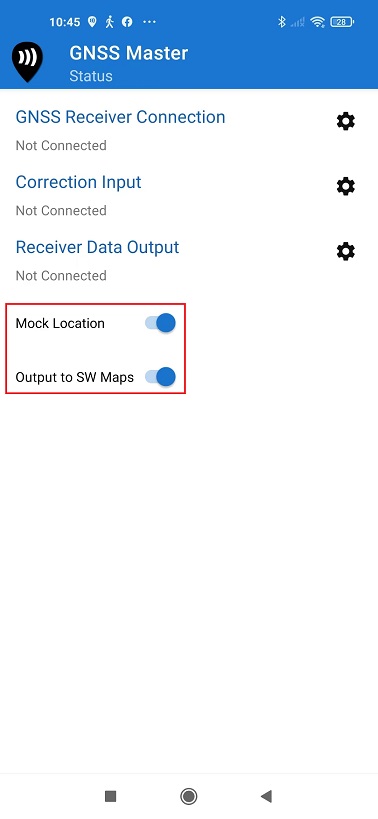
- Click the gear icon on the right side of GNSS Receiver Connection to enter the setup menu.
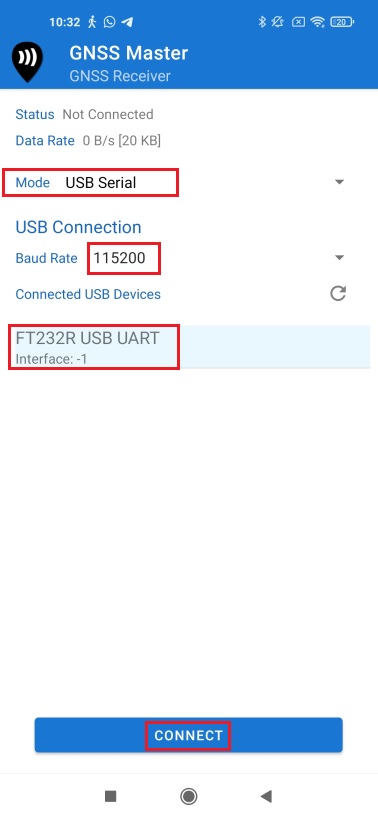
- Choose USB Serial at Mode. Set Baud Rate to 115200 bps (if you ordered your ArduSimple Proofessional kit before 09.10.2023, set Buad Rate to 38400 bps. If you use a different receiver, the Baud Rate should match with your receiver configuration). At Connected USB Device, it will automatically recognize your receiver with name ***** USB UART.
- Press CONNECT.
- Power your RTK receiver by connecting USB cable to the power supply (smartphone/tablet/ compatible powerbank). If you get any popup message to connect the USB device with any app, you can ignore it.
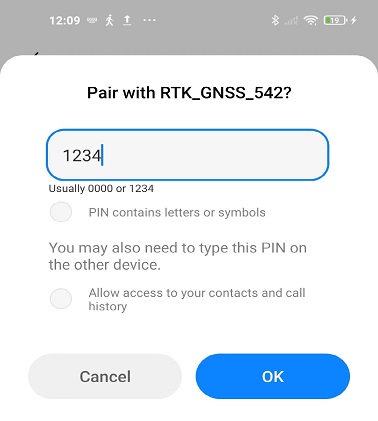
- Enable your smartphone/tablet Bluetooth, and pair it with your RTK receiver.
When pairing your device, notice that it may appear as RTK_GNSS_*** or as a generic MAC number (e.g.: F0:0A:95:9D:68:16). The password is always 1234. The pairing only needs to be done once.
- Open GNSS Master app. Check Mock Location and Output to SW Maps.
- Click the gear icon on the right side of GNSS Receiver Connection to enter the setup menu.
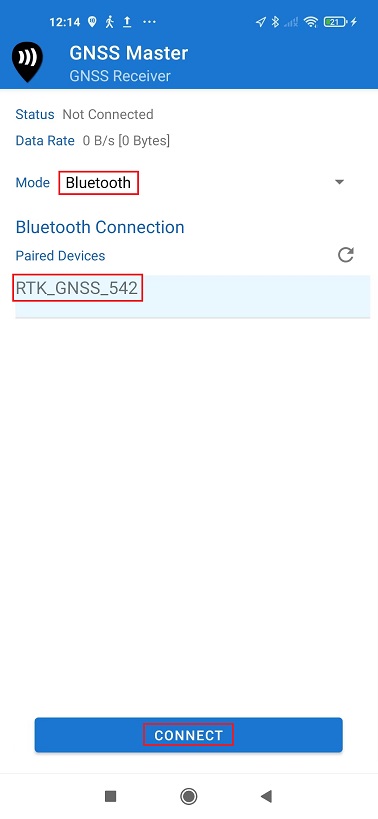
- Choose Bluetooth at Mode.
In Paired Devices chose the one you paired in step 8.
Press CONNECT.
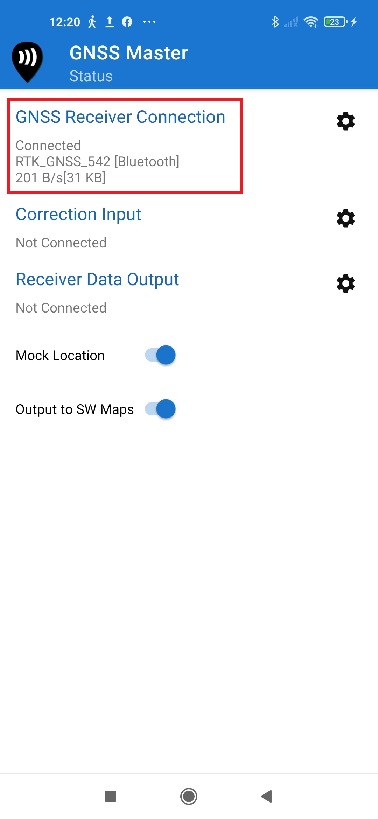
- Go back to main menu. Now you should see in GNSS Receiver Connection it says Connected and with data transfer.
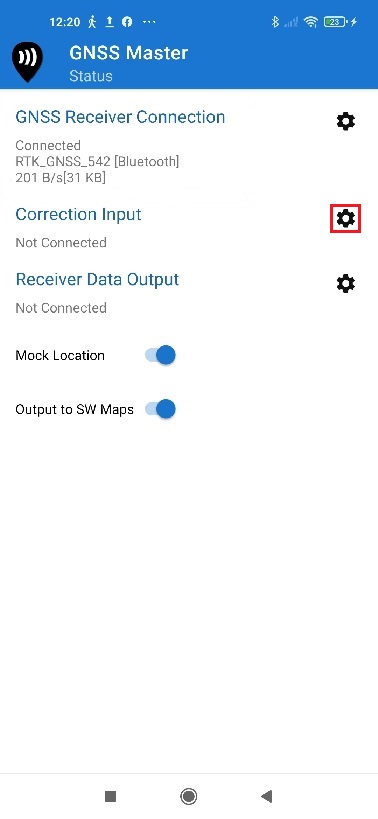
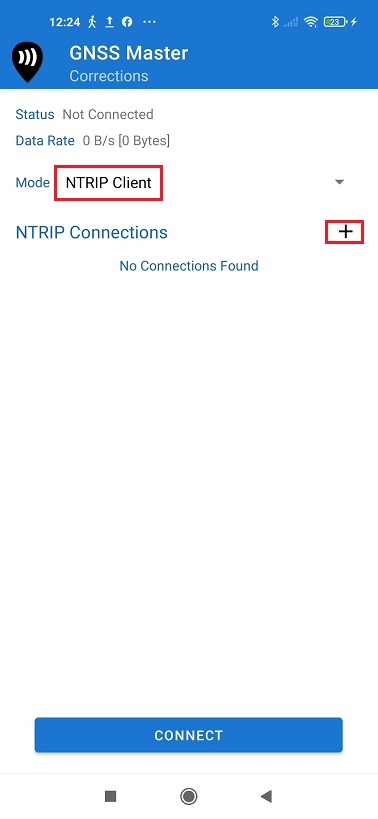
- Open Correction Input by clicking on the gear icon.
- In Mode choose NTRIP Client and press the + button next to NTRIP Connections.
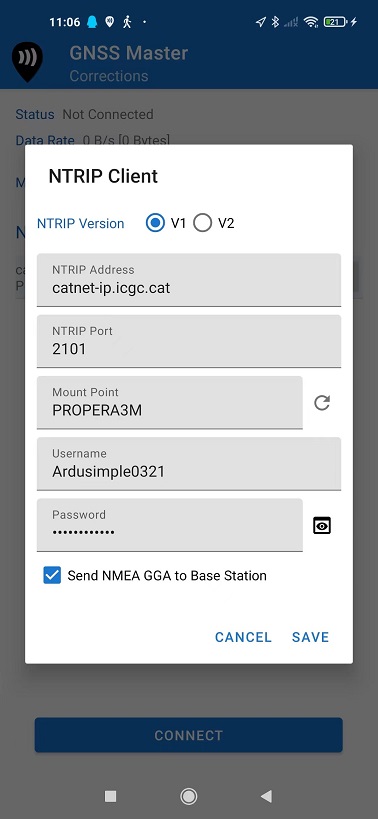
- Set your NTRIP Client credentials (Caster IP, Caster Port, Username and Password). If you don´t know how to do it, have a look at this tutorial. Press SAVE.
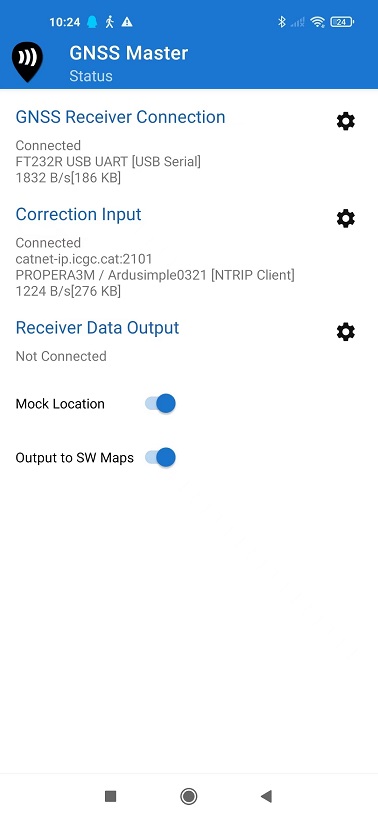
- Press CONNECT. In Status you will see GNSS Receiver Connection and Correction Input showing Connected and with data communication.
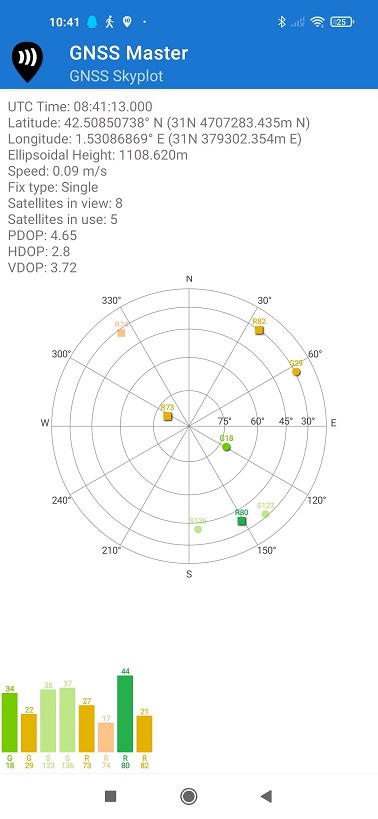
- You can check your location and available satellites in Skyplot.
- Open your favorite GPS/GNSS application and use it as usual.
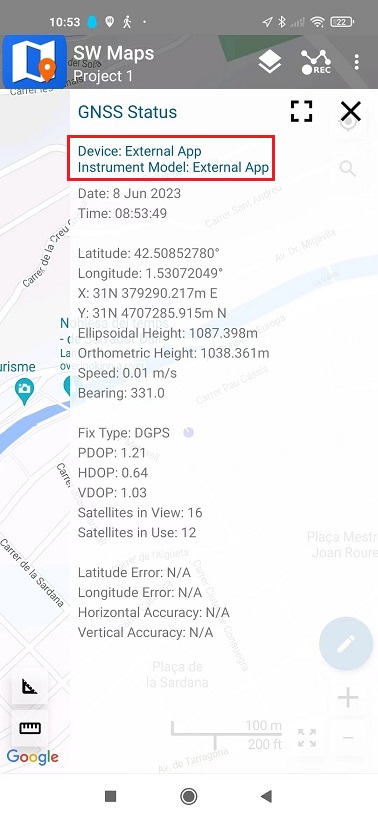
You will be using the external RTK GNSS receiver instead of the smartphone/tablet internal GPS receiver. Following image is the example of SW Maps.
- We have tested this functionality with many apps, you can find them in this link.
If you test it in other apps, you can send us an email at info@ardusimple.com and we will add it to the list.
The Android robot is reproduced or modified from work created and shared by Google and used according to terms described in the Creative Commons 3.0 Attribution License.
If you want to do this tutorial, we have all the products in stock and ready to be shipped:
 and
and 

