How to connect ArduSimple RTK receivers to QGIS for real time position

QGIS is a free and open-source desktop geographic information system (GIS) app that provides data viewing, editing, and analysis. It can be used for almost any GIS application by GIS analysts, cartographers, surveyors, foresters etc. to visualize geographic information.
In this tutorial, we’ll explain step by step how to integrate your RTK receiver with QGIS, enabling you to obtain real-time geographical position data.
Required hardware:
- simpleRTK2B Budget
- u-blox GNSS Multiband antenna ANN-MB-00 (IP67)
- Bluetooth module (optional if you want to connect QGIS via Bluetooth)
- USB to micro-USB cable
- a PC or computer
Required software:
- QGIS
- u-center (for M8, M9, F9)
Virtual Serial Ports Emulator (64 bit/AMD64 platform build)
How to activate live GPS tracking in QGIS?
Firstly, configure the RTK receiver to successfully connect it to QGIS via preferred interface.
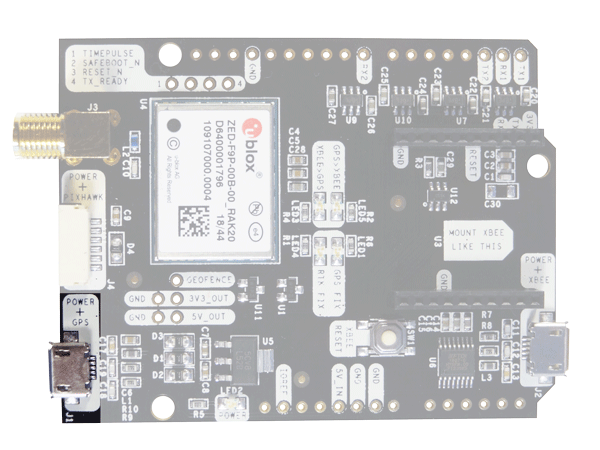
- Connect your RTK receiver to the computer via USB port labled with POWER+GPS.
- Make sure you installed u-blox USB driver for Windows.
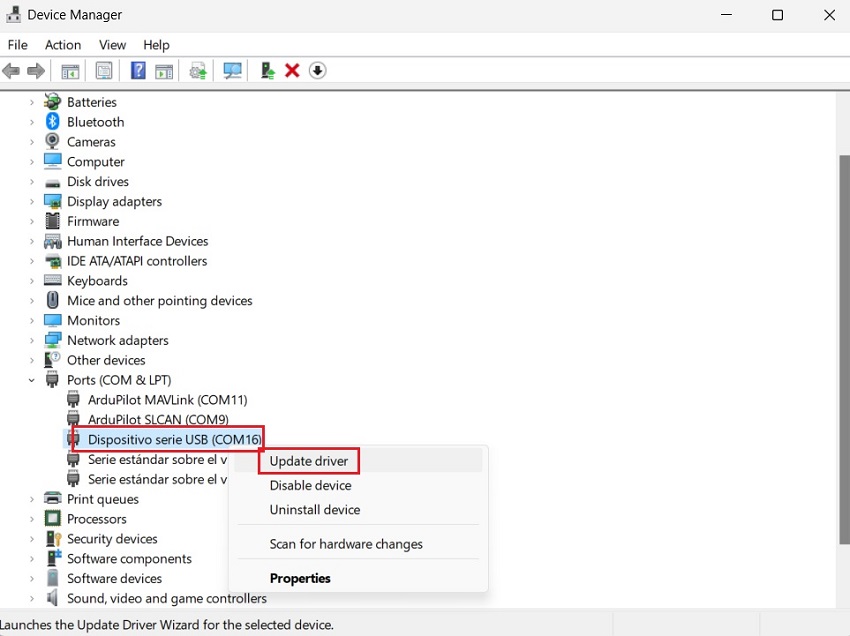
If not you can downloade it here and unzip it to your preferd folder. - Open Device Manager of your computer. Go to Ports–>USB Serial Port.
Select the port of your receiver, right click and choose Updare driver.
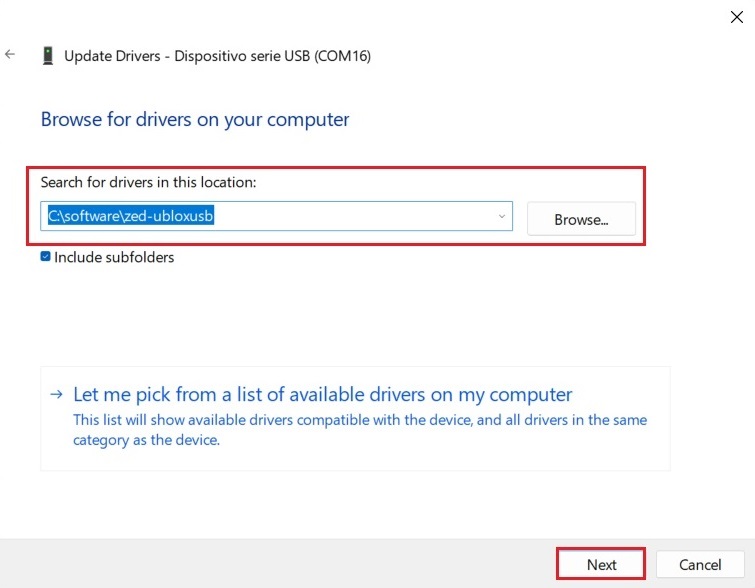
- Choose Browse for drivers on your computer and select the driver you downloaded in step 2. Press Next.
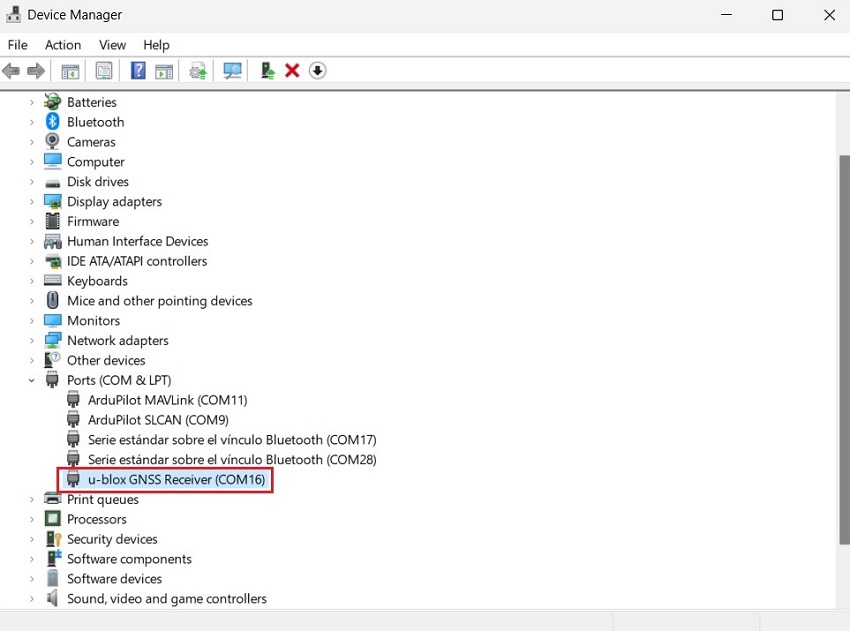
- After updating the driver, you will see USB port is recogonized as u-blox GNSS Receiver.
- Open u-center. Connect your receiver to u-center via COM port.
Make sure you have firmware version 1.32. If you don´t know how to update firmware and load configuration file, have a look at this tutorial. - You can connect your receiver to QGIS via USB or Bluetooth. Choose the interface which you are going to use to connect your RTK receiver to QGIS.
Download the configuration file simpleRTK2B_FW132_QGIS (right click and save link as) and load it to your receiver.
Don´t forget to save the configuration.
Don´t forget to save the configuration.
Secondly, connect your receiver to QGIS.
- Connect the RTK antenna to your RTK receiver. Place antenna in a location with good view of the sky, or near a window for testing the functionality.
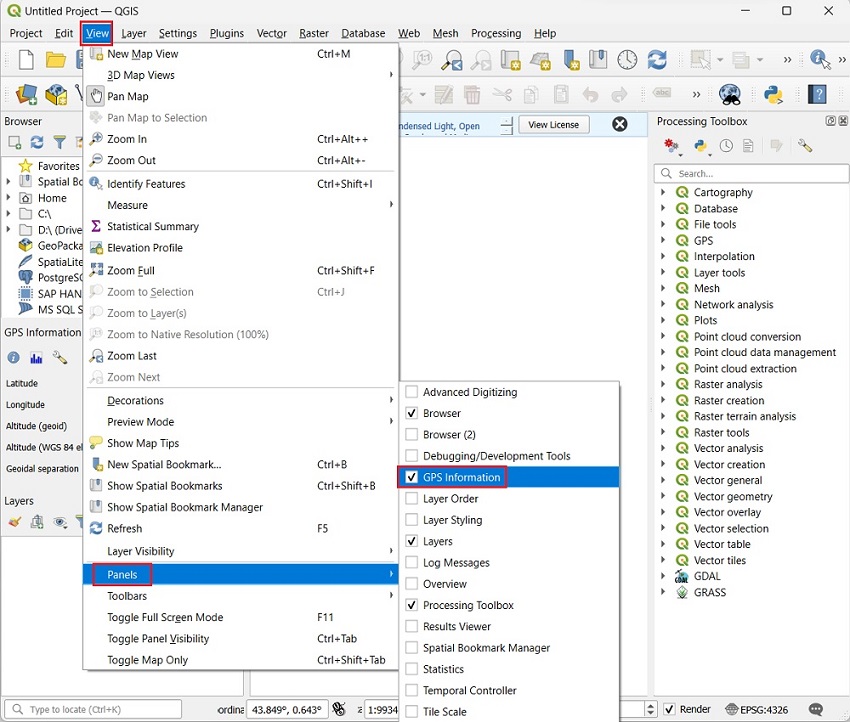
- Open QGIS. In the toolbar, click on View–>Panels–>GPS. You will get a new docking window on the left side of the canvas.
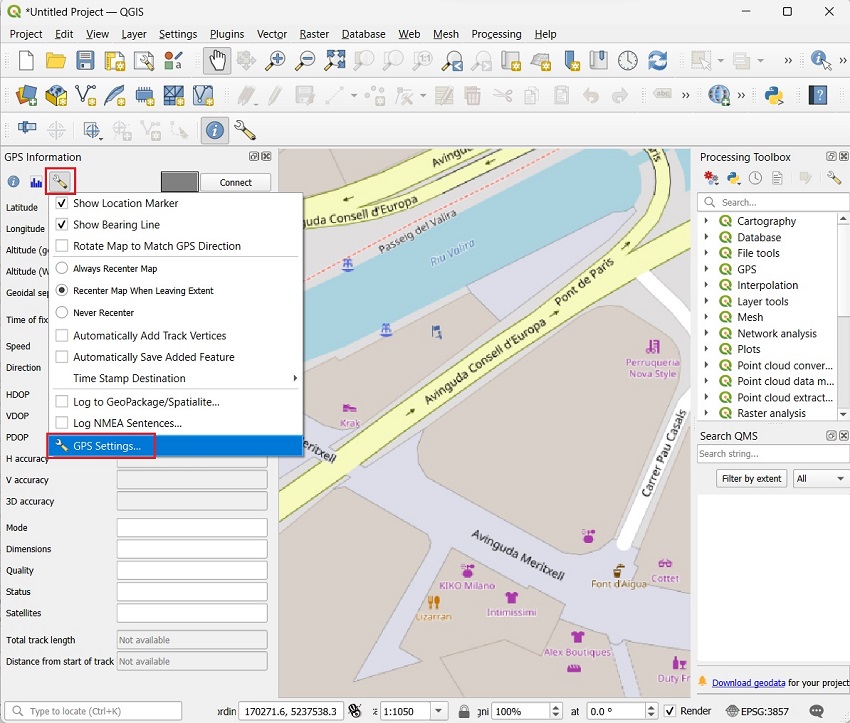
- Click on the wrench icon, go to GPS Settings….
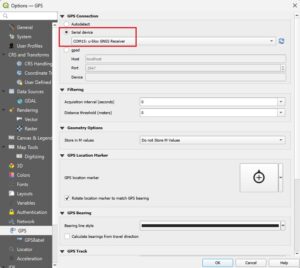
- Select Serial device. Choose the u-blox GNSS Recever. The COM port number should be the same as you connected with u-center. Press OK.
- Go back to the main screen. Press Connect.
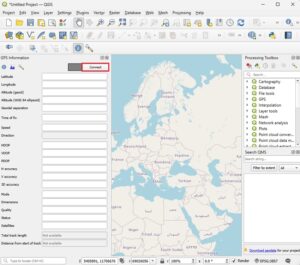
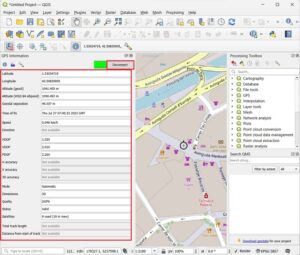
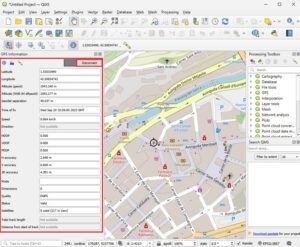
- You will see GPS information on the panel. You can now track the position with your preferred map Plugins or layers imported from other applications.
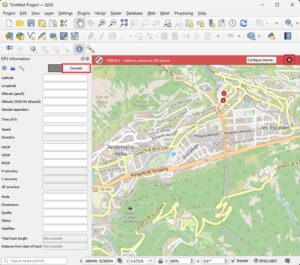
- Note that when you connect multiple times, there maybe be error message says TIMEOUT – Failed to connect to GPS devices. Don´t worry just press Connect again. Once it is connected it will work stable.
- Plug the Bluetooth Module to your receiver.
- Enable Bluetooth of your computer, and pair it with your RTK receiver.
When pairing your device, notice that it will appear as RTK_GNSS_*** The password is always 1234. The pairing only needs to be done once.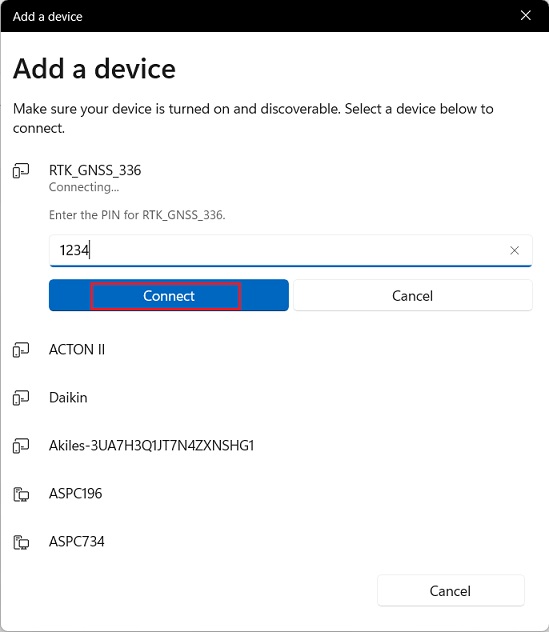
- In QGIS select Serial device and choose Standard Serial over Bluetooth link. Press OK.
Note: There will be two COM port show as Bluetooth link, one of them works. Just test between the two to check which one work.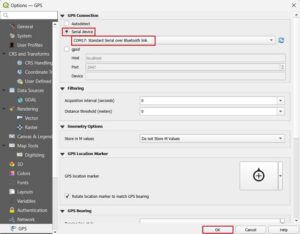
- Go back to the main screen. Press Connect.

- You will see GPS information on the panel. You can now track the position with your preferred map Plugins or layers imported from other applications.
Thirdly, connect to NTRIP correction service.
There is no built in NTRIP function or free plugin in QGIS. But don’t worry you can connect to your preferred NTRIP or PointPerfect correction through u-center.
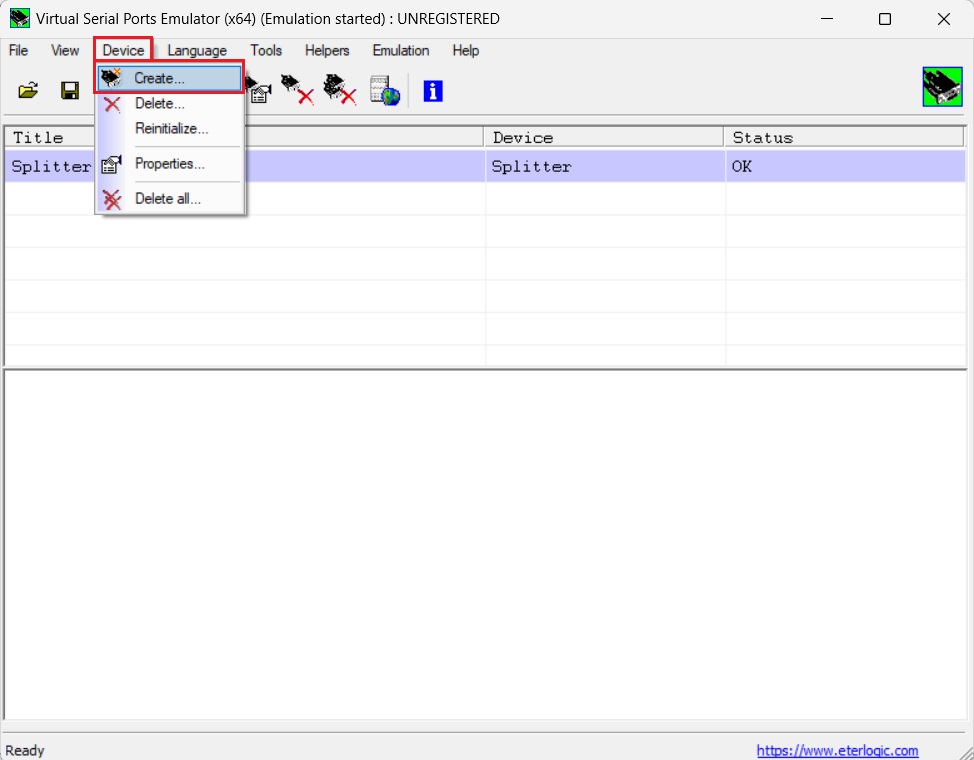
- Open Virtual Serial Ports Emulator. Go to Device–>Create….
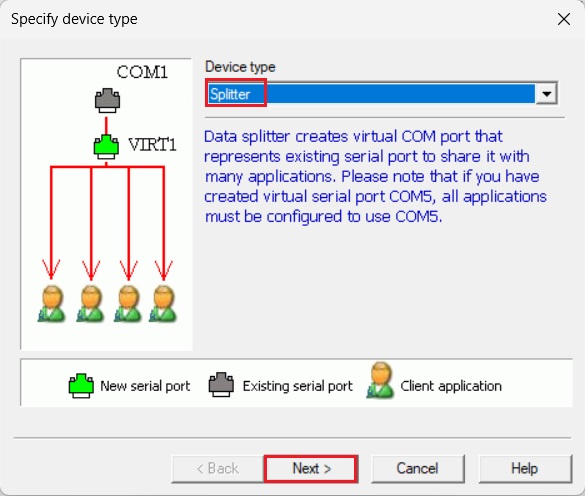
- At Device type choose Splitter. Press Next.
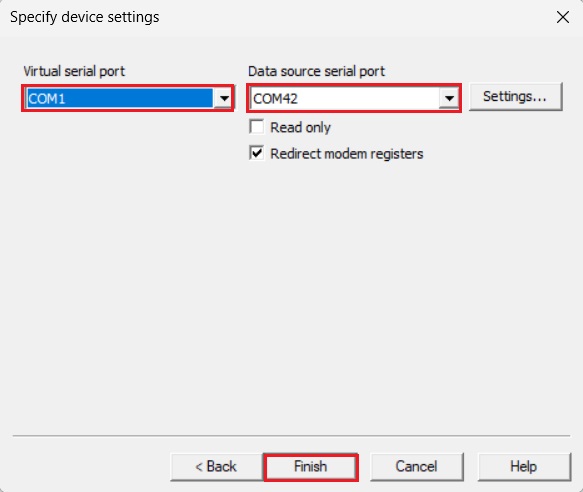
- At Data source serial port choose the COM port of your receiver. At Virtual serial port choose a number that is not in use. Press Finish.
Now you can connect multiple applications to your receiver via the Virtual serial port.
- Go to u-center. Connect your receiver via the Virtual serial port.
Connect to your preferred NTRIP or PointPerfect correction service.
If you don’t know how to do it, check out tutorial How to connect simpleRTK2B series receiver to a NTRIP correction service via PC and How to use PointPerfect with u-blox receivers.
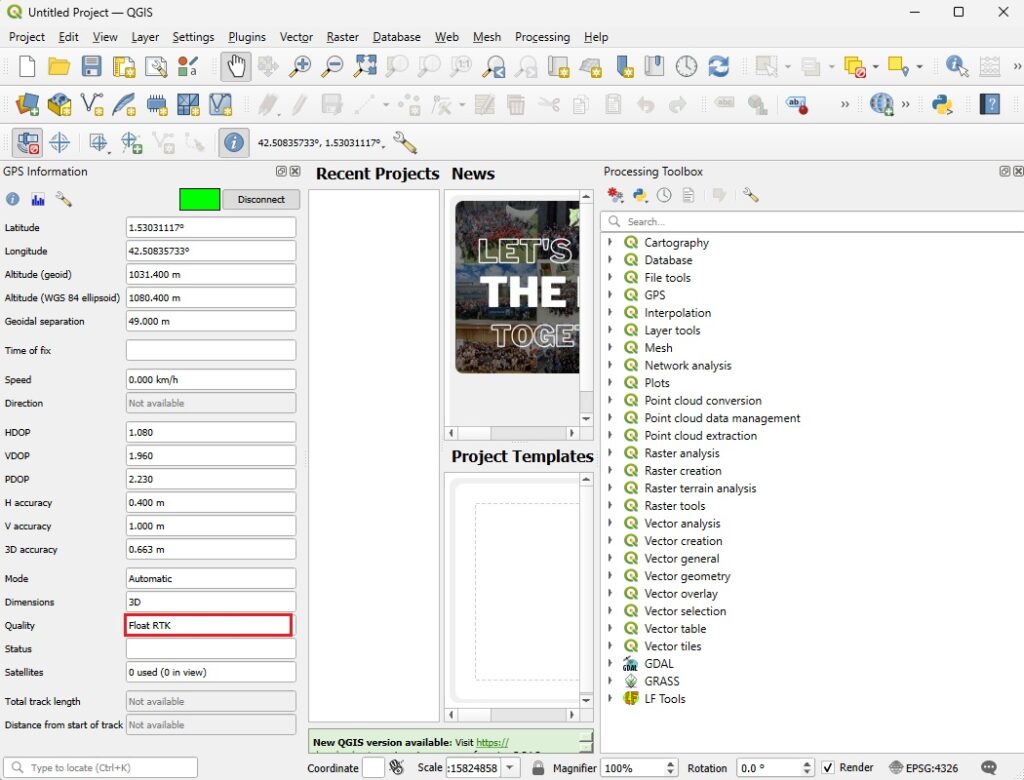
- Go back to QGIS. Connect your receiver via the Virtual serial port. Now you should see Quality change to Float or Fix RTK.
If you want to do this tutorial, we have all the products in stock and ready to be shipped:
- simpleRTK2B Budget
- u-blox GNSS Multiband antenna ANN-MB-00 (IP67)
- Bluetooth module (optional if you want to connect QGIS via Bluetooth)
- USB to micro-USB cable
 and
and 

