How to do Post-Processing Kinematic (PPK) with free software RTKLIB

PPK solutions have several advantages:
- No real-time corrections required:
The rover hardware is simpler, less expensive, lighter, and lower power since post-processing does not require a real-time data link between base and rover.This can be advantageous in remote or challenging environments where real-time corrections may be limited or unavailable. RTK has a limited range of typically 5-10 km, while PPK has no such range limitation. - Consistent and repeatable Results:
PPK provides consistent and repeatable results. Once data is collected, it can be processed multiple times using different algorithms or parameters to optimize the accuracy of the final position solution.
In the previous tutorial we have shown you how to generate RINEX files from simpleRTK2B, simpleRTK3B Pro, and simpRTK3B Budget.
In this tutorial we will demonstrate how to use the RINEX files from your base and rover for PPK.
If you don’t have your own base station, don’t worry. You can download the RINEX file from an online base station in your area.
You can find the free correction service in your area here.
Required software:
- RTKLIB GUI apps (version used in tutorial: 2.4.3 b34)
How to do Post-Processing Kinematic (PPK) with RTKLIB?
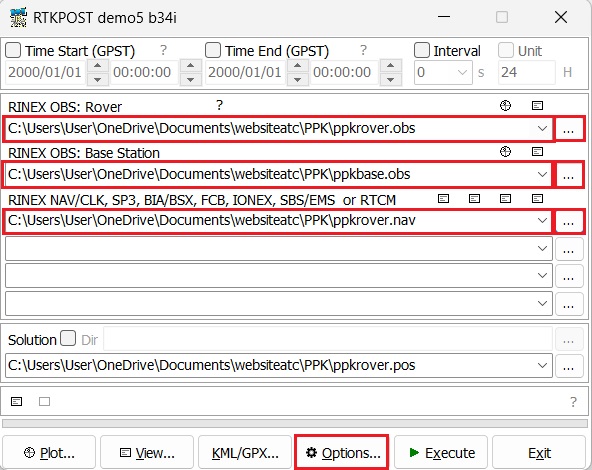
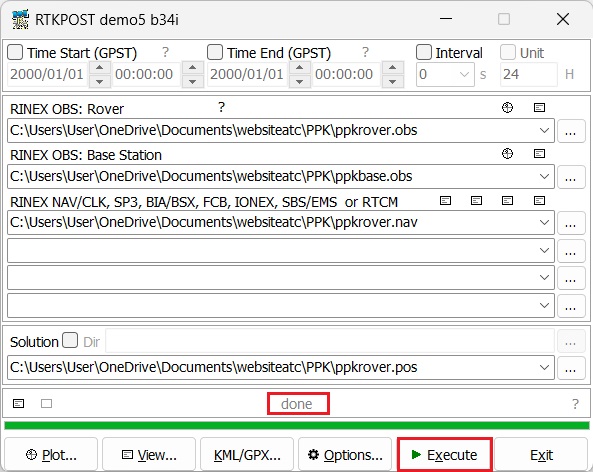
- Open RTKPOST from your downloaded RTKLIB package. Click the … buttons on the right side, select the Rover observation file, the Base observation file, and the navigation file. Click the Options… button.
If you don’t have your own base station, you can download a RINEX file from online correction service here.
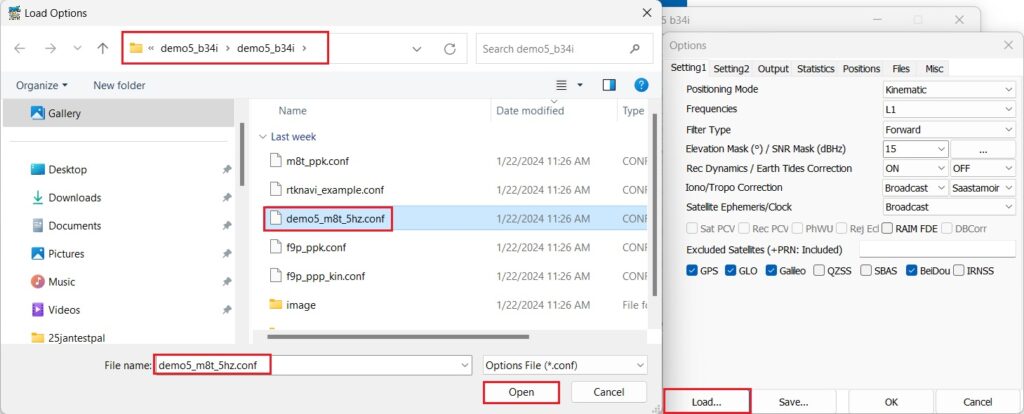
- Click the Load button.
Select the demo5_m8t_5hz.conf file from the same folder as the demo5 RTKLIB executables, and then click Open.
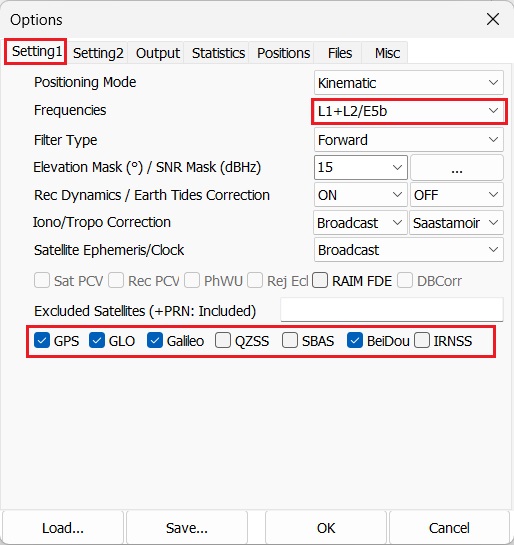
- At Setting1 tab, choose L1+L2/E5b at Frequencies. Enable applicable satellites in your geographic region.
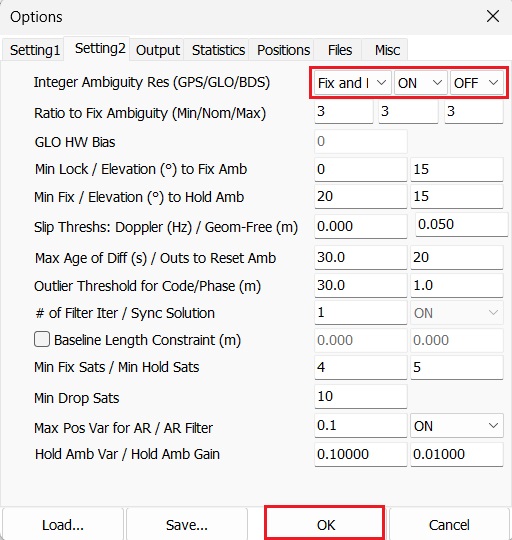
- From the “Setting2” tab, set Integer Ambiguity Res GPS to Fix and Hold, GLO to ON, BDS to OFF.
If you are not using an F9P receiver for base, then leave this field set to “Fix-and-Hold” which will automatically calibrate out the biases. Click OK to close the Options menu.
- Click Execute to run the solution. The bar at the bottom of the GUI will show the solution status as it runs and will report any errors. You should see a mix of Q=1 and Q=2 as the solution runs. You will see done when it finishes.
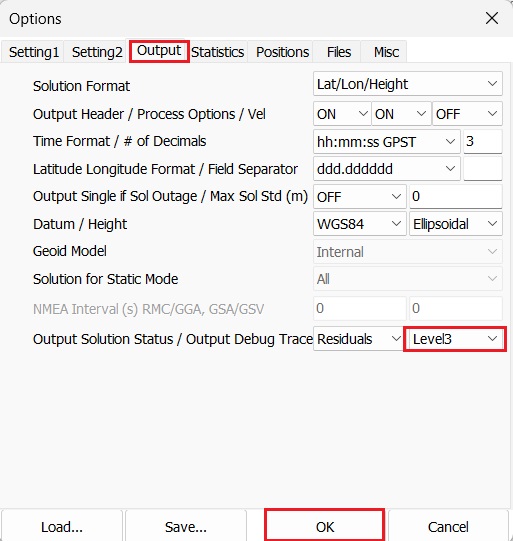
- If you see only Q=0, something is wrong. In this case, open the Options window, select the Output tab and set “Output Debug Trace” to “Level3”, exit the Options menu, and rerun the solution. Then open the **.trace file in the solution folder for additional information on what went wrong.
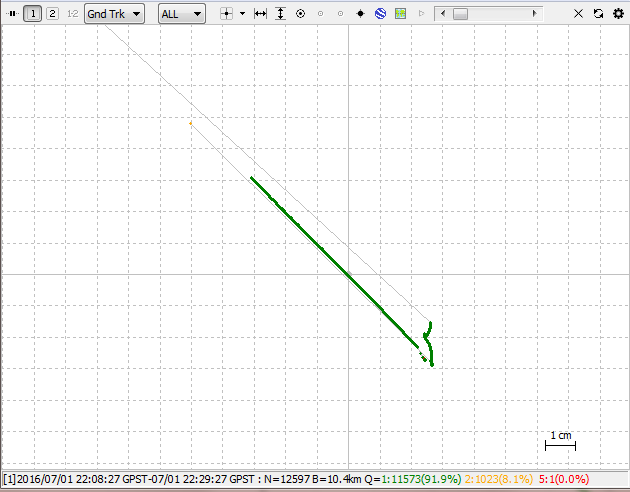
- Click on Plot to plot the solution with RTKPLOT.
- Q = 1 solution means Fix: accuracy is centimeter level.
- Q = 2 means Float: accuracy is submeter level
- Q = 5 solution stands for Single, which is usually meter level
Now you can perform PPK for your project!
This method enables you to achieve high-accuracy GNSS positioning without the necessity for real-time corrections, thereby simplifying the hardware requirements.
If you require the RTK starter kit, including both Rover and Base for PPK, we have all the necessary products in stock and ready for shipment:
 and
and 

