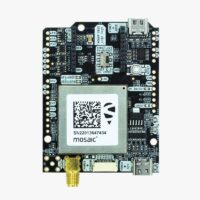
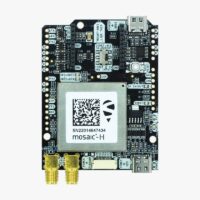
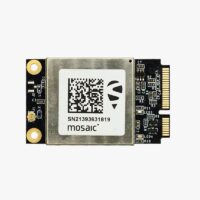
How to configure Septentrio Mosaic-X5 and Mosaic-H
Introduction
In this guide, we will show how to connect, configure key settings, manage data output, and ensure the modules are operating at their best for your application.
Connect to Septentrio web interface
- Connect the GNSS antenna to your receiver. Make sure the antenna has a good view of the sky for testing functionality. Otherwise you won’t see satellites view and signal.
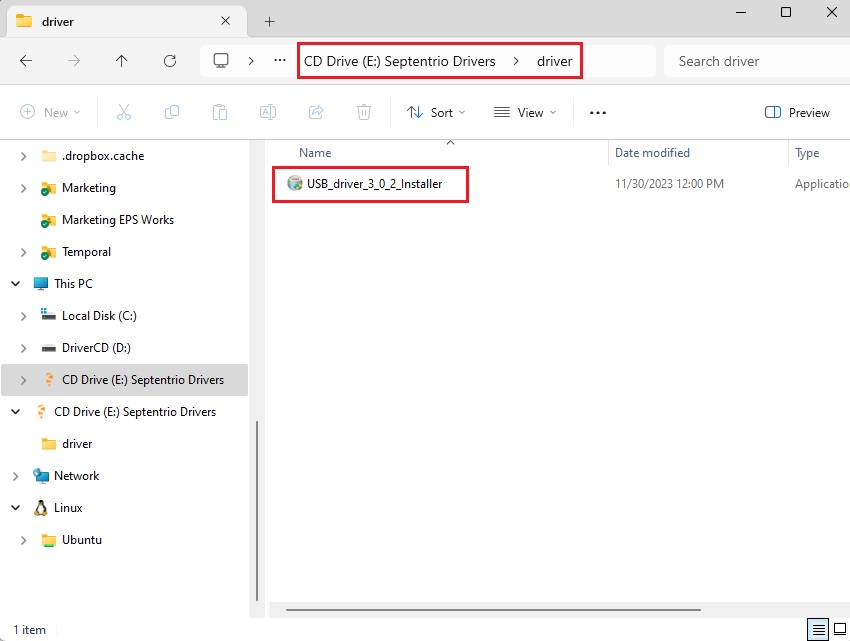
- Connect the receiver to your PC via the USB port labelled as POWER+GPS. When you connect this product to a PC for the first time, the PC may not recognize it. you will only see a new Hard Disk in your computer. Open it and install the Septentrio driver. After installation, disconnect and reconnect again, your PC will recognize the receiver. This only needs to be done once.
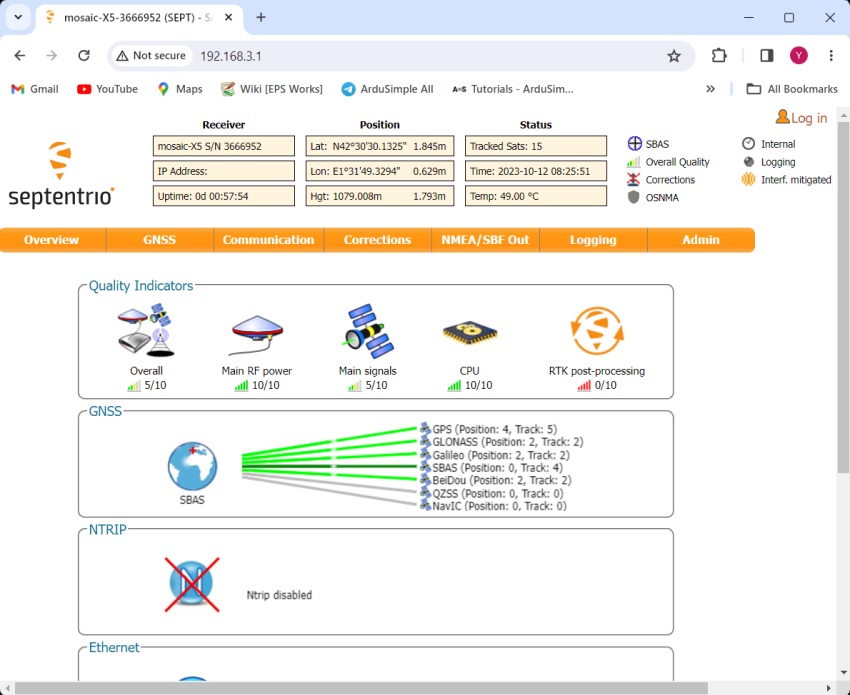
- Open a web browser and type in 192.168.3.1. If you are using a company computer, try to disable the VPN.
Send NMEA messages to Xbee Socket
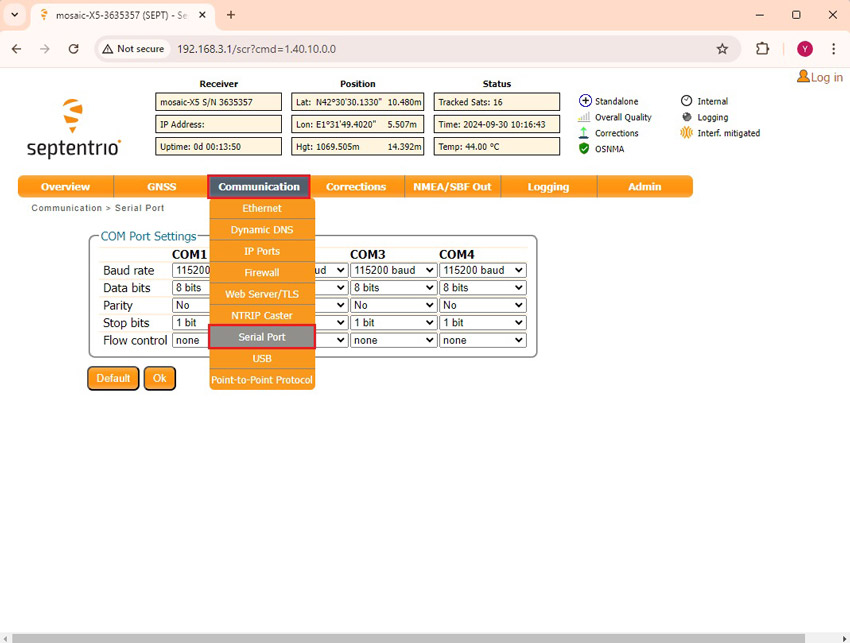
- In the menu bar go to Communication–>Serial Port.
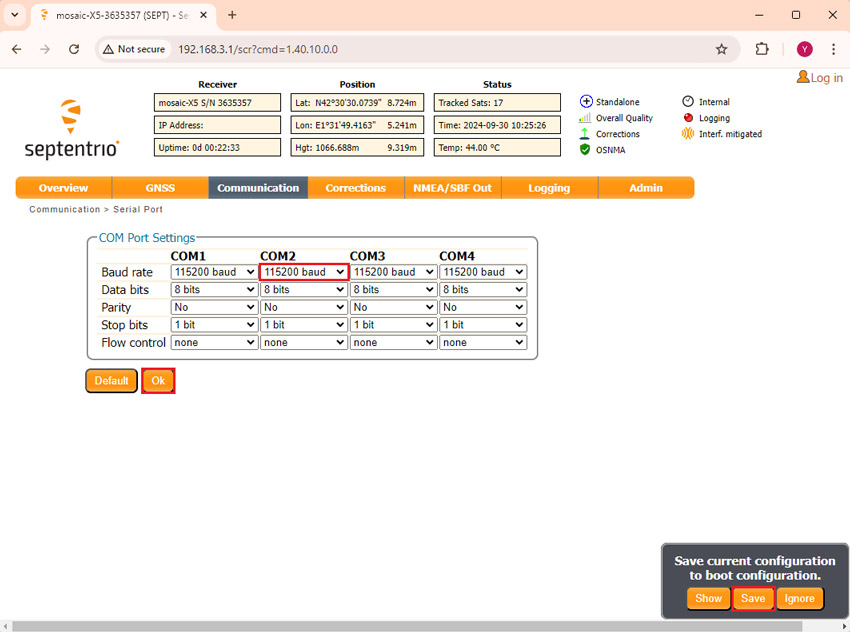
- Set the Baud rate of COM2 at 115’200 bps, because most of our communication plug-in works at 115’200 bps. Press Ok and Save configuration.
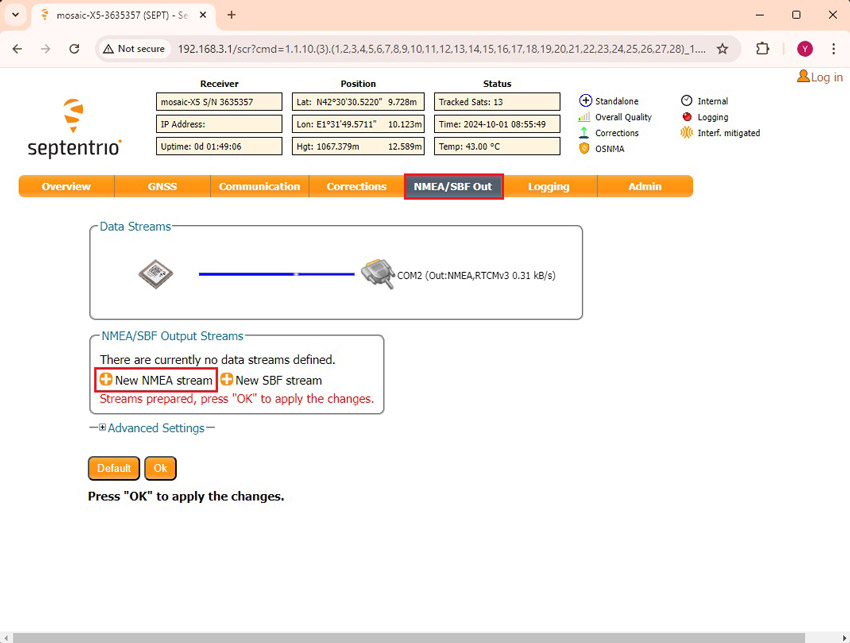
- In the menu bar go to NMEA/SBF Out. Press +New NMEA stream–>Serial port–>COM2.
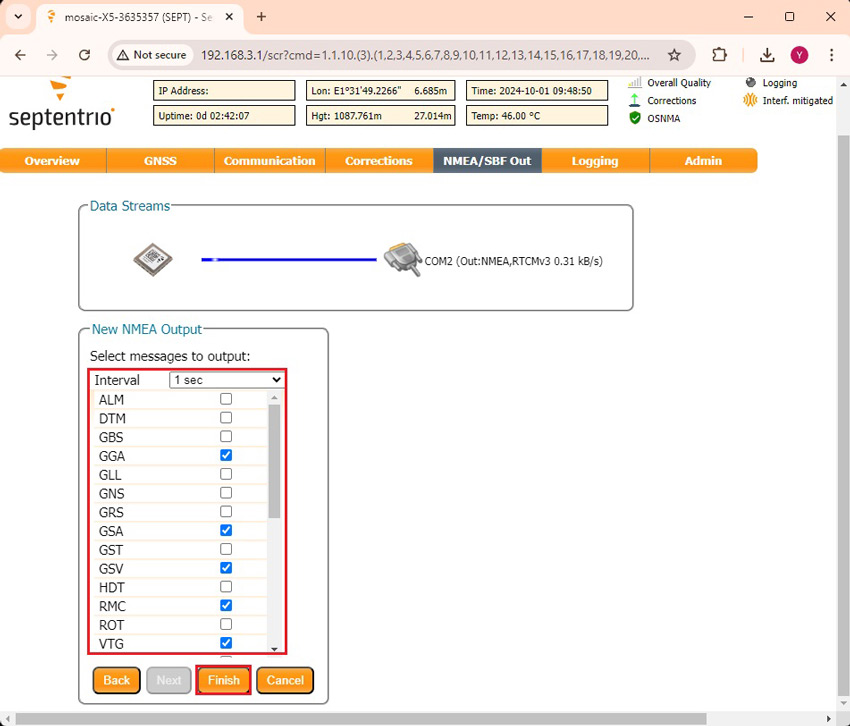
- At Interval choose 1 sec and check your preferred NMEA messages. If you don’t know which one to choose, we suggest to check GGA, GSA, GSV, RMC and VTG because they are used by most of the applications. Select these messages and press Finish. However, be aware that Bluetooth bandwidth is limited. Enabling this message will limit the maximum transmission rate to 1 Hz. If you want to use a higher frequency, you can either use the USB connector or reduce the number of transmitted messages to avoid exceeding Bluetooth’s transmission capacity.
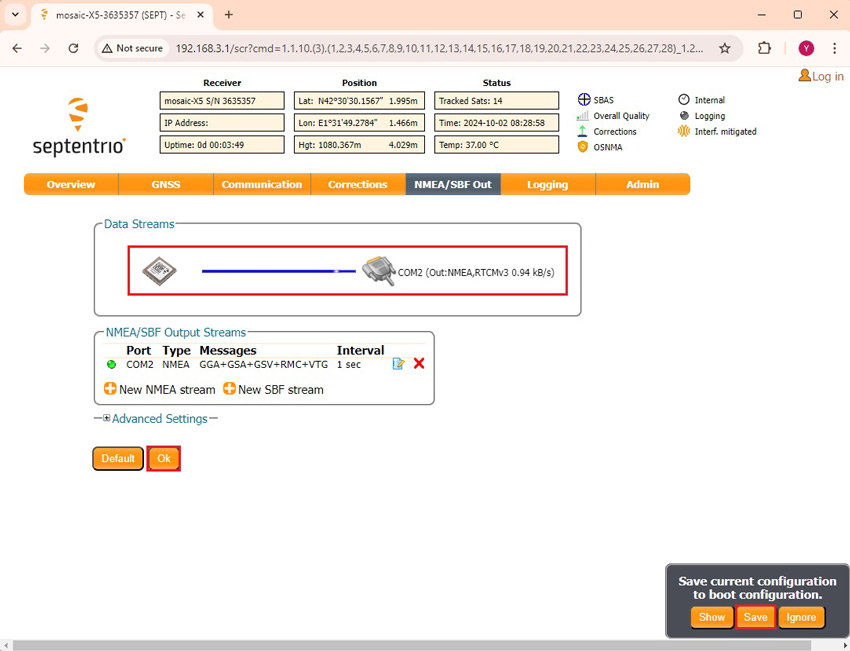
- You will observe Data Streams outputting NMEA and RTCM messages to COM2. Press Ok and Save configuration.
Configure as a Base
In ArduSimple tutorial How to determine the exact position of your base station, we provide a detailed explanation on how to configure your receiver as a static base station.
Configure as a Rover
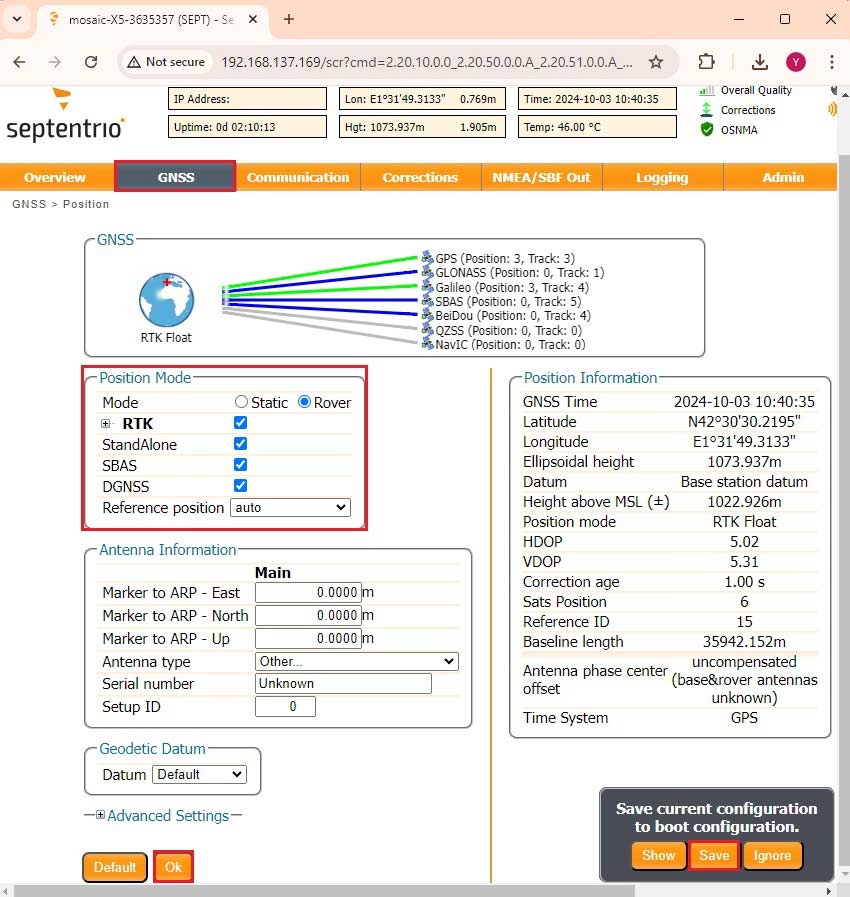
- Go to GNSS–>Position. At Mode choose Rover and check all position mode. Click Ok and Save configuration.
Get RTK corrections
- NTRIP Corrections:
- Pros:
- Easy to use with just one receiver.
- No need to set up your own base station.
- Corrections can be received over the internet.
- Cons:
- Requires a reliable internet connection.
- Dependent on the availability of NTRIP services in your region.
- Subscription fees may apply for using NTRIP services.
- Pros:
- Base-Rover Setup:
- Pros:
- Complete independence from external services.
- Works well in areas without internet access or NTRIP service.
- Full control over the accuracy and quality of the corrections.
-
- Cons:
- Requires two receivers (one base, one rover).
- More complex to set up and manage.
- Base station needs to be in a fixed position for reliable corrections.
NTRIP corrections
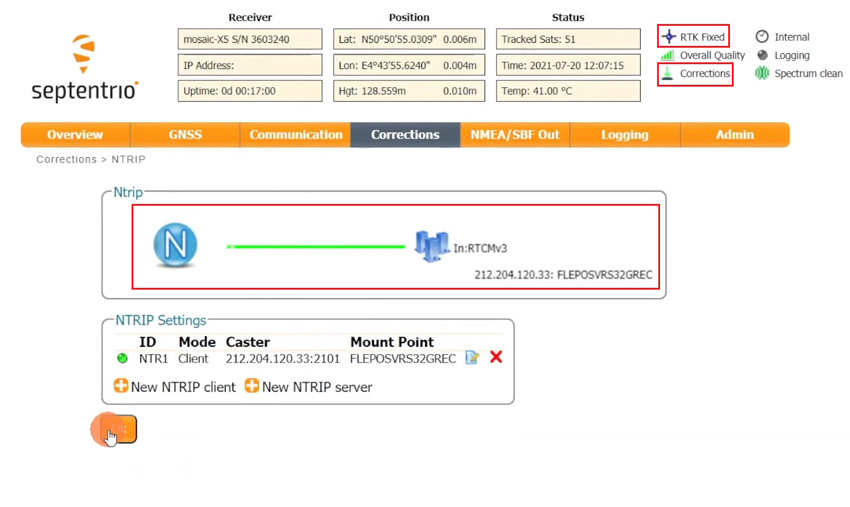
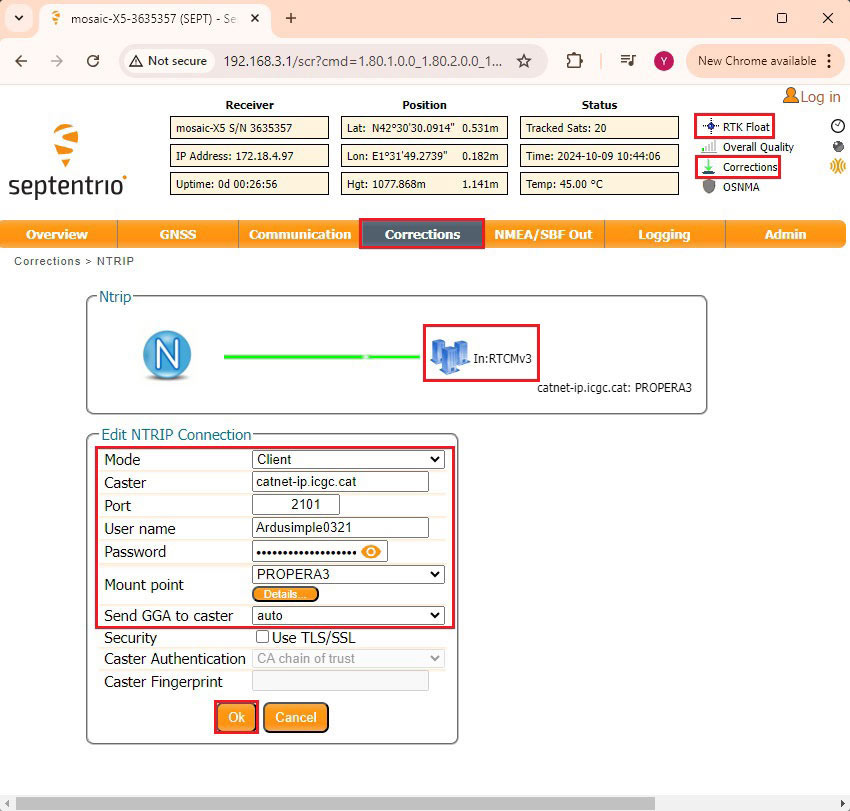
You can find third party base stations at RTK Correction Services in your Country. Register and get your server, port, username, password and mount point of your NTRIP correction. We will use them later.
- Share your internet connection with the receiver via USB and receive RTK corrections by following the video tutorial.
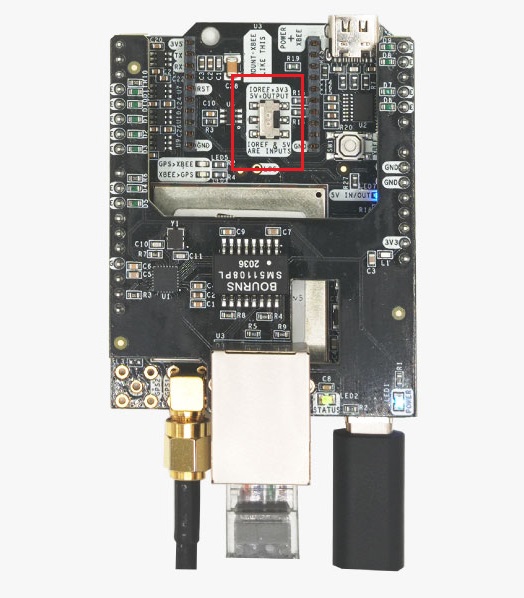
- Moving the switch on your board towards 5V = OUTPUT.
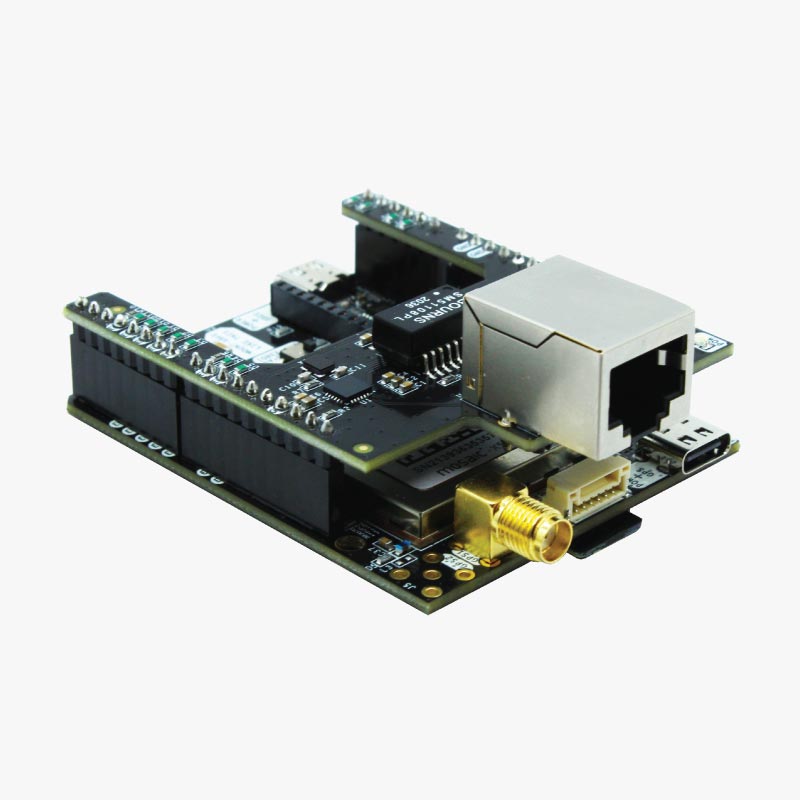
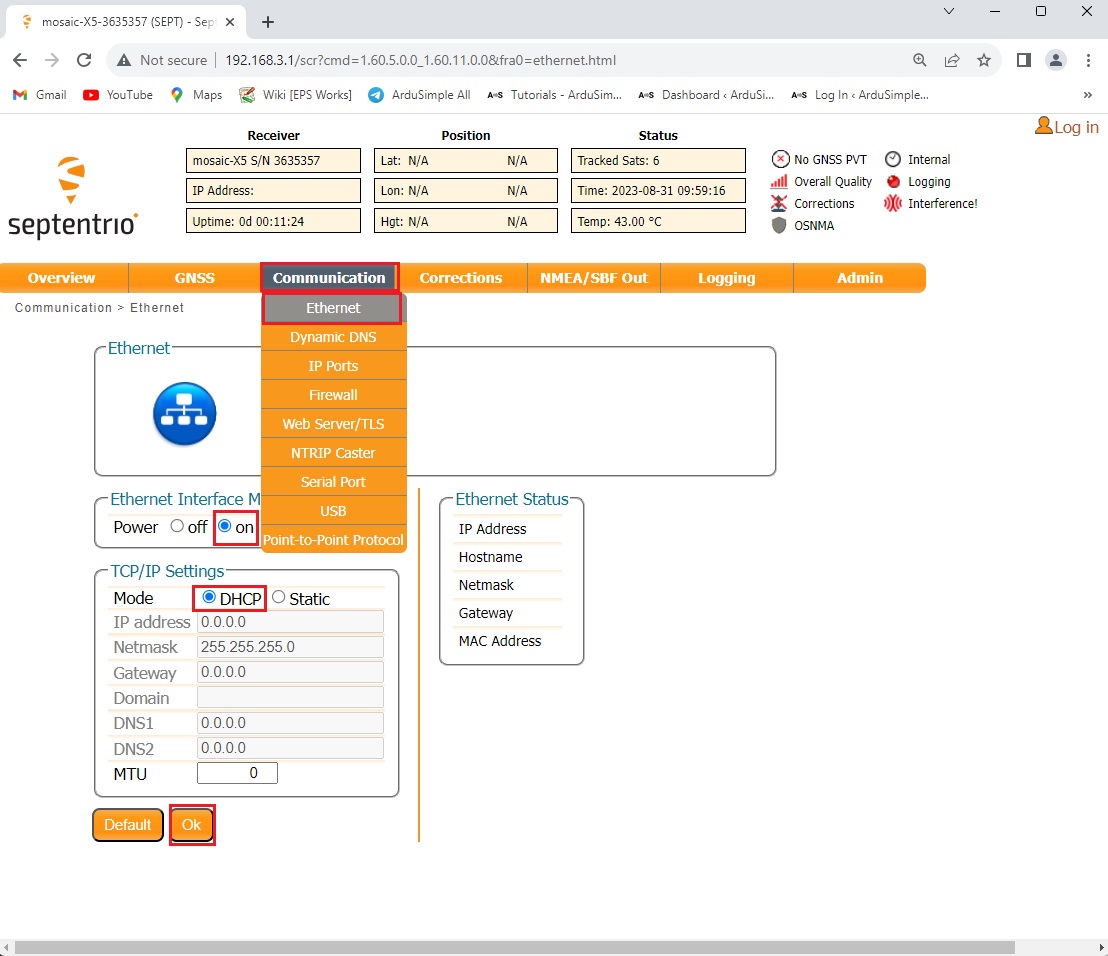
Plug the Shield for Septentrio Native Ethernet in your receiver. Connect the shield to your ethernet hub with RJ45 Ethernet cable.
Connect your receiver to your computer through the USB port labeled with POWER+GPS.
- Moving the switch on your board towards 5V = OUTPUT.
There are three communication plugins which can be used to get access to NTRIP correction, WiFi NTRIP Master, 4G NTRIP Master and Ethernet NTRIP Master. If you want to know more detail, check section use a communication plugin to connect to NTRIP Caster.
Base-Rover set up
This setup requires two receivers, and a pair of radio links.
-
Plugins
Radio module Long Range (LR)
101,00€ This product has multiple variants. The options may be chosen on the product page -
Plugins
Radio module eXtra Long Range (XLR)
161,00€ This product has multiple variants. The options may be chosen on the product page
Configure one receiver as a static Base station. You can follow tutorial How to configure simpleRTK3B Pro as static base station to do this. Configure the other receiver as a Rover. Insert the radio links to both of your receivers. The Base will send RTCM corrections to your Rover.
Revert to factory default
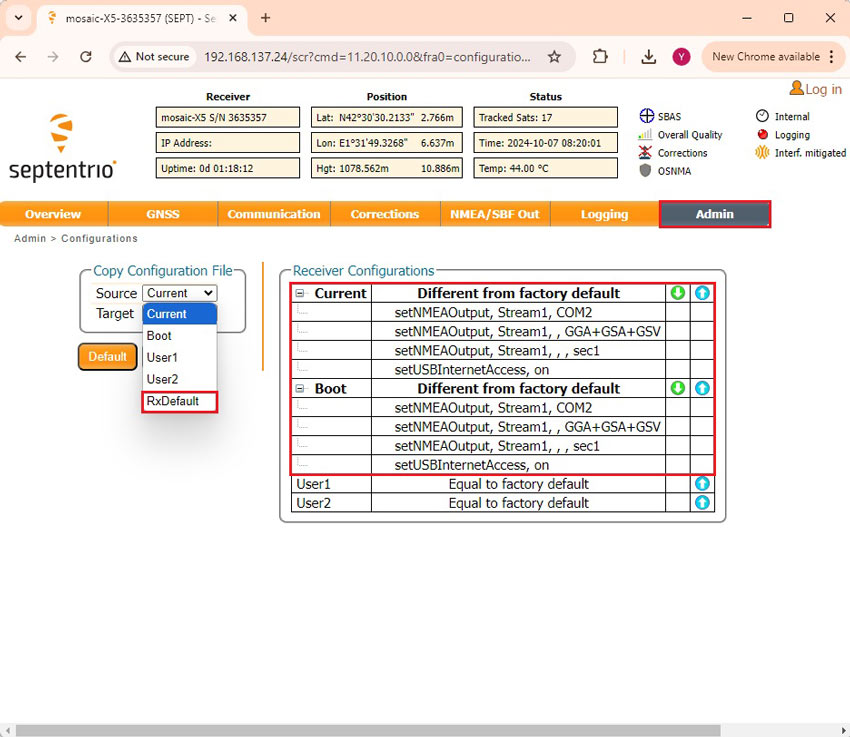
- You can set the Mosaic configuration to its default settings via the Admin–> Configurations. At Receiver Configurations you can check the Different from factory default.
Select RxDefault from the Source drop-down list. And select Current in the Target menu.
Press OK.
Log data
- You can use RxTools to log data onto your PC. Or you can use a Micro-SD card to log data directly to it. Insert an empty Micro-SD card into your Onboard datalogging. Then connect the receiver to your PC. Note that if you insert the SD card while the receiver is connecting, the SD card may not be detected and mounted.
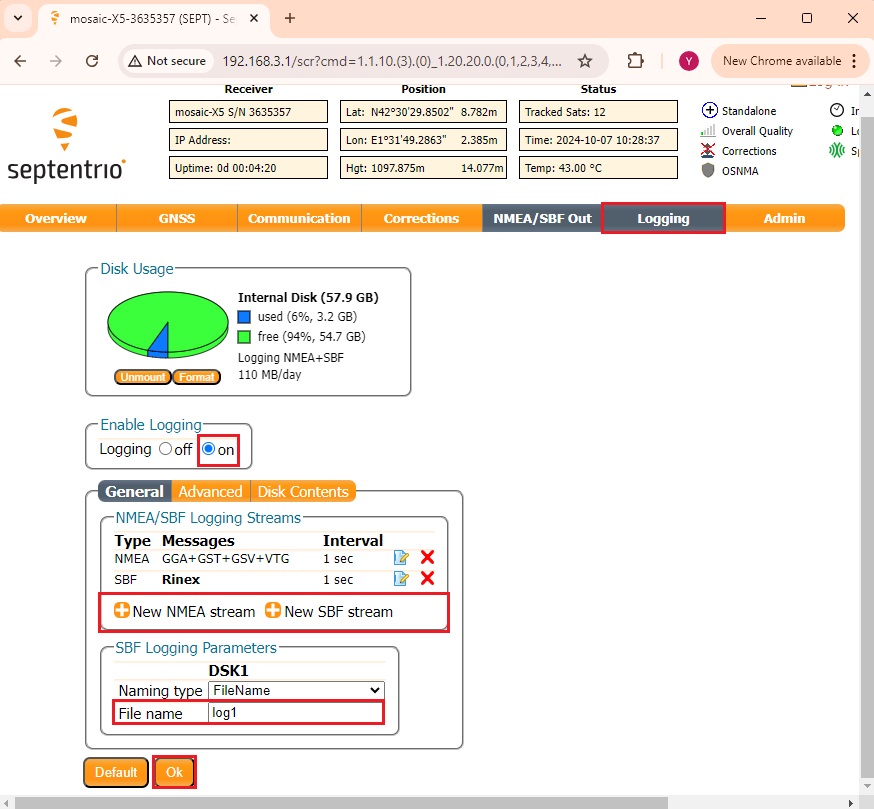
- Go to Logging. At +New NMEA stream select the NMEA messages you want to log, usually GGA, GST, GSV and VTG. SBF (Septentrio Binary Format) can be analysed using SBF Analyzer, replayed with RxControl or converted into other common formats such as RINEX or KML using SBF Converter. For example if you want to log a Rinex file for PPK analysis, go to +New SBF stream and check Rinex. For more detail, you can go to our tutorial How to generate RINEX files with simpleRTK3B Pro.
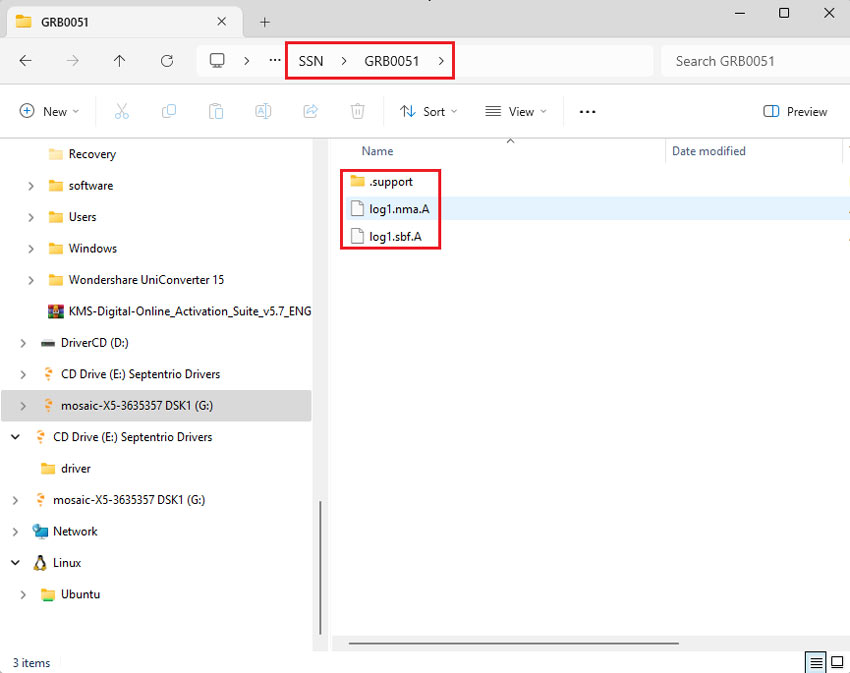
- The log file will be saved in the SSN folder. You can use your preferred tool or custom program to analyse the NMEA data. For SBF data, we recommend using SBF Analyzer to review and visualize your log data.
Firmware upgrade
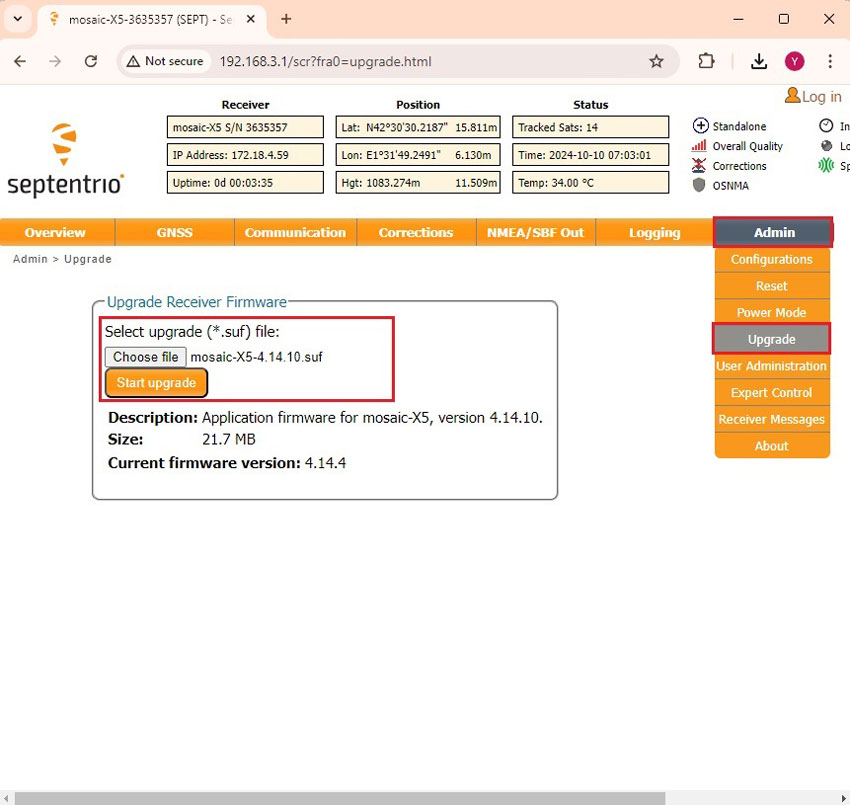
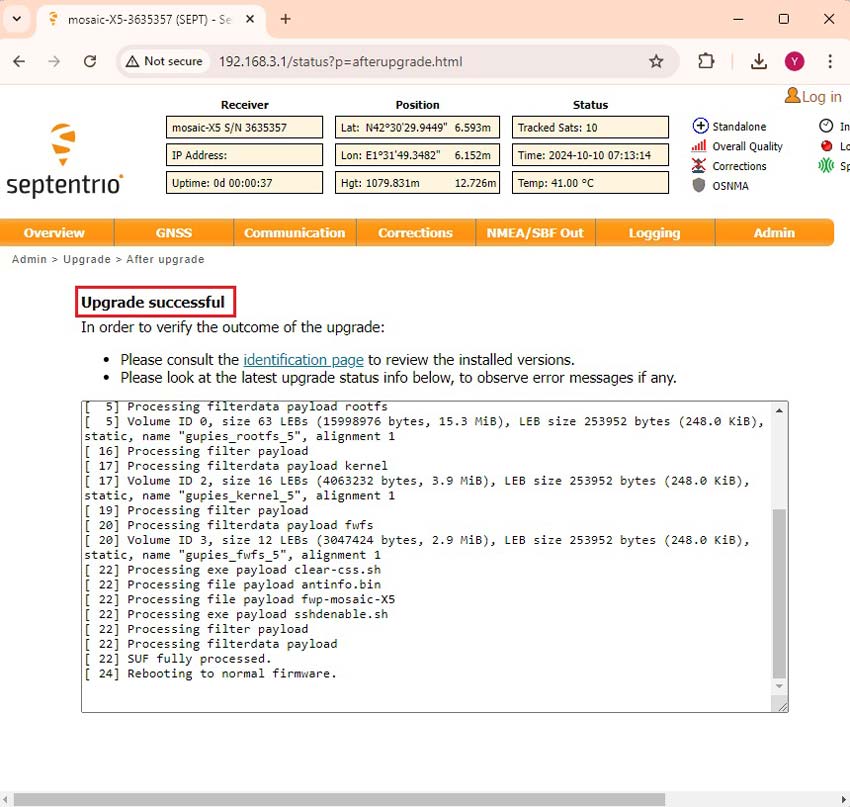
- In a few minutes, you will see it shows Upgrade successful.
Septentrio Documentation
- Mosaic-X5 reference guide
- Mosaic-H reference guide
- How to enable the latest anti-spoofing OSNMA service on your Septentrio receiver
- How to share your Septentrio base station with RTK2go via Septentrio Native Ethernet
- How to configure Septentrio receiver and connect it to ArduPilot
- How to use PointPerfect with Septentrio receivers
- How to generate RINEX files with simpleRTK3B Pro
- How to load antenna calibration files to Septentrio receivers
-
RTK3B Boards
simpleRTK3B Pro
From 569,00€ This product has multiple variants. The options may be chosen on the product page -
RTK3B Boards
simpleRTK3B Heading
From 699,00€ This product has multiple variants. The options may be chosen on the product page -
RTK3B Boards
simpleRTK3B Micro Septentrio
From 575,00€ This product has multiple variants. The options may be chosen on the product page -
RTK3B Boards
simpleRTK3B mPCIe
From 575,00€ This product has multiple variants. The options may be chosen on the product page
 and
and 

