How to configure Septentrio RTK Heading and connect it to ArduPilot

In this tutorial we will guide you through the steps of how to get high precision GNSS based heading to your ArduPilot project with the simpleRTK3B Heading receiver, powered by Septentrio Mosaic-H.
Required hardware:
- simpleRTK3B Heading
- 2 × Lightweight helical GNSS Tripleband + L-band antenna (IP67)
- 2 × SMA antenna RF cable extender (these items are needed particularly for helical antenna)
- USB to USB-C cable
- USB to micro-USB cable
- Pixhawk cable set
- Holybro Pixhawk4 (you can also use your preferred autopilot)
- a PC or laptop
Required software:
Important things before start:
- This tutorial is based on the simpleRTK3B Heading, if you have a different hardware you may need to apply some changes in this tutorial. We have prepared another tutorial for the simpleRTK2B Heading kit.
- We have validated the tutorial with these autopilots:
- Holybro Pixhawk4
- We have validated the tutorial with these firmware versions:
- ArduRover 4.1.0
- ArduCopter 4.1.0
- ArduPlane 4.1.0
How to connect simpleRTK3B Heading RTK receiver to ArduPilot?
Firstly, configure simpleRTK3B Heading RTK receiver.
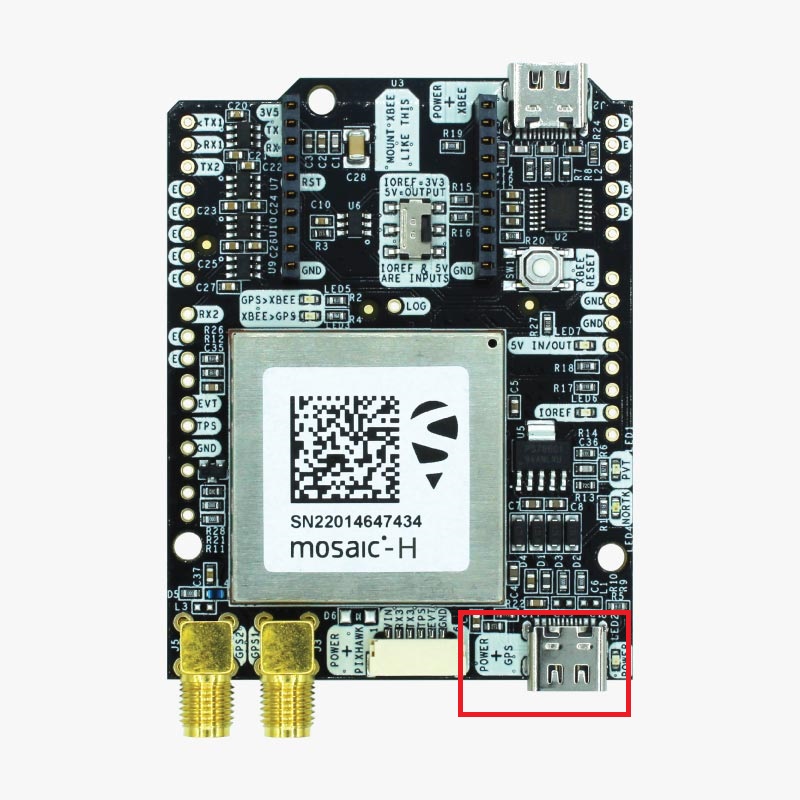
- Connect the simpleRTK3B Heading to your PC via the USB port labeled with POWER+GPS using USB-C cable.
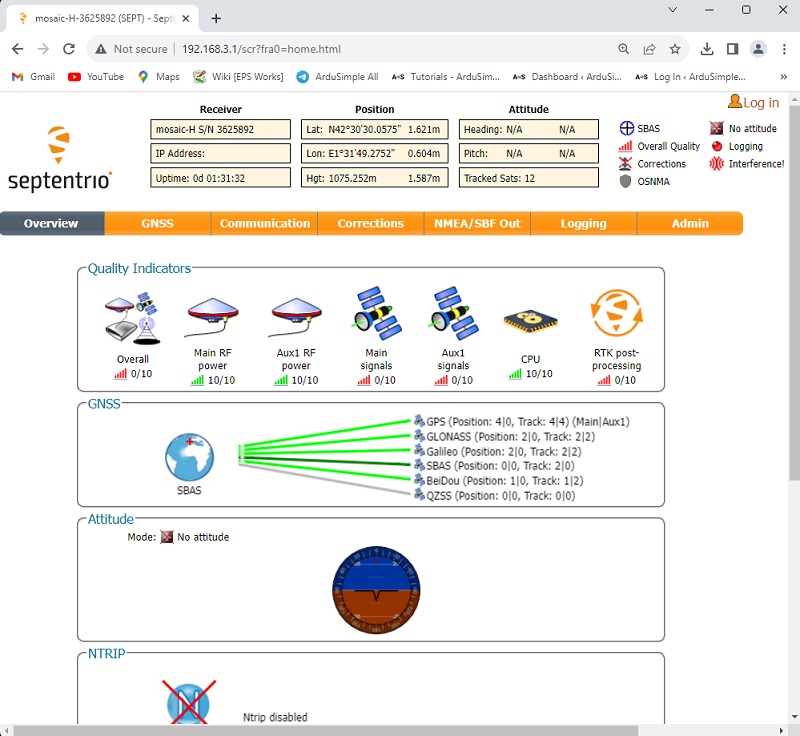
- Open a browser and type 192.168.3.1 to open the Septentrio web interface.
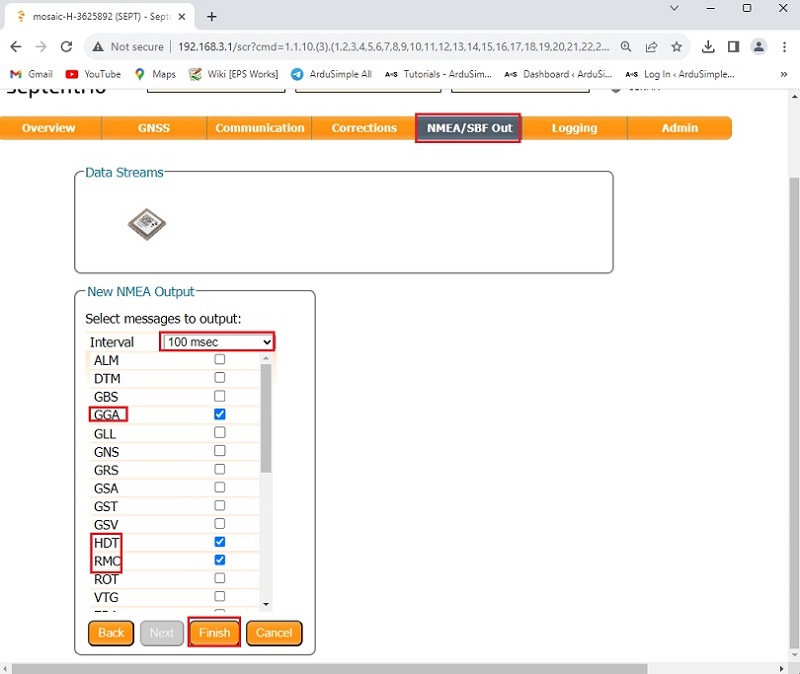
- In the menu bar, go to NMEA/SBC Out–>New NMEA stream–>Serial port (Next)–>COM3 (Next)–>Interval (100msec), select GGA, RMC, HDT. Click Finish.
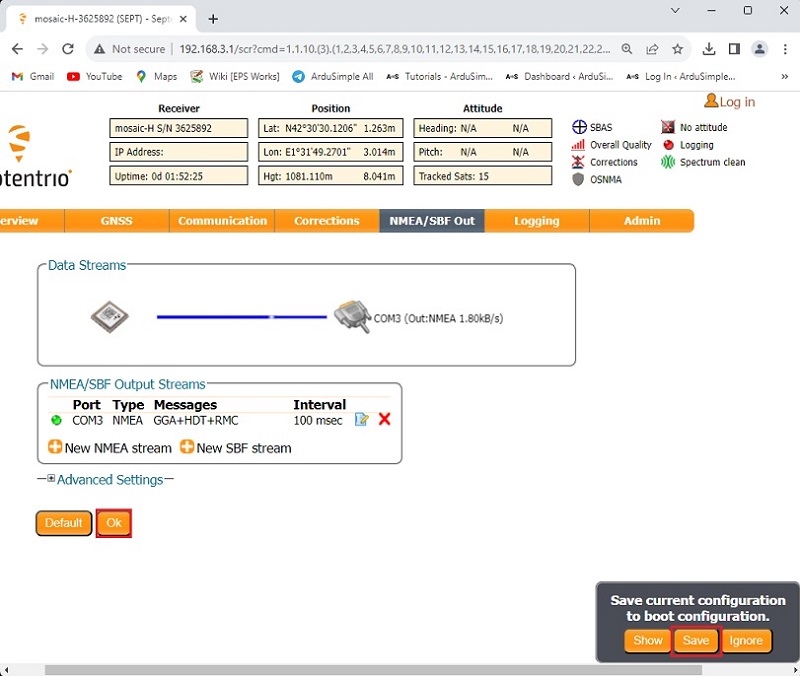
- Click Ok. On the lower right corner of your browser, a pop-up window will appear. Click Save configuration.
- Connect both GNSS antennas to your receiver. Make sure they have a good view of the sky.
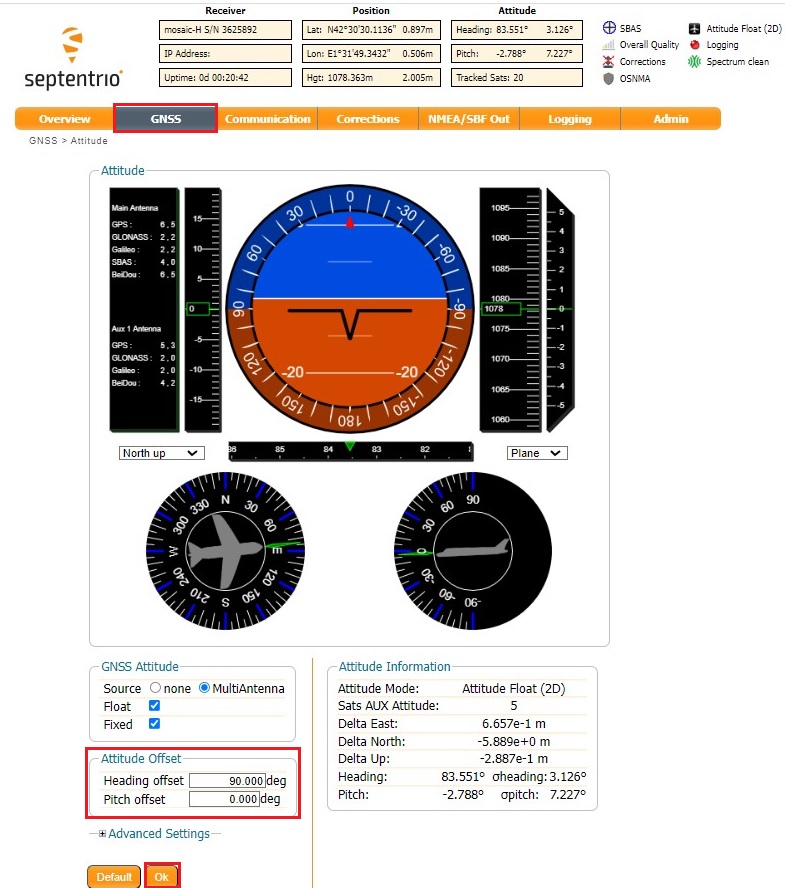
- Go to GNSS–>Attitude.
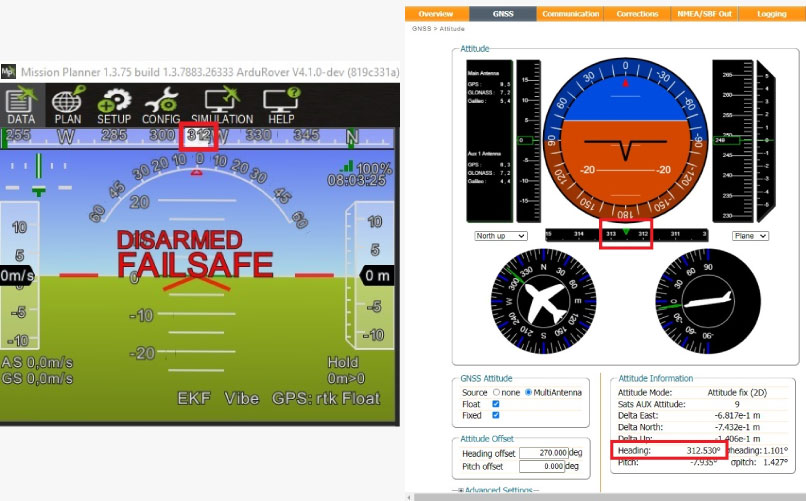
Set the Attitude Offset–> Heading offset value to match your antenna configuration respect to your platform.
This means that you should adjust the value until the reported heading value matches the heading of your vehicle (Heading offset will be typically 0, 90, 180 or 270deg, unless you have a rare antenna setup).
Click Ok and the click the Save button on the lower right corner window.
Secondly, configure ArduPilot.
- Connect your Pixhawk to your computer using a USB to micro-USB cable.
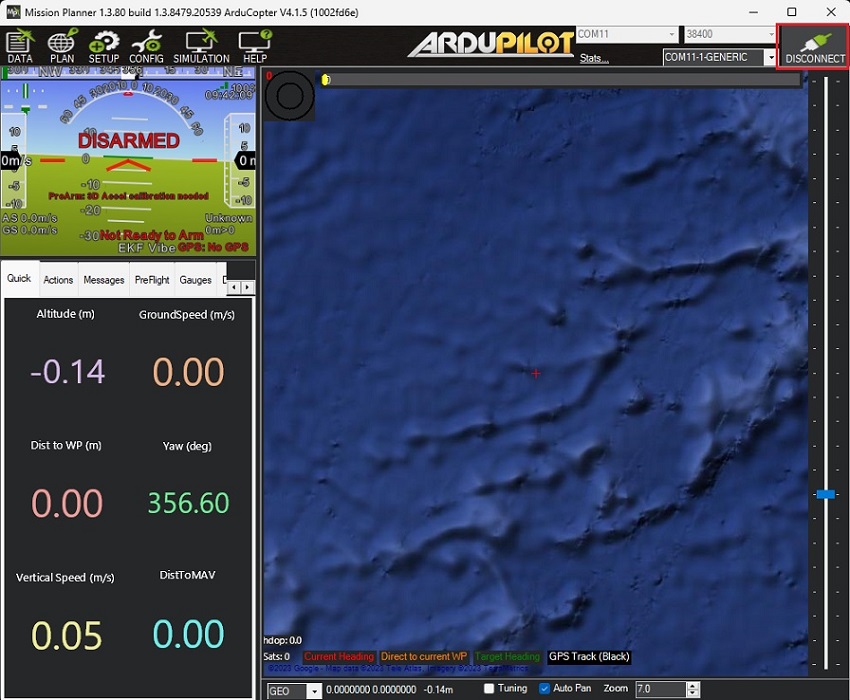
- Open Mission Planner and connect your Pixhawk to it with COM port.
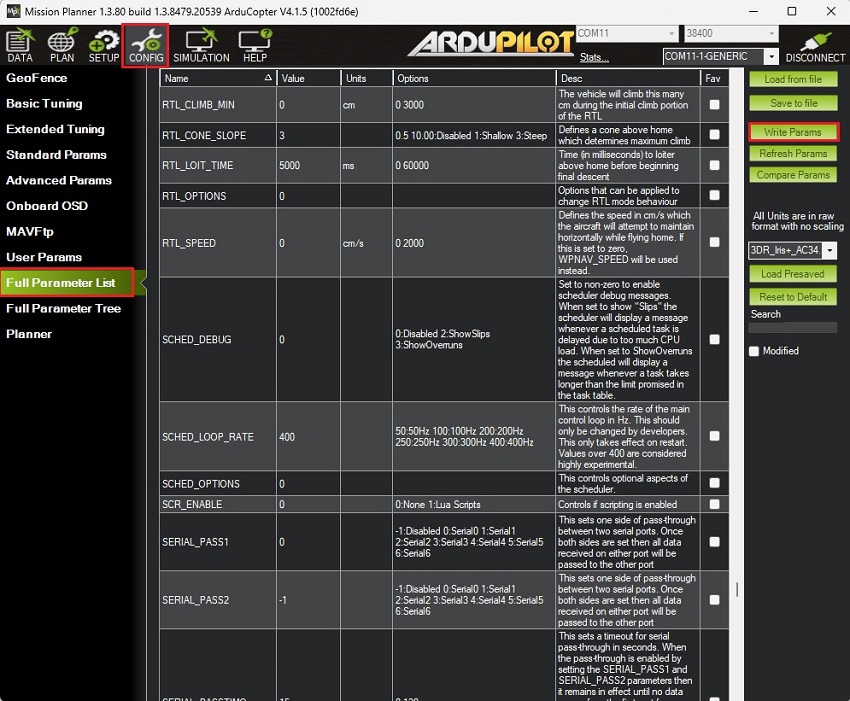
- Go to CONFIG–>Full Parameter List.
Since the firmware versions may be different to yours, here is a list of all the parameters modified with respect to the default configuration:COMPASS_ENABLE,0
COMPASS_USE,0
COMPASS_USE2,0
COMPASS_USE3,0
EK3_MAG_CAL,2
EK3_SRC1_YAW,2
GPS_AUTO_CONFIG,0
GPS_AUTO_SWITCH,0
GPS_RATE_MS, 100
GPS_TYPE,16
SERIAL1_BAUD,115
SERIAL1_PROTOCOL,5Press Write Params to save your setting.
- After saving all the parameters make sure you remove the power from your autopilot by disconnecting USB cable to reset your autopilot.
Thirdly, connect the heading kit to your autopilot.
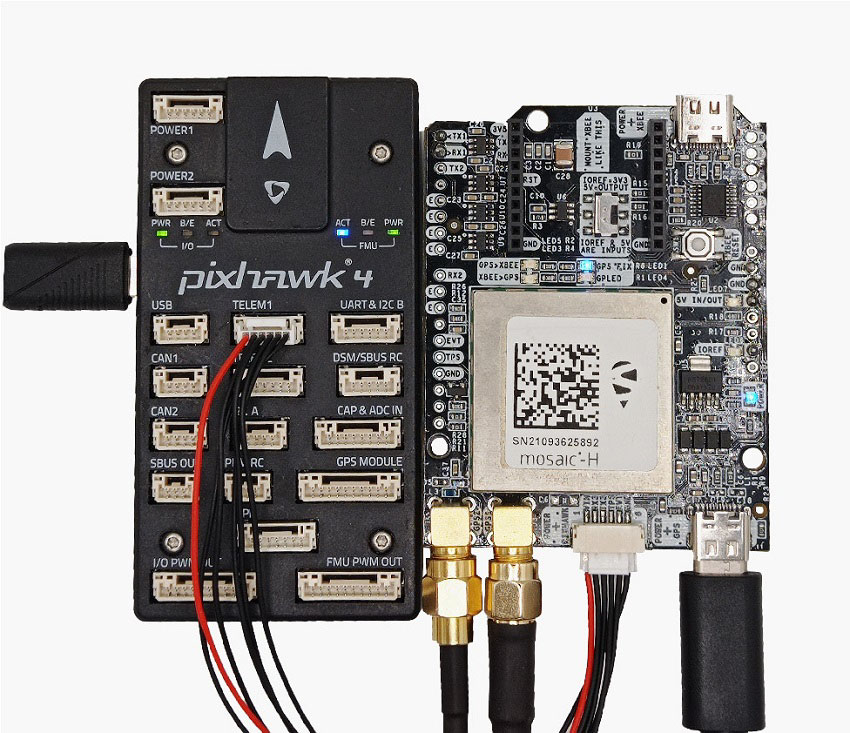
- Use the JST connector on the simpleRTK3B Heading and connect it to the TELEM1 port.
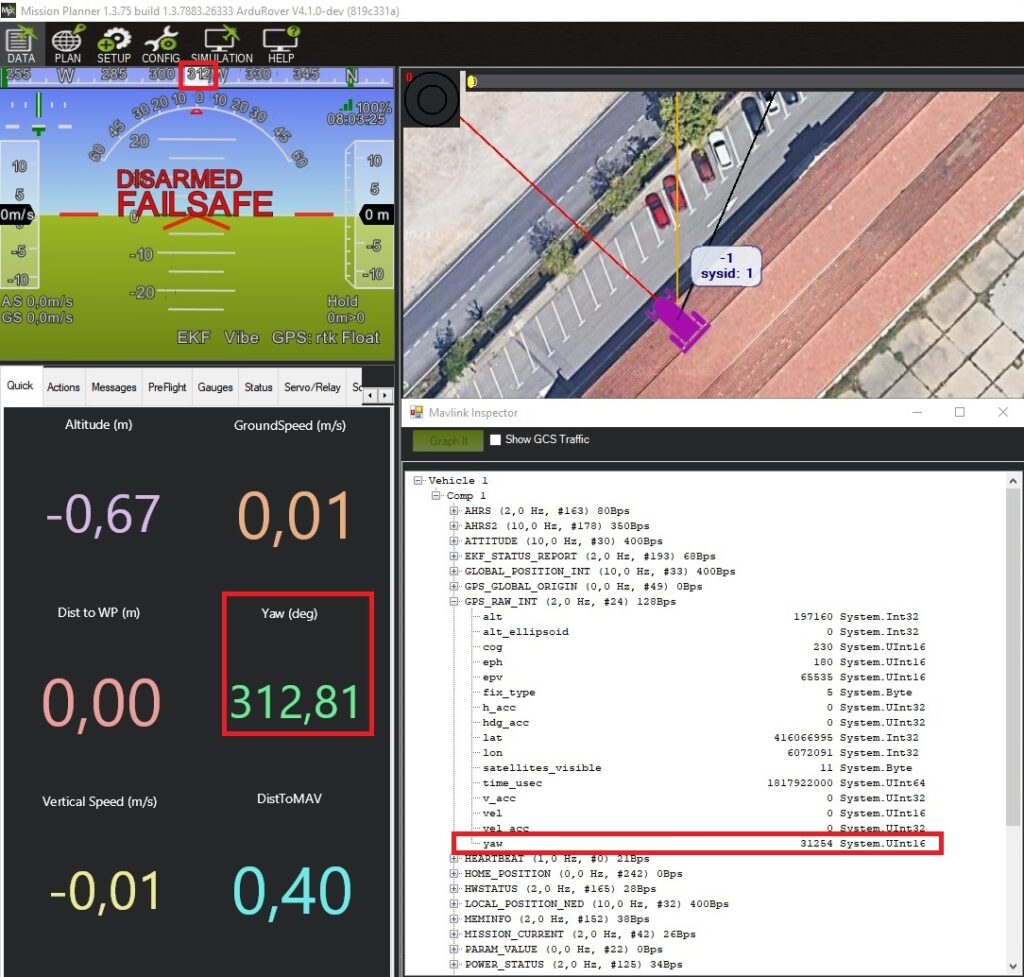
- Power the autopilot. Wait a few seconds and check the AHRS heading value on Mission Planner, it should match the direction between your antennas.
- As an additional check to see if it is working, the heading value of the AHRS should be the same as the one in CTRL+F–>MAVlink inspector–>GPS_RAW_INT–>yaw.
- Notice that the EKF will take into account the gyroscope readings, so if you turn the autopilot without turning the whole vehicle frame where the antennas are mounted the heading will change, although after a few seconds it will go back to the GNSS calculated heading.
If you want to do this tutorial, we have all the products in stock and ready to be shipped:
- simpleRTK3B Heading
- 2 × Lightweight helical GNSS Tripleband + L-band antenna (IP67)
- 2× SMA antenna RF cable extender (these items are needed particularly for helical antenna)
- USB to USB-C cable
- USB to micro-USB cable
- Pixhawk cable set
 and
and 

