How to configure your simpleRTK2B receiver on your Android smartphone via GNSS master?
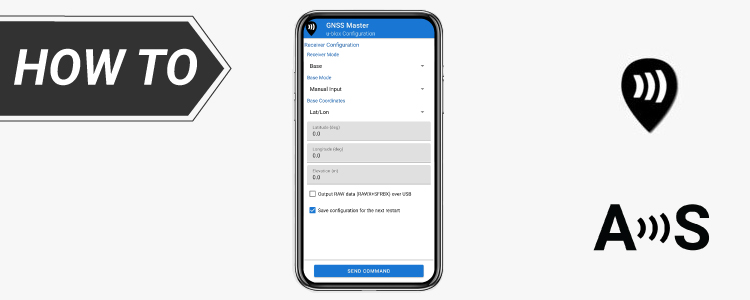

There are plenty of tutorials explaining how to change the configuration of your ZED-F9P with u-center, but sometimes you are in the field and you don’t have a laptop to do this.
In this tutorial we will show you an easy way to do this. The following list shows use cases examples:
- I have a receiver acting as a Rover and I need it as a base station
- I have a receiver acting as a base station and I need it as a rover
- I want to change my base station survey in configuration
- I want to set my base station fixed coordinates (ECEF)
- I want to set my base station fixed coordinates (geodetic)
Before starting the tutorial, remember to enable UBX on Protocol in of UART2 with u-center, so you can configure the receiver with your phone. You can download the configuration file here (right click and choose Save link as).
If you don’t know how to upload configuration files, check out tutorial How to connect, configure GPS Receiver and update firmware with u-center.
Required hardware:
- simpleRTK2B Pro
- u-blox GNSS Multiband antenna ANN-MB-00 (IP67)
- USB-C to USB-C cable (OTG)
- USB to USB-C cable
- Android smartphone or tablet
- simpleRTK2B Pro
- u-blox GNSS Multiband antenna ANN-MB-00 (IP67)
- Bluetooth module
- USB to USB-C cable
- Android smartphone or tablet
- simpleRTK2B Pro
- u-blox GNSS Multiband antenna ANN-MB-00 (IP67)
- BT+BLE Bridge
- USB to USB-C cable
- Android smartphone or tablet
- simpleRTK2B Pro
- u-blox GNSS Multiband antenna ANN-MB-00 (IP67)
- WiFi NTRIP Master
- USB to USB-C cable
- Android smartphone or tablet
Required software:
How to configure your simpleRTK2B receiver on your Android smartphone?
Firstly, connect your receiver to GNSS Master.
- Connect RTK receiver with your Android device with USB OTG cable.
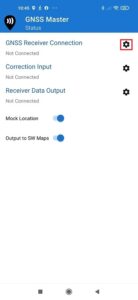
- Open GNSS Master app. Click the gear icon on the right side of GNSS Receiver Connection to enter the setup menu.
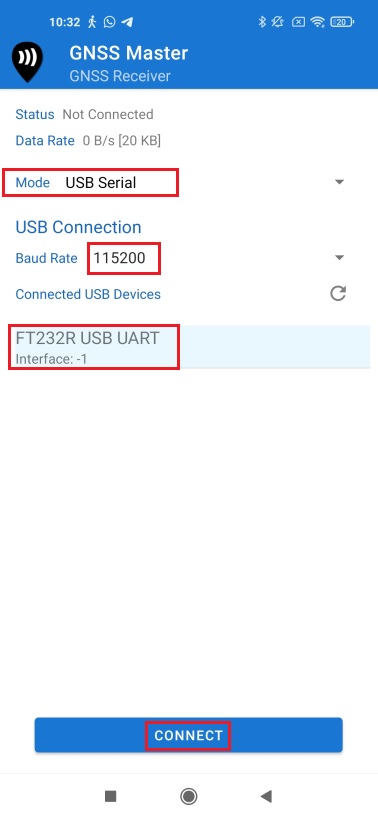
- Choose USB Serial at Mode.
Set Baud Rate to 115200 bps (If you use a different receiver, the Baud Rate should match with your receiver configuration).
At Connected USB Devices, it will automatically recognize your receiver with name ***** USB UART.
Press CONNECT.
- Power your RTK receiver by connecting USB cable to the power supply (smartphone/tablet/ compatible powerbank).
If you get any popup message to connect the USB device with any app, you can ignore it. - Enable your smartphone/tablet Bluetooth, and pair it with RTK receiver.
When pairing your device, notice that it may appear as RTK_GNSS_*** or as a generic MAC number (e.g.: F0:0A:95:9D:68:16).
The password is always 1234.
The pairing only needs to be done once.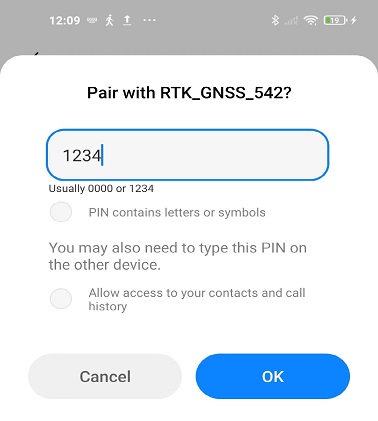
- Open GNSS Master app.
Click the gear icon on the right side of GNSS Receiver Connection to enter the setup menu.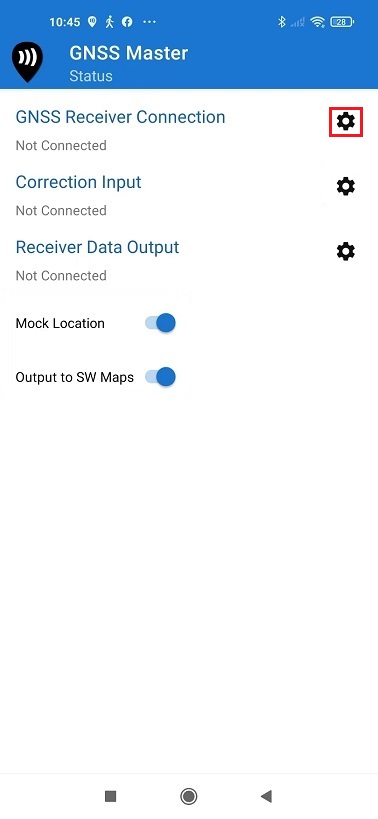
- Choose Bluetooth at Mode. In Paired Devices choose the one you paired in step 2.
Press CONNECT.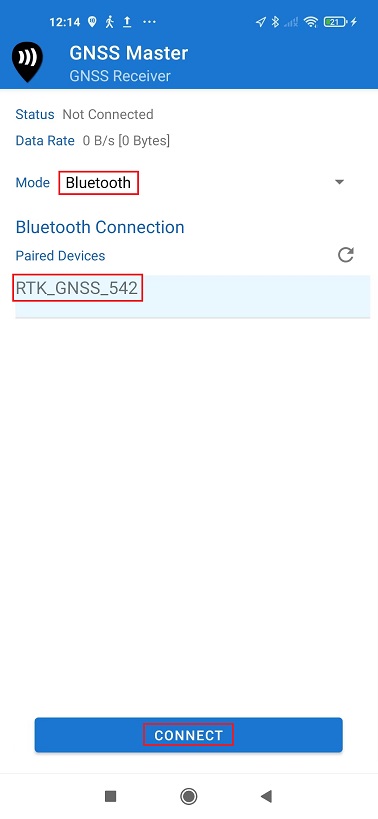
- Power your RTK receiver by connecting USB cable to the power supply (smartphone/tablet/ compatible powerbank).
If you get any popup message to connect the USB device with any app, you can ignore it. - Enable your smartphone/tablet Bluetooth, and pair it with your RTK receiver. When pairing your device, notice that it will appear as BT+BLE_Bridge _****. The password is always 1234.
The pairing only needs to be done once.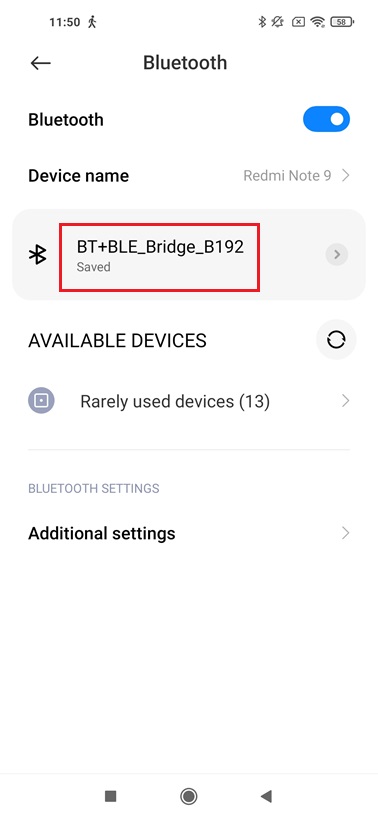
- Open GNSS Master app. Click the gear icon on the right side of GNSS Receiver Connection to enter the setup menu.

- Choose Bluetooth LE at Mode.
In Paired Devices choose the one you paired in step 2.
Press CONNECT.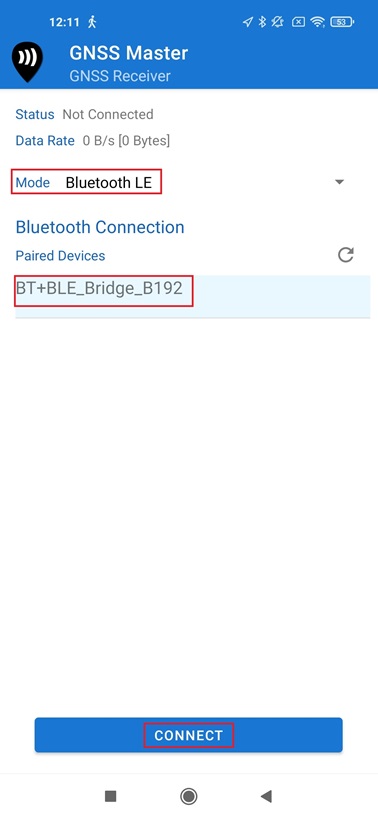
- Power your RTK receiver by connecting USB cable to the power supply (smartphone/tablet/ compatible powerbank).
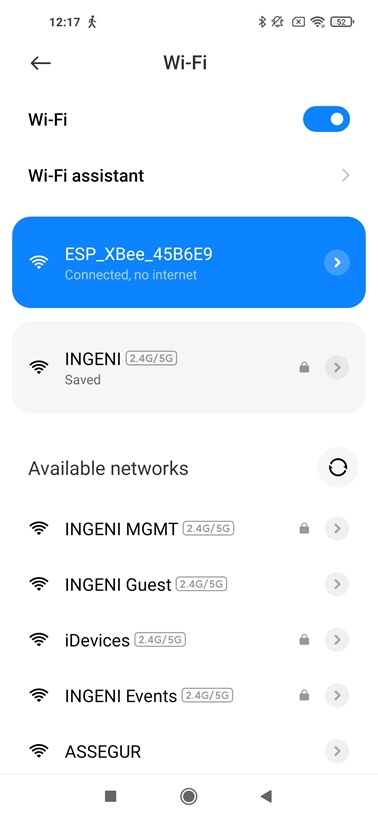
If you get any popup message to connect the USB device with any app, you can ignore it. - Enable your smartphone/tablet WiFi, and connect to the hotspot created by WiFi NTRIP Master. It will appear as ESP_XBee_*****.
- Open GNSS Master app. Click the gear icon on the right side of GNSS Receiver Connection to enter the setup menu.

- Choose TCP/IP at Mode.
In TCP Address type in 192.168.4.1.
At TCP Port type 23.
Press CONNECT.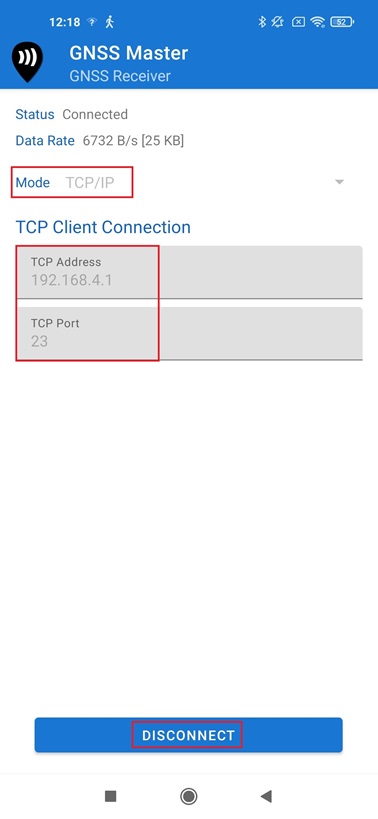
Secondly, configure your receiver on GNSS master.
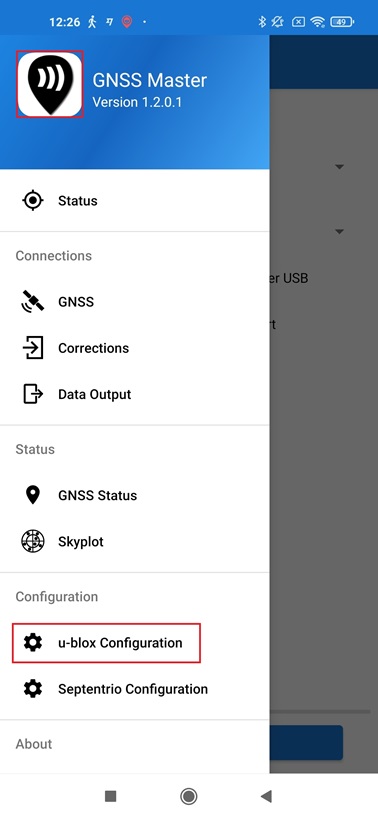
- Go back to menu. Choose u-blox Configuration.
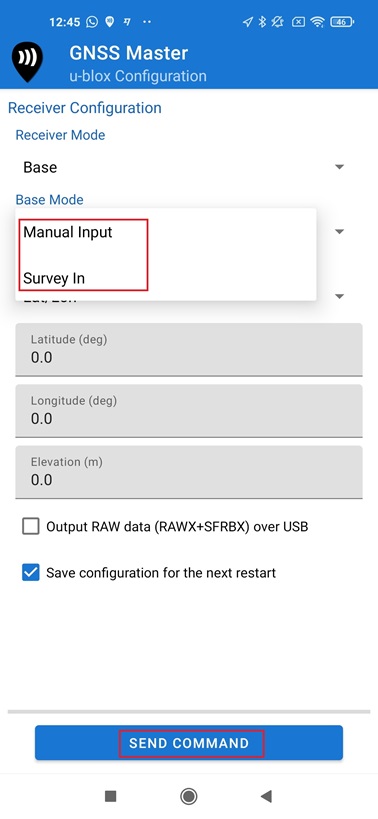
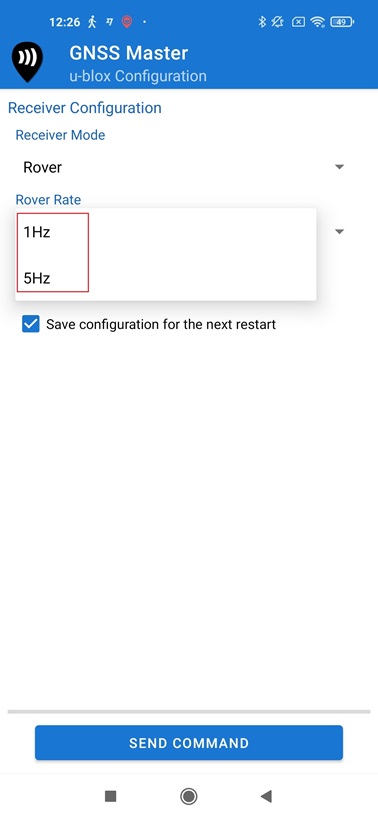
- Receiver Mode allows you to set up your receiver as Rover or Base. Additionally, you have the option to upload a preferred configuration file.
Note that if the uploaded configuration file disables UBX messages at the Protocol in UARTs, you won’t be able to reconfigure your receiver using a smartphone.
Exercise caution when uploading a configuration file in the field, unless you are familiar with its contents and potential impact on the receiver.
- At Base Mode you can choose Manual Input or Survey In.
- At Rover Mode you can choose Rover Rate at 1Hz or 5Hz.
- Press SEND COMMAND.
Now you can configure your receiver on field without using a laptop.
If you want to follow this tutorial, we have all the necessary products in stock and ready to be shipped:
 and
and 

