
 and
and 

How to configure u-blox ZED-X20P
Introduction
This page applies to u-blox X20 modules. We will guide you through the steps for the basic usage of the u-center 2 software, which is designed for evaluating performance, conducting performance analysis, and configuring u-blox receivers.
Install u-center 2
You can download u-center 2 here.
u-center 2 has been tested on Windows 10 (64 bit) platform and runs on Windows 11 as is. Once the installation has completed successfully, you need to enter your u-blox support portal account credentials and log in with a browser. If you don’t have a u-blox account click Register.
After login, having internet connectivity, u-center 2 will start and can also be used offline.
Connect to u-center 2
- Connect the GNSS antenna to your receiver. Make sure the antenna has a good view of the sky for testing functionality. Otherwise, you won’t see satellites view and signal.
- Connect the receiver to your PC via the USB port labelled as POWER+GPS.
- Click the Devices icon on the left menu bar, click + icon. Select the COM port of the device. Select Autobauding for automatic detection of the baud rate. Click Add device.

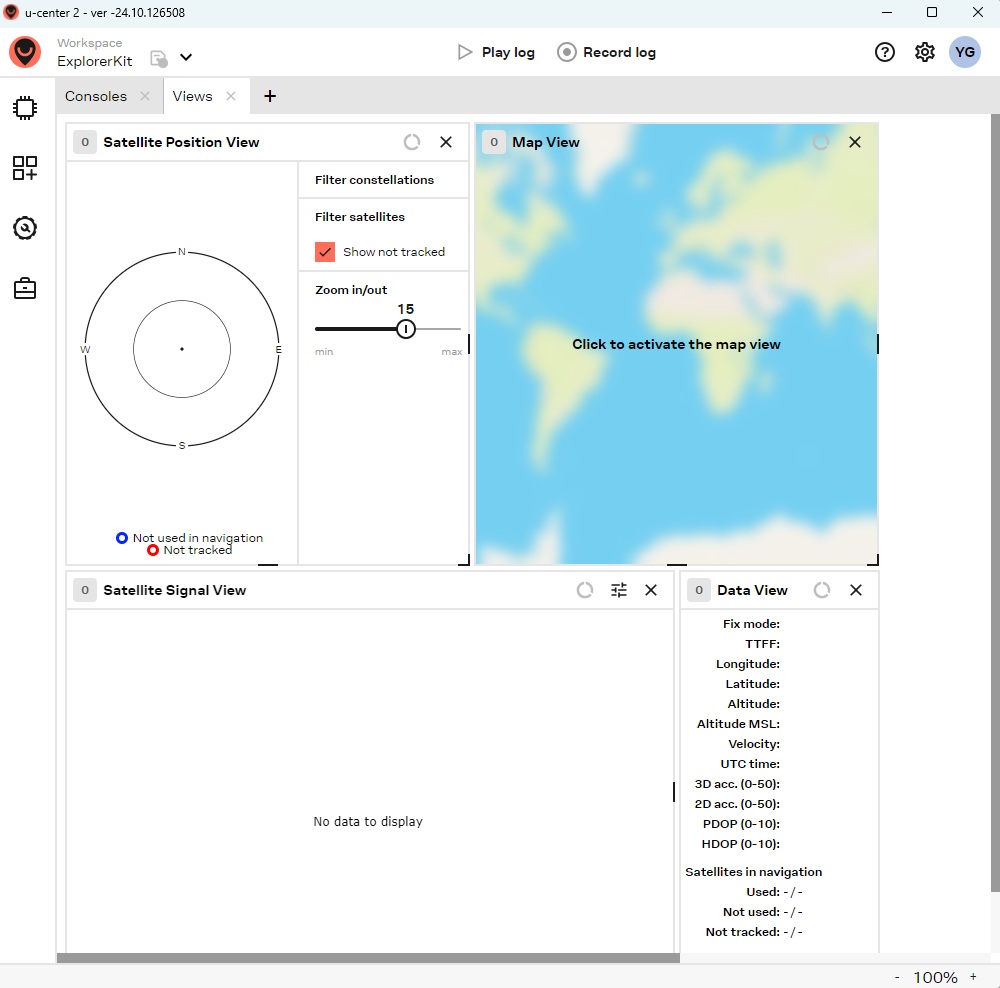
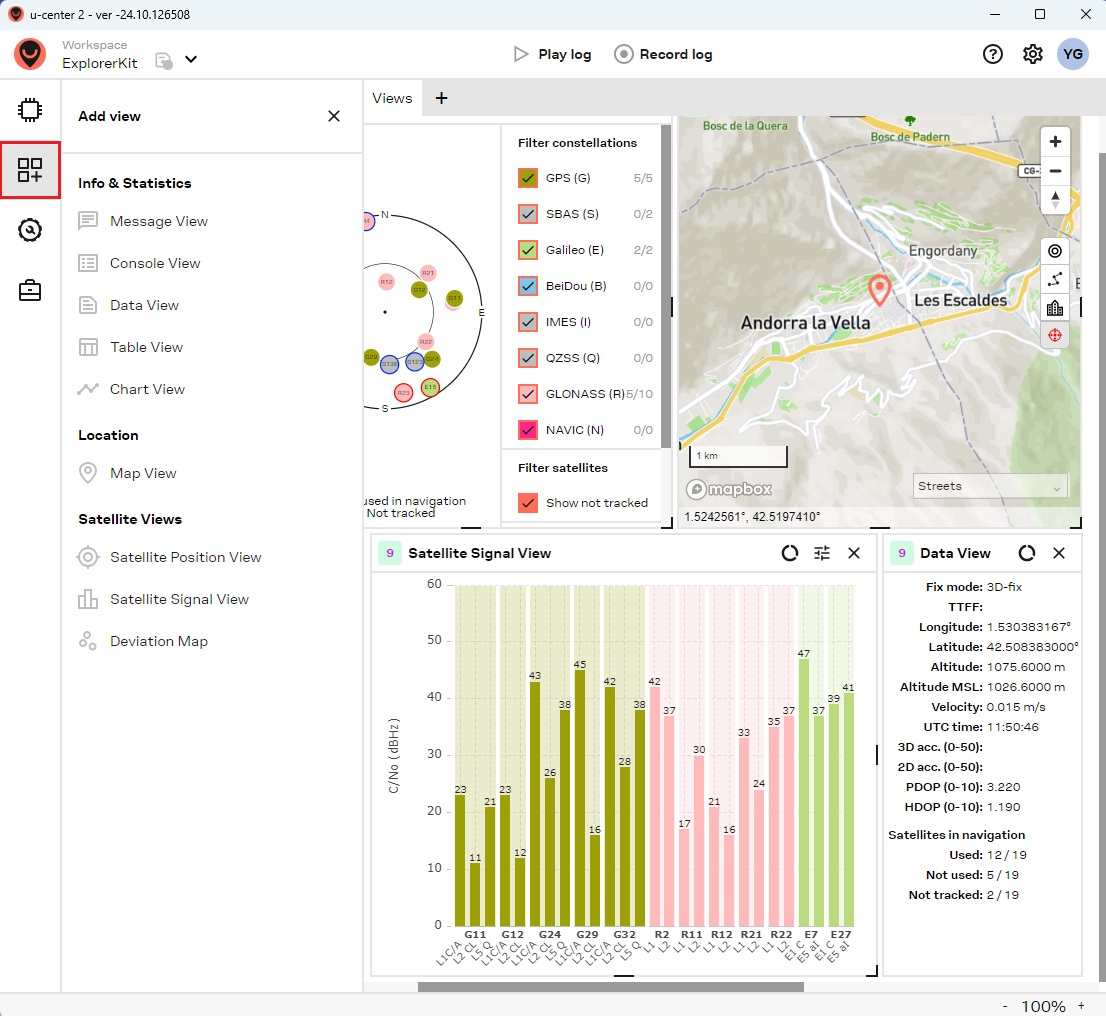
- Click the Add View icon in the left menu bar to add your preferred views.
Firmware update
- Select Firmware update from the Tools and Services. At Receiver information you can see the current firmware.
If you need to update the firmware, select the firmware file and click Update.
Configure X20P receiver
We will guide you through the steps of loading the configuration file from your PC to the receiver, saving the configuration to the receiver’s flash memory (after changing configuration, configuration must be stored in flash otherwise it’s lost when removing power), and creating a new configuration file.
Load a configuration file
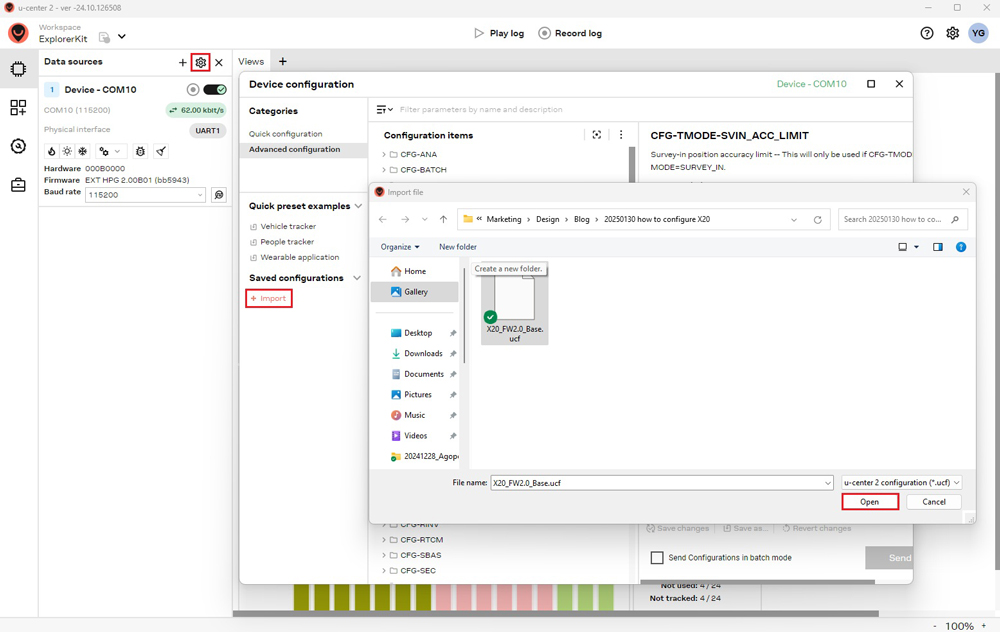
- In the menu bar, click the gear icon to open the Device Configuration window. Under Saved Configurations, click +Import, select the desired configuration file, and click Open to import it.
- Click Send. You will see the green check mark at Configuration changes.
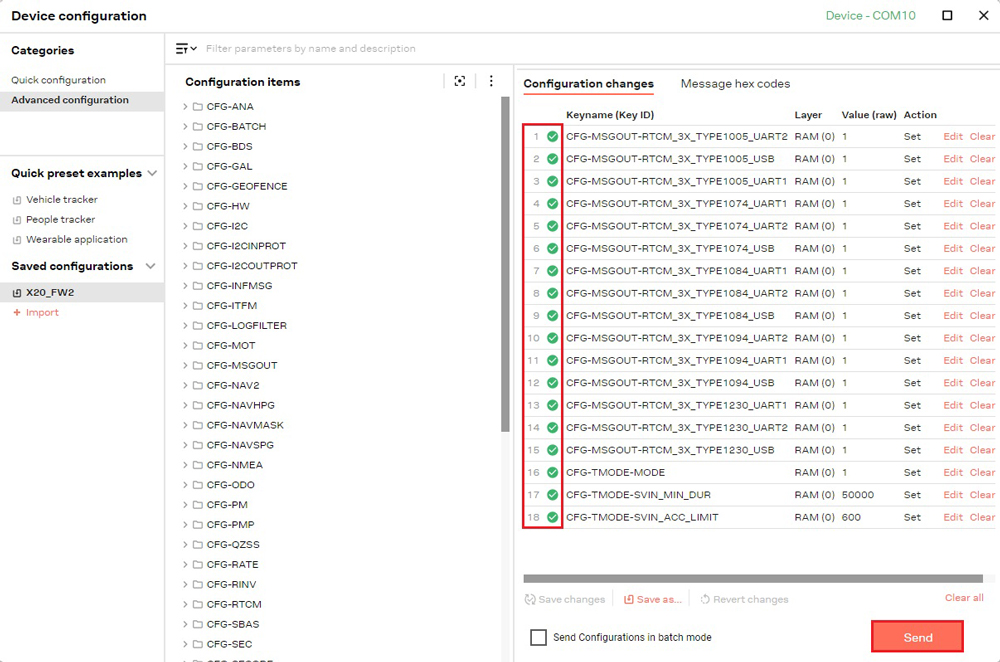
Configure the receiver
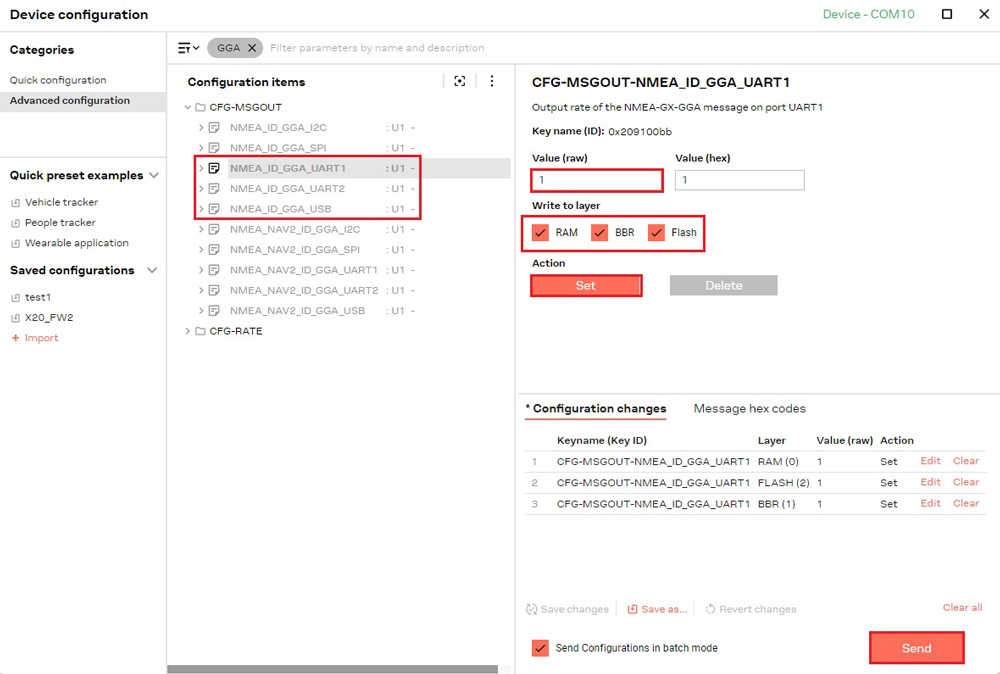
- Select the configuration items you want to modify. After changing the values, select the layers to write. If you only need a temporary change, select RAM (the settings will be lost when the device is restarted). To keep the changes even after turning the device off, select RAM, BBR, and Flash.
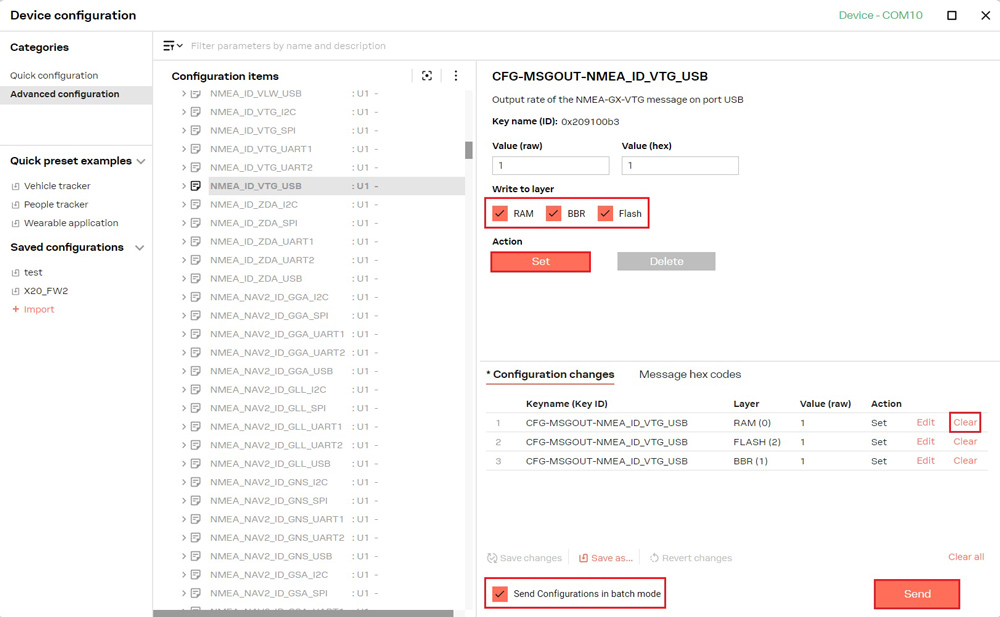
- Click the Set. This will add the item, its value and the layers to the Configuration changes list.
- Repeat step 8 to 9 to build up your list of configuration item change.
- Review the list configuration item changes to send to the device. To change the order, drag an item in the Configuration changes list to the new position. To remove an item, select Clear.
Each configuration property in the list will be sent as an individual UBX message. By selecting Send configuration in batch mode these properties will be grouped together into one UBX message per layer. This will result in fewer messages which can be send to the connected device faster. - Click Send to send the changes to the device.
- To save the Configuration changes list and add it to the list of Saved configurations, click Save as….
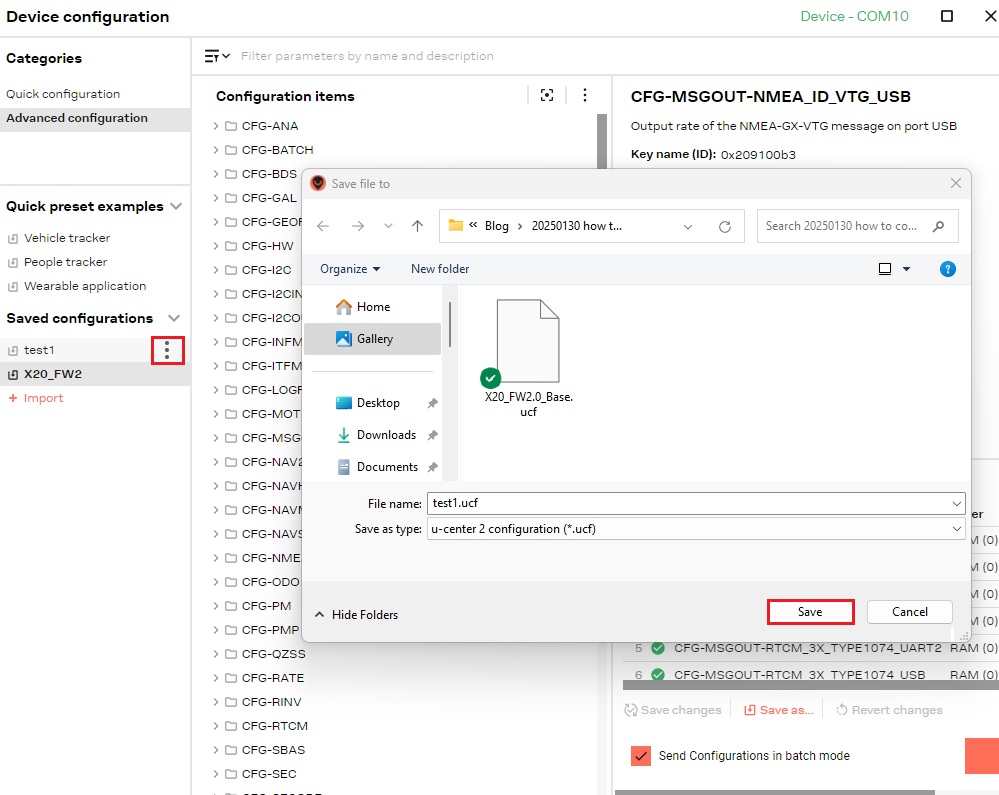
Create a configuration file
The configuration can be export as a local. ucf, making it easy to use with other receivers.
- Select the desired configuration, click the three-dot icon, select Export, choose your folder and file name, then click Save. The configuration .ucf file will appear in the selected folder.
Examples of configuration file
We provide a variety of configuration files designed for different purposes, such as configuring as a base station, as a Rover, sending NMEA messages via Bluetooth or BLE, connecting to NTRIP correction via 4G NTRIP master, and enable RAW data for PPK. You can download the configuration file that fits your requirements by right-click and choose ‘Save link as’.
| Configuration | File |
|---|---|
Base
| Download |
Rover 1Hz
| Download |
Rover 5Hz
| Download |
Rover 25Hz
| Download |
| Send 1Hz full NMEA to Plugin This configuration allows you to connect the receiver to your mobile device via Bluetooth, BLE, or use radio and other communication plugins on Xbee socket.
| Download |
| Send 1Hz GGA to Plugin This configuration file allows connection to NTRIP client with VRS mountpoints.
| Download |
| Log RAW data for PPK This configuration file allows output RAW data (UBX-RXM-RAWX and UBX-RXM-SFRBX) on UART1, UART2 and USB. | Download |
Get RTK corrections
To achieve centimeter- or millimeter-level accuracy with our GNSS receivers, RTK corrections are required. These corrections can be obtained through a Base Rover setup or an online Base station (NTRIP).
Base and Rover setup
- With a Base and Rover setup, you will need two receivers: one configured as a Base and the other configured as a Rover. They will communicate with each other via radio. Load the configure file from section Examples of configuration file.
NTRIP corrections
NTRIP (Networked Transport of RTCM via Internet Protocol) is a protocol used for streaming GNSS data over the internet. It facilitates the transmission of real-time correction data from a reference station to a rover or user device.
If you don’t have your own base station for corrections, you can find third party NTRIP corrections at RTK Correction Services in your Country to gain credential (server address, port, user and password) of NTRIP.
You can connect to NTRIP using a PC, smartphone, or our Communication Plugins. Before start, make sure your receiver is configured as a Rover.
NTRIP via PC
- To connect to the caster for correction data, UBX-NAV-PVT or NMEA standard GGA messages must be enabled. You can skip this step if you load our Rover configuration file.
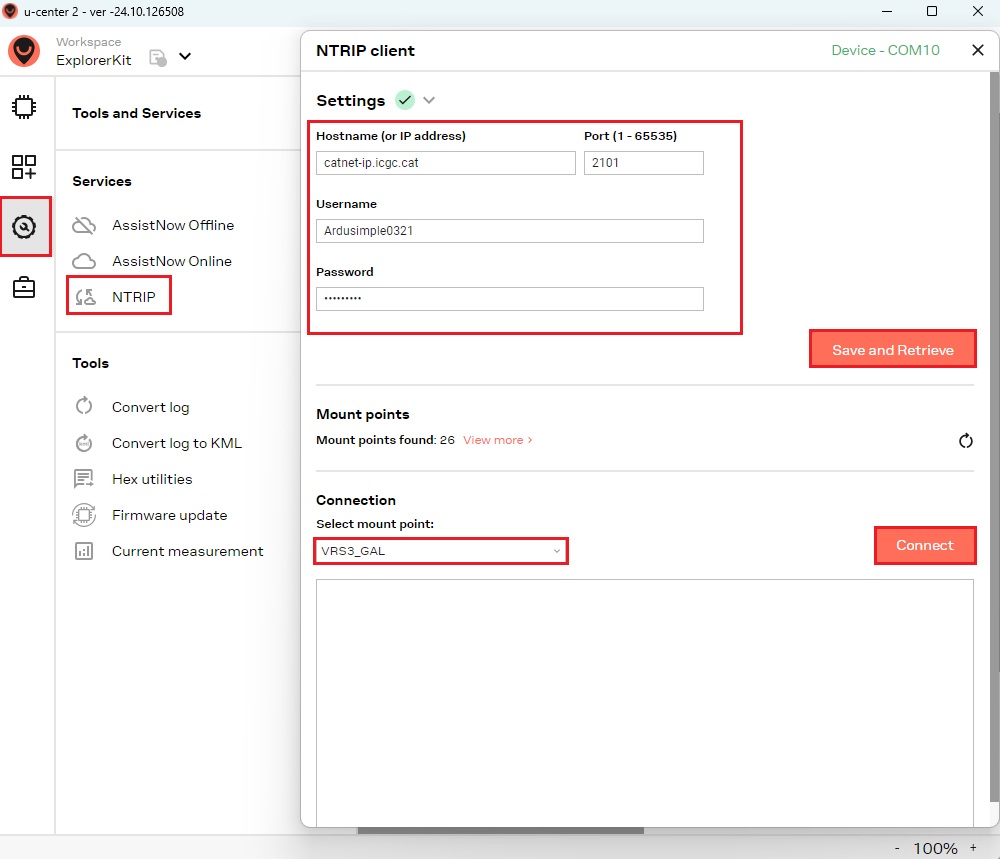
- Go to Tools and Service –> Services –> NTRIP. Enter the hostname or IP address, port, username and password of the NTRIP caster. Click Save and Retrieve to get an up-to-date list of all available mount points.Select mount point then click Connect.
NTRIP via smartphone or tablet
- You can also connect to NRTIP using your mobile device, which is convenient for fieldwork. For more information, check our tutorial How to use centimeter GPS with any Android app (Mock location).
NTRIP via communication plugin
- You can also connect to NRTIP correction with one of our communication plugin below. For more information, check the User Guide of each product.
- Sale!
 Plugins
4G NTRIP Master
156,00€ This product has multiple variants. The options may be chosen on the product page - Sale!
 Made in Europe
 -

Log data and replay
- Click the Record log button. On the dialog displayed, select the file location by selecting the Change option and type in the log file name.
Select Record log to start recording.
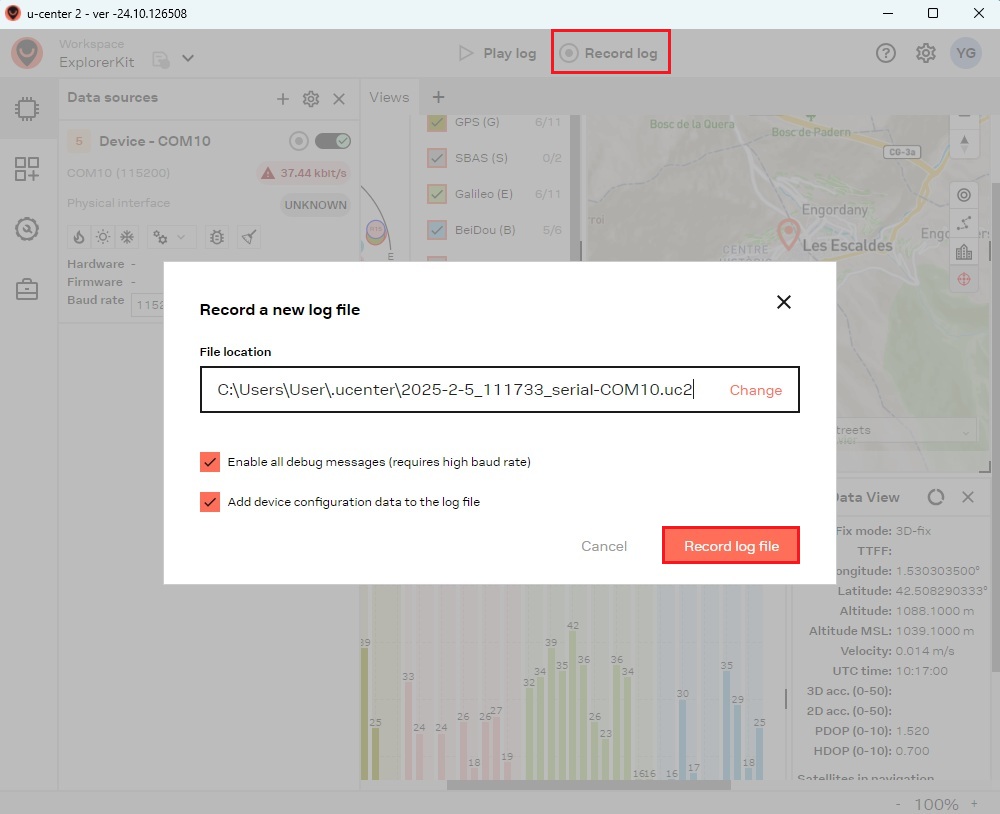
- Click Stop recording to finish recording. Two log files with different formats will be saved at the selected location. One with extension .uc2 and another with extension .ubx.Log files with the .ubx extension are created only for backwards compatibility with existing scripts and u-center legacy. They cannot be used directly by u-center 2. u-center 2 can only play log files with the .uc2 file extension.
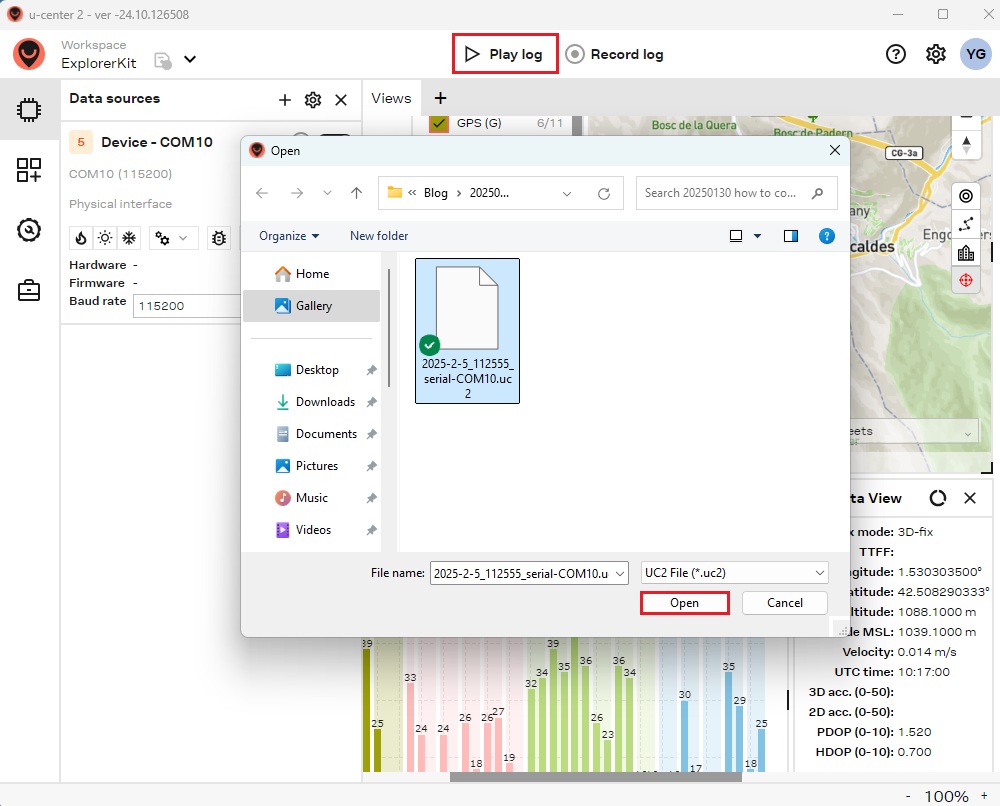
- To play any existing log file, select the Play log button and select a log file. Click Open.
U-blox Documentation
If you are an advanced user seeking detailed information, please refer to the u-center 2 User Guide.
- RTK4 Boards
Micro u-blox ZED-X20P
From 253,00€ This product has multiple variants. The options may be chosen on the product page - Sale!
 Made in EuropeRTK4 Boards
simpleRTK 4 Optimum
249,00€Original price was: 249,00€.225,00€Current price is: 225,00€. - Sale!
 Made in EuropeRTK starter kits
simpleRTK 4 Optimum – Basic Starter Kit
299,00€Original price was: 299,00€.275,00€Current price is: 275,00€.


