How to install u-center on macOS and connect GNSS RTK receiver to it
The official u-center software is available only for Windows, but many users operate on macOS computers. This tutorial will guide you through the process of installing u-center on macOS and connecting the simpleRTK2B receiver powered by ZED-F9P module.
Note that the process doesn’t work on M1/Apple Silicon module and some of the newer version of MacOS.
Some users reports that they cannot install u-center with PlayOnMac, but they can install via Porting Kit.
If you want to use u-center on Linux system, check our tutorial How to install u-center on Ubuntu and connect GNSS receiver to it.
u-center (Just download the exe file, we will install it later. Download the version for F9)
How to install u-center on your Macbook or iMAC?
Firstly, install u-center on mac.
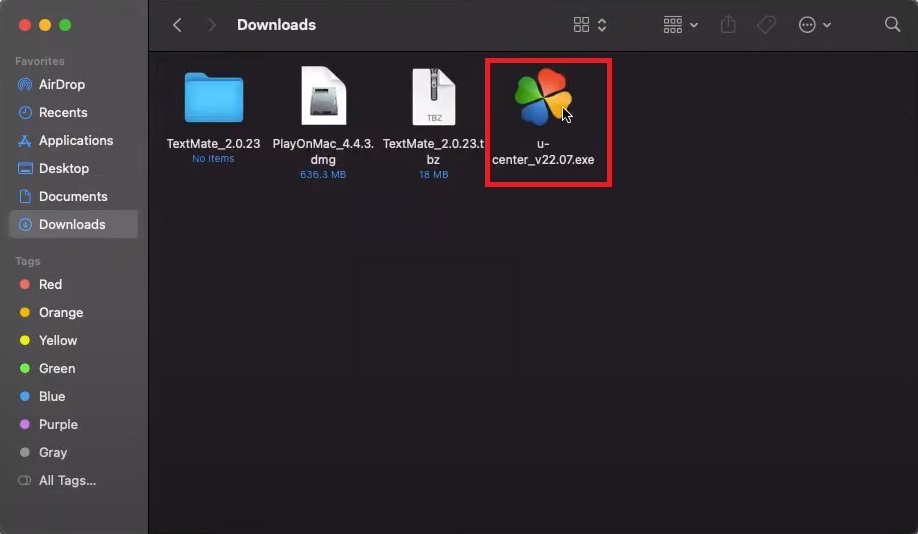
Open Downloads, you will find the u-center.exe file with PlayOnMac icon. Double click it.
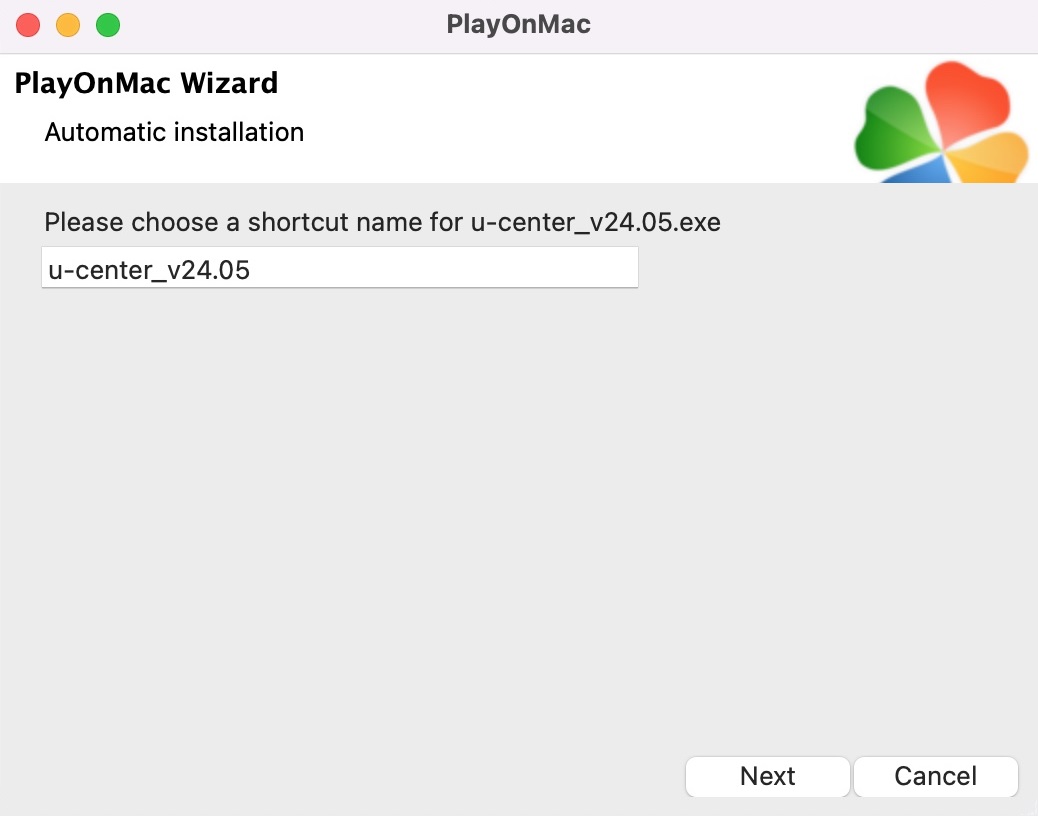
You will see PlayOnMac Wizard, follow the instruction on the window, to install u-center.
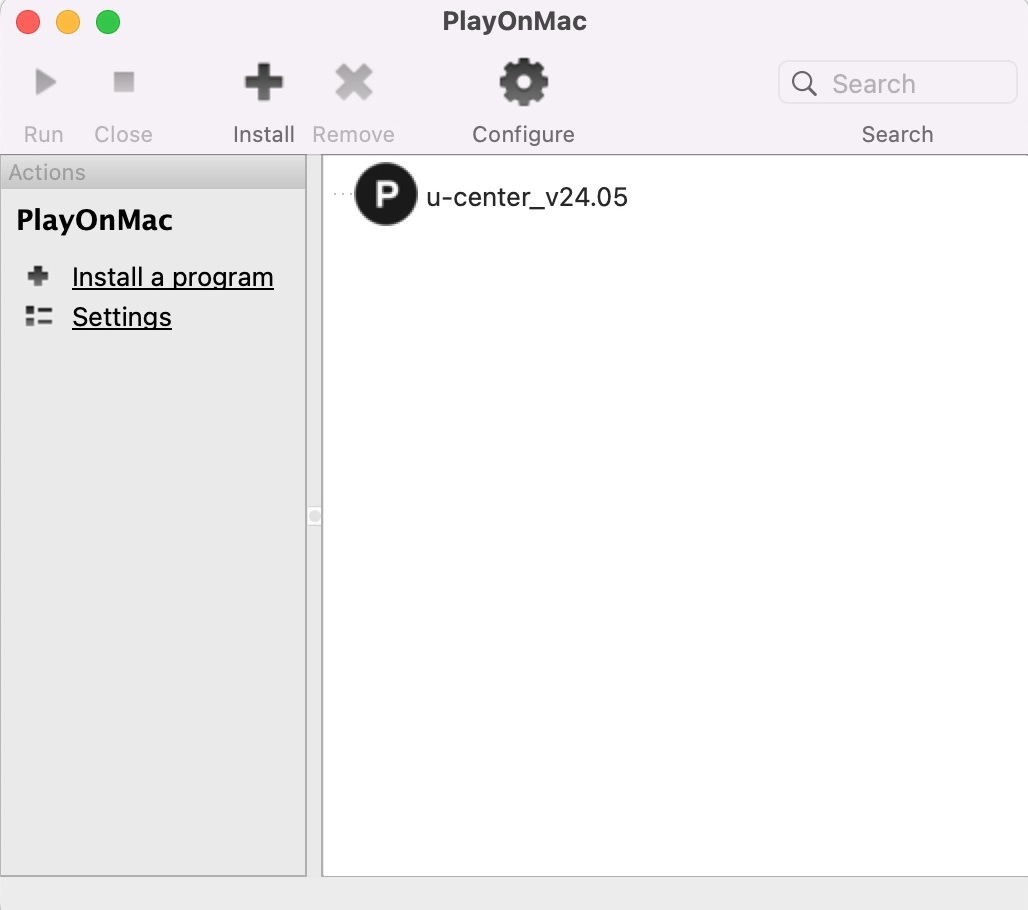
Open PlayOnMac, you will see u-center is installed.
Secondly, setup COM port in PlayOnMac.
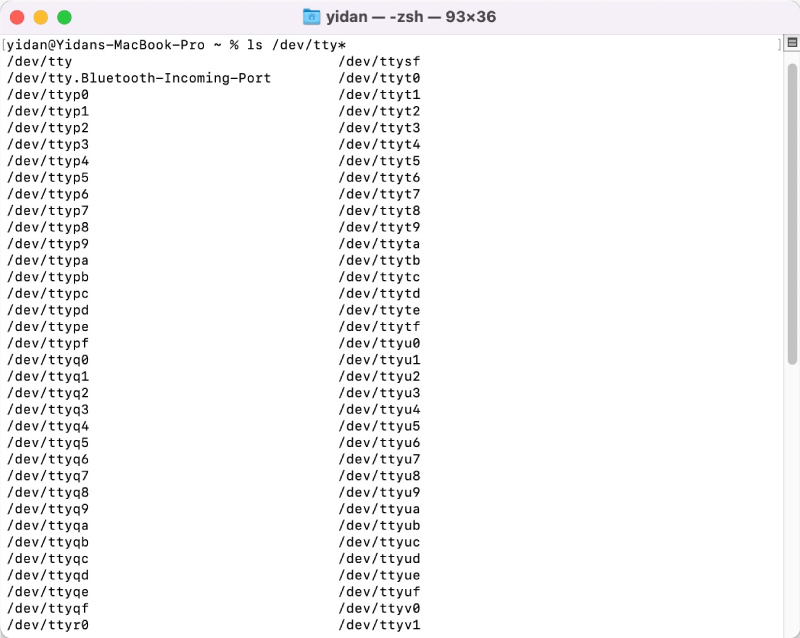
Open terminal, type in ls /dev/tty* to check all the serial ports in use.
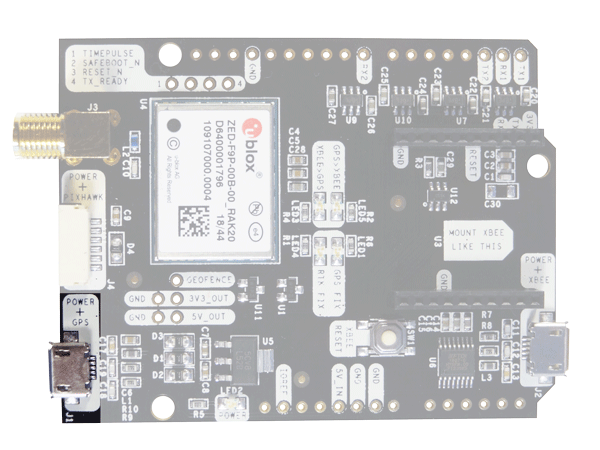
Plug in your ArduSimple receiver to your computer via the USB port labeled as POWER+GPS.
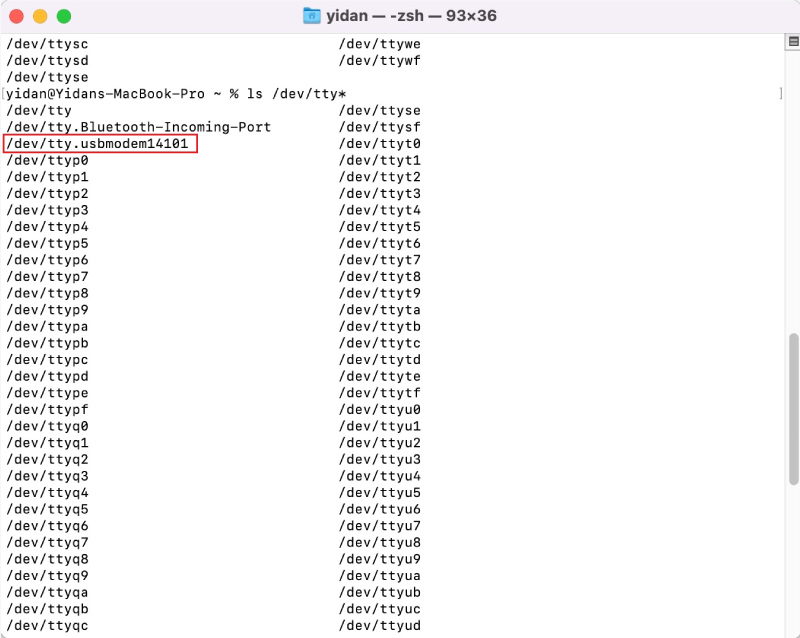
Go back to terminal and type in ls /dev/tty* You will see the new serial port of your receiver (The name may be different on your computer). Copy the name of the port, we will use it later.
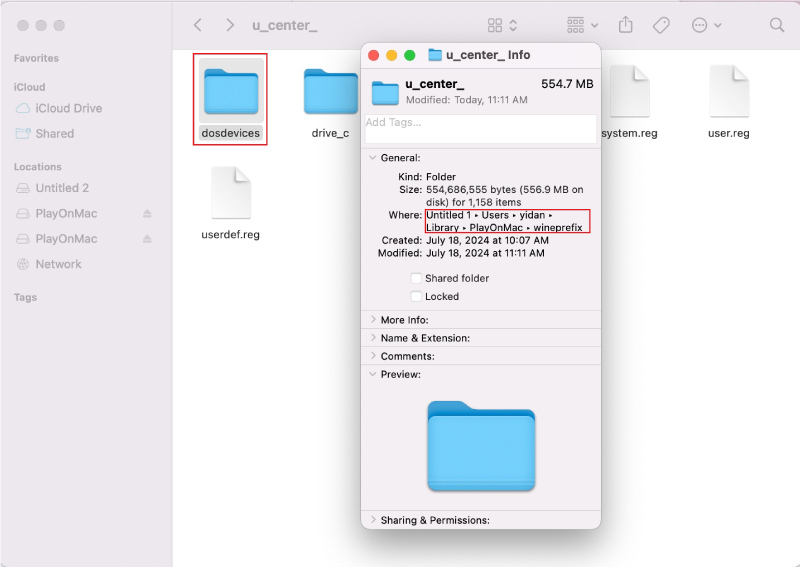
Create a symbolic link to the device in the PlayOnMac u-center configuration ’dosdevices’ folder.
On my computer the folder is at:´~Library/PlayOnMac/wineprefix/u_center_dosdevices´.
It should be similar for all devices.
At Terminal type in:
ln -s /dev/tty.usbmodem14101 ~/Library/PlayOnMac/wineprefix/u_center_/dosdevices/com1 Note that you may need to change the commend according to your own port name and folder name.
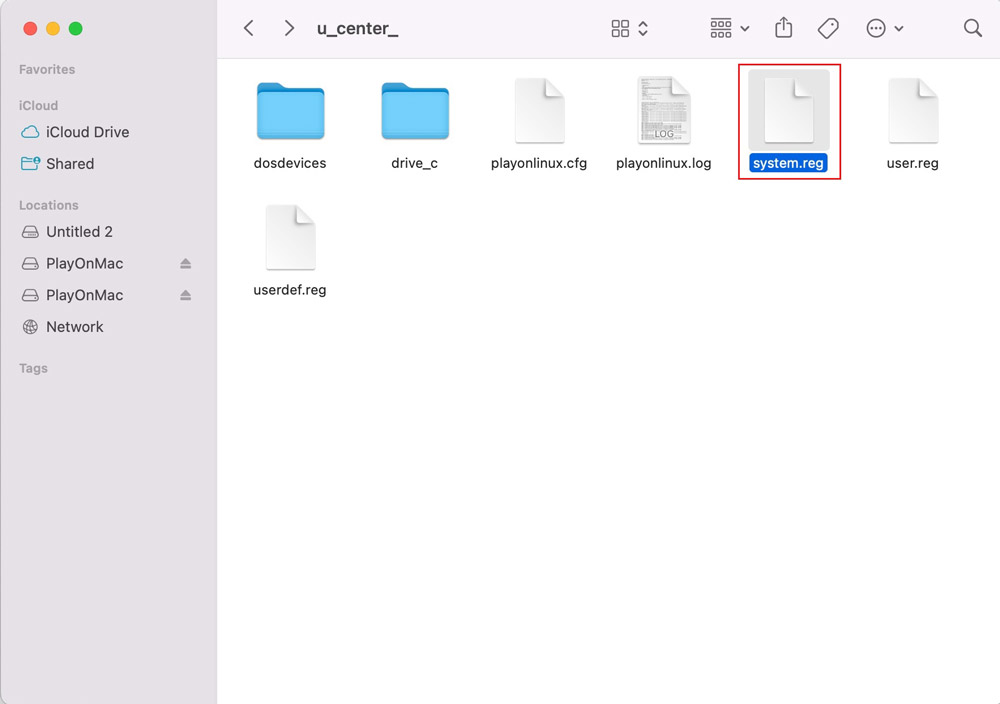
Open the system registry file reg in a text editor.
Note that use a code editor and not a word processor because we don’t want to add any special character to it.
Find the section [Software\\Wine\\Ports] and add the line ”com1”=”/dev/tty.usbmodem14101”. Save the change.
Finally, launch u-center and connect your receiver.
Connect the antenna to your receiver. Place the antenna in an open air with good view of the sky for testing.
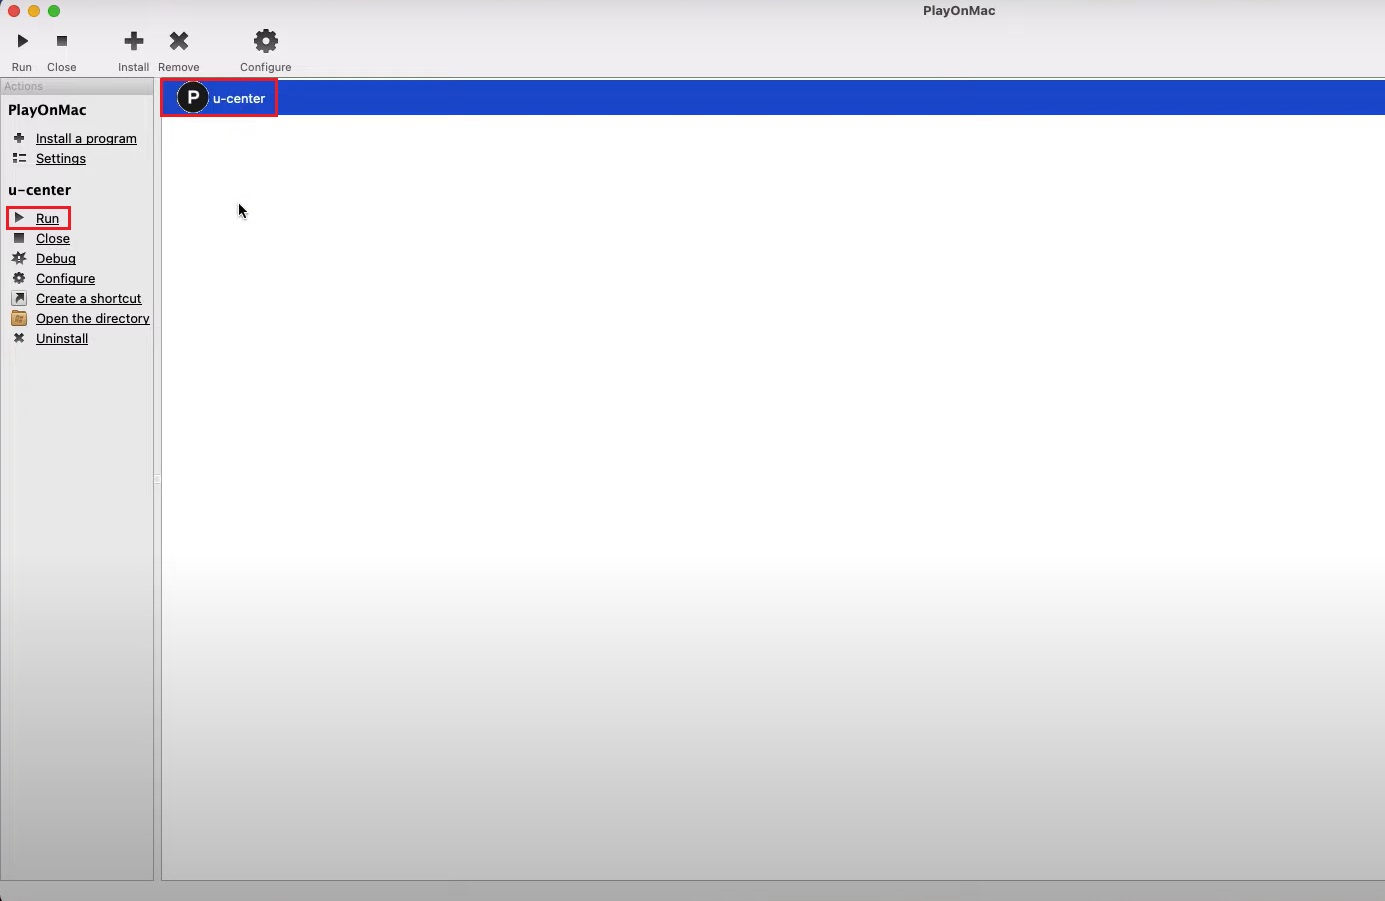
Open PlayOnMac. Select u-center and click Run on the left menu.
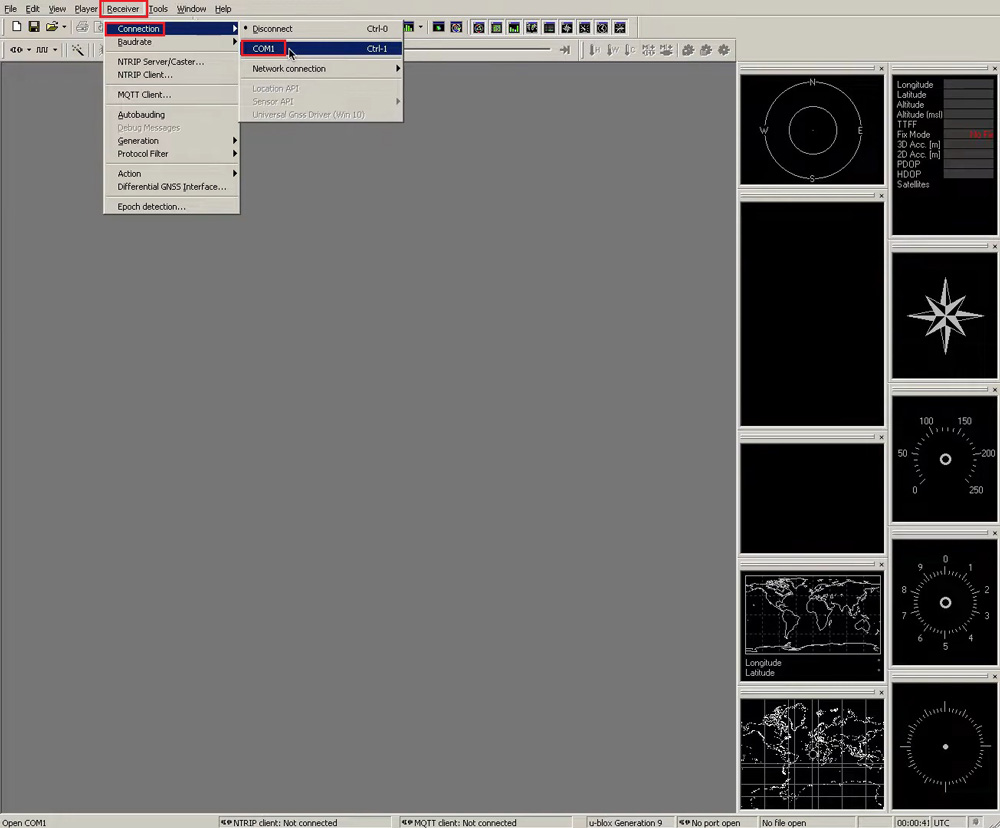
On the menu bar, go to receiver–>Connection you will see COM1. Click to connect.
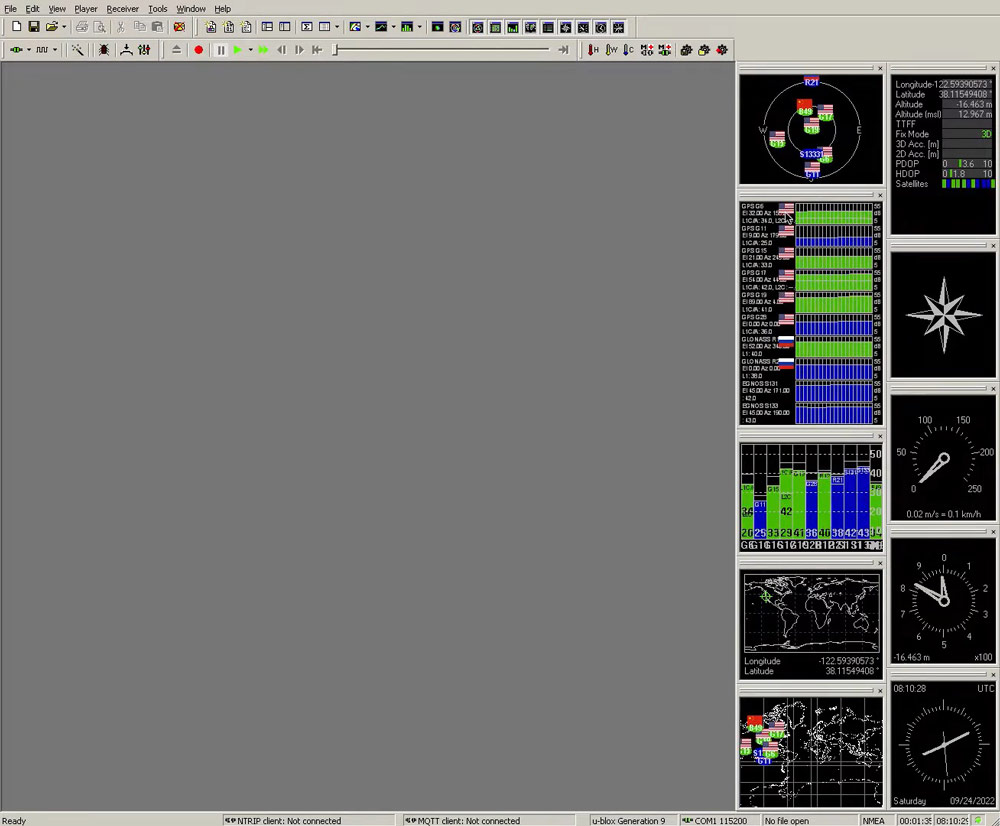
Now you will be able to effectively use u-center on your Mac and take full advantage of the SimpleRTK2B receiver’s capabilities.
If you want to follow the tutorial, we have all product in stock and ready to be shipped:
1. Our engineering team will contact you to solve any questions
2. We will keep you updated about promotions and new product releases
3.You will only hear from us when we have important news, we won’t spam your email
 and
and