How to share your triple-band Septentrio base station with RTK2go via Septentrio Native Ethernet

In this tutorial we will guide you through the steps how to setup a future-proof triple-band base station and share it with free NTRIP Caster RTK2go.
If you want to deploy a base station with maximum long-term availability and maximum rover compatibility, the setup of triple-band simpleRTK3B Pro receiver is your choice.
Adding Shield for Septentrio Native Ethernet to your RTK receiver powered by Septentrio module, makes a base station configurable directly via Septentrio web interface which is very intuitive for the user.
If you have a simpleRTK2B series receiver or want to use other communication plugins, check out another ArduSimple tutorial: How to share your dual-band F9P Base station with RTK2go.
Required hardware:
- simpleRTK3B Pro – Headers soldered
- Budget Survey Tripleband GNSS Antenna
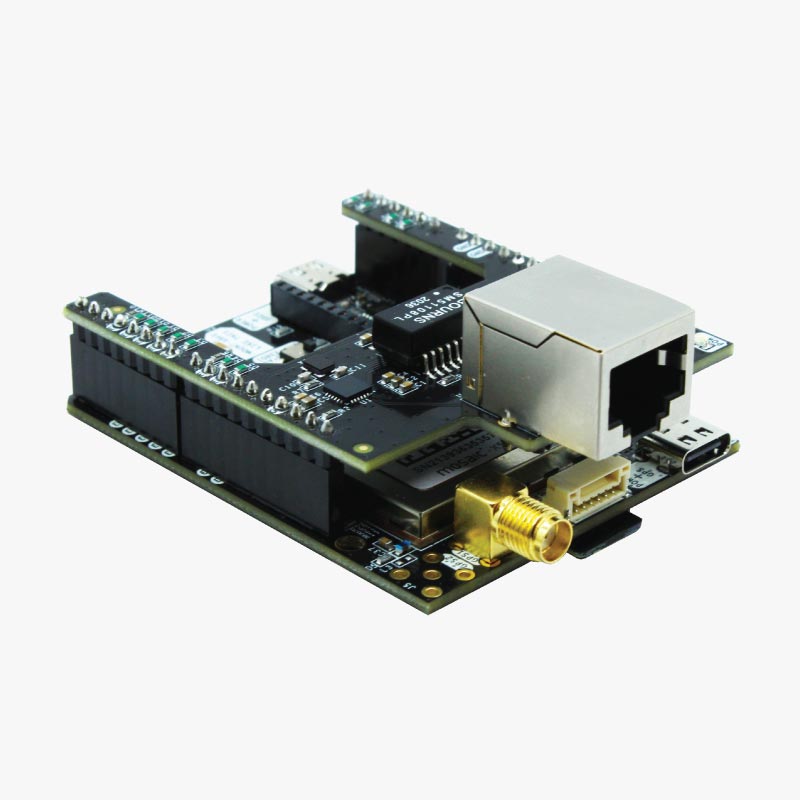
- Shield for Septentrio Native Ethernet
- USB to USB-C cable
- RJ45 Ethernet cable
- a free LAN (Ethernet) port on your router
How to share your Septentrio base station with RTK2go?
Firstly, get the credentials to connect to NTRIP service.
- Register using this link.
You will be asked to enter your name and e-mail address and mountpoint
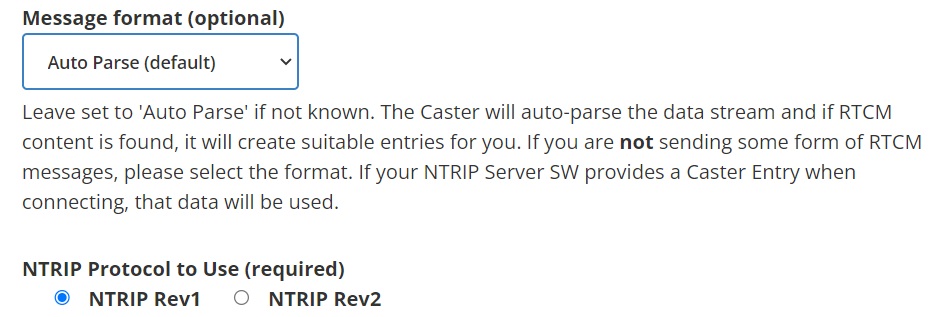
Leave the Message format to Auto Parse and NTRIP Protocol to Use to NTRIP Rev1. Other fields are optional.
- An automatic e-mail will be sent. You need to reply to the sender to confirm your registration.
- A few hours after your reply, you will get another e-mail to confirm that your mountpoint is available.
- Now you have the credentials to connect to RTK2go (password and your mountpoint).
Secondly, configure your receiver as base station.
- Connect the GNSS antenna to your receiver, in a location with good view of the sky or near a window.
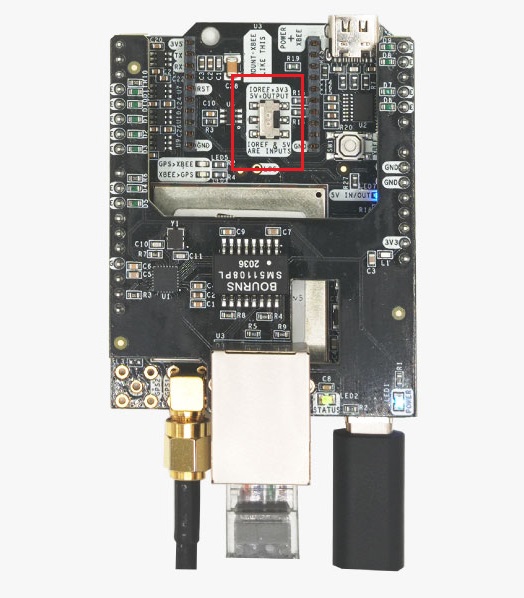
- Moving the switch on your board towards “5V = OUTPUT”.
Plug the Shield for Septentrio Native Ethernet in your receiver. Connect the shield to your ethernet hub with RJ45 Ethernet cable.
Connect your receiver to your computer through the USB port labeled with POWER+GPS.
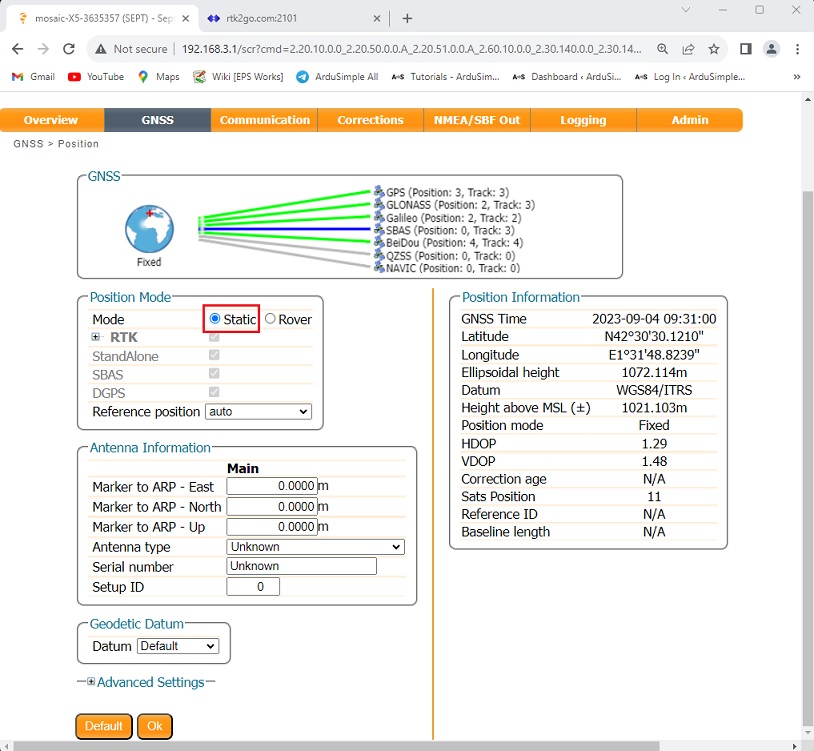
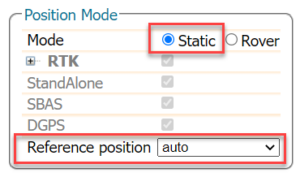
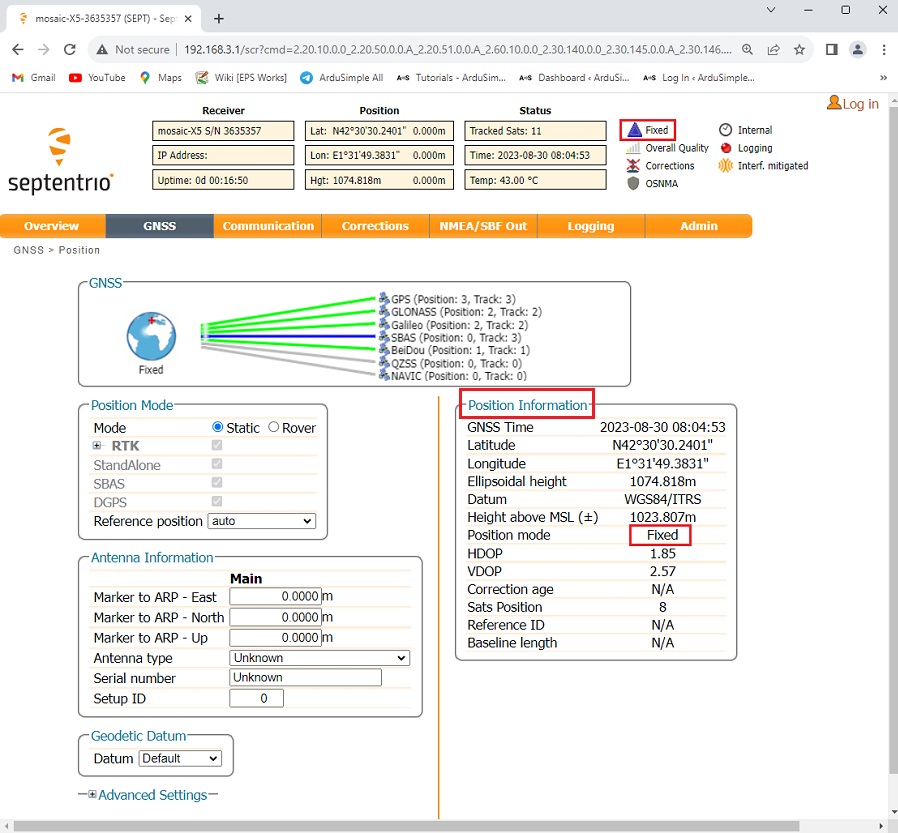
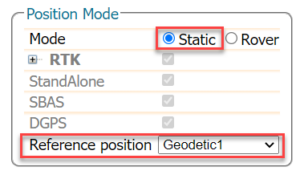
- Open a browser, type in 192.168.3.1 to enter the Septentrio web interface. In the toolbar, go to GNSS–>Position. In the Position Mode select Static.
Your base station position can be calculated in two different ways:
If you want precise base-rover distance for good pass-to-pass accuracy, and the rover’s exact position doesn’t matter much, you don’t need to accurately position the base station.
For precise and consistent positioning, make sure to provide the accurate coordinates of the antenna reference point (ARP). You can find this information on the product page for each of our simpleANT3B antennas.
- To do that in the “Position Mode” window, this time select Reference position to Geodetic 1.
- Now scroll down and expand the “Advanced Settings”. Continue scrolling down until you find “Antenna Reference Point Static Position – Geodetic”. Set your known latitude, longitude and altitude. If you use a custom datum also define it here. Note that the altitude to be set is the ellipsoid altitude (if you need more info about different types of altitudes you can check out tutorial about gnss altitudes).
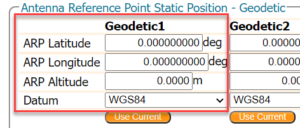
- In a few minutes, you should receive Position Information and the Position mode will be Fixed.
Thirdly, share your base station with RTK2go.
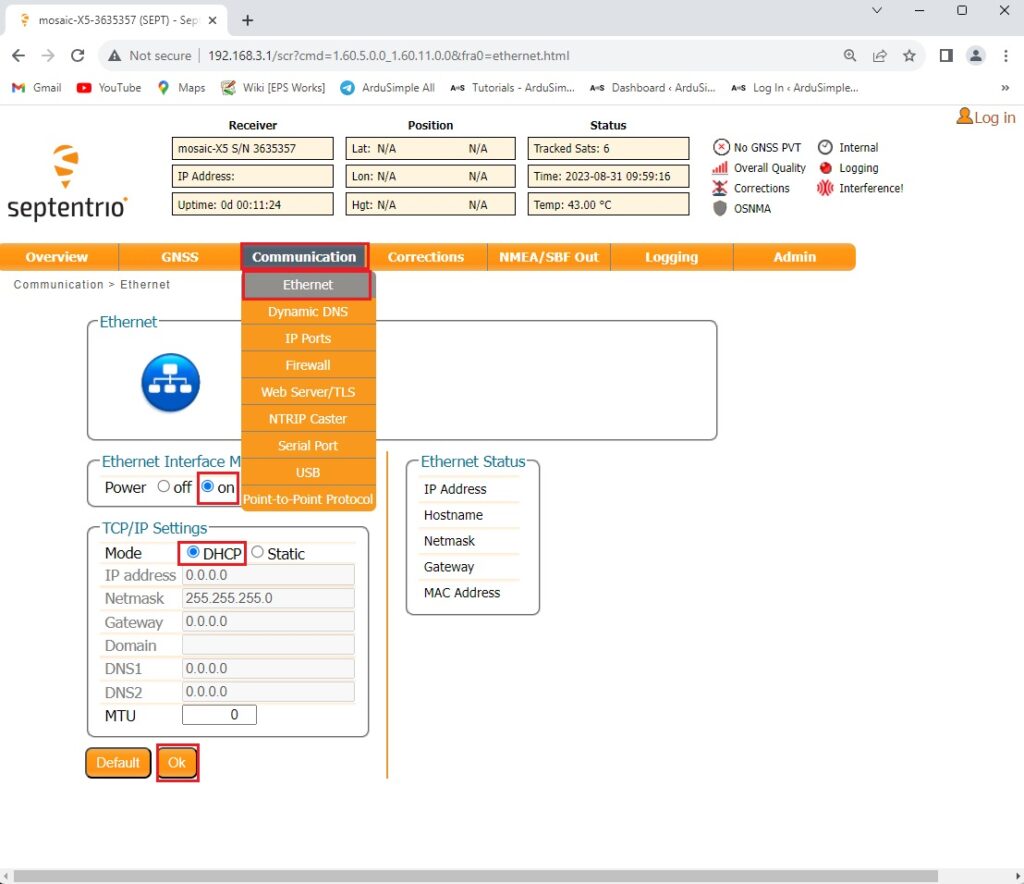
- In the toolbar, go to Communication–>Ethernet. At the Ethernet Interface Mode, check Power on.
In most of the routers automatic IP is used. To work in this way, select DHCP. If you prefer to set up your local IP manually, you can also do it from this menu. Press Ok.
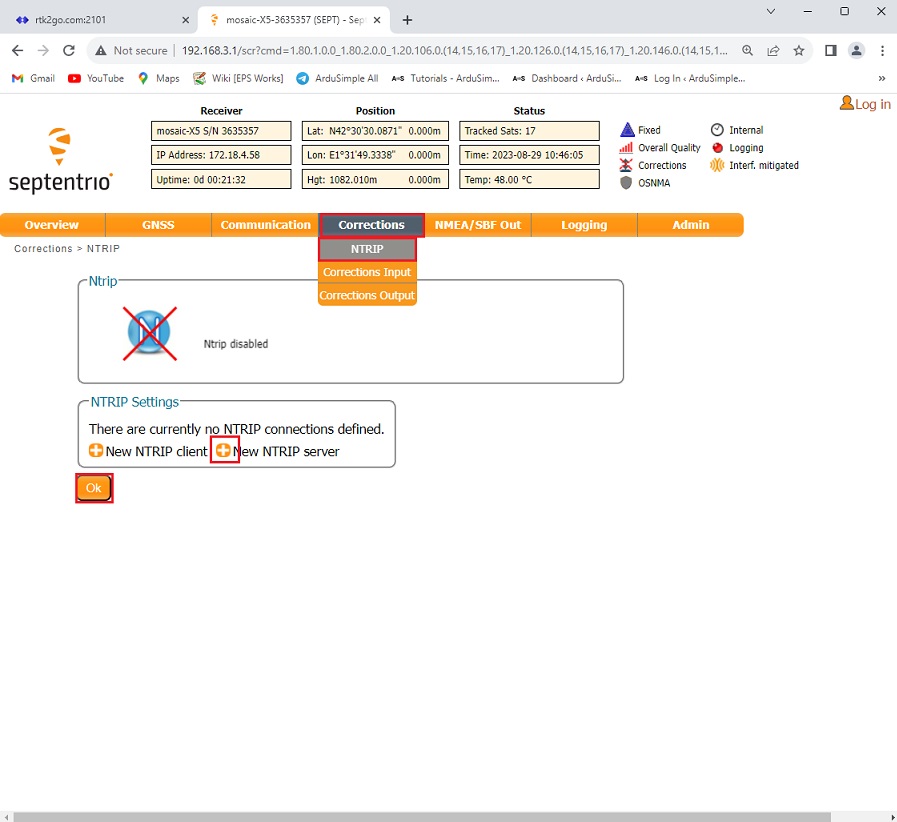
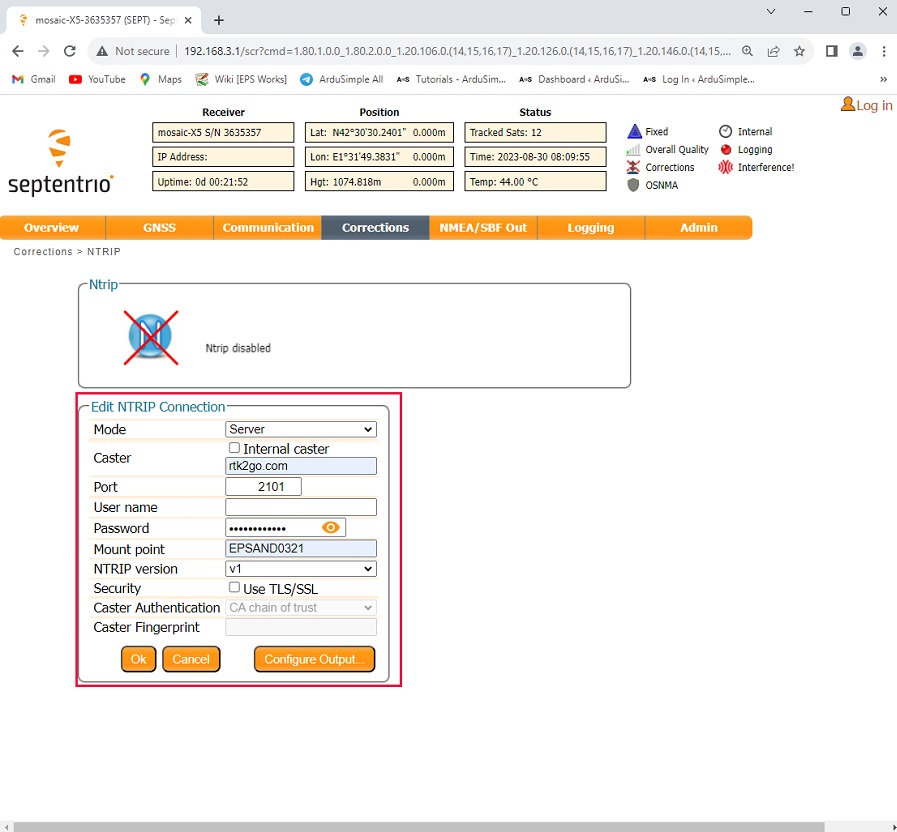
- In the toolbar, go to Corrections–>NTRIP. Choose +New NTRIP server and press Ok.
- Edit NTRIP Connection as it is on the following image. Set Mode to Server, Caster to rtk2go.com, Port to 2101, Password and Mount point as you registered in step1 and NTRIP version to v1. Then press Ok and Save configuration.
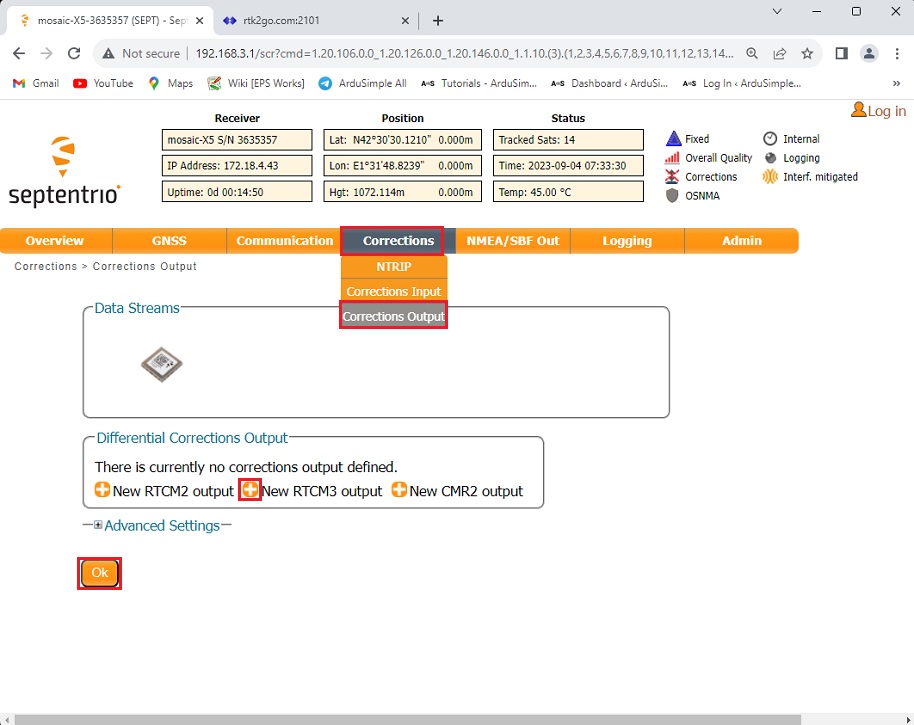
- At the toolbar go to Corrections–>Corrections Output. Select +New RTCM3 output. Press Ok.
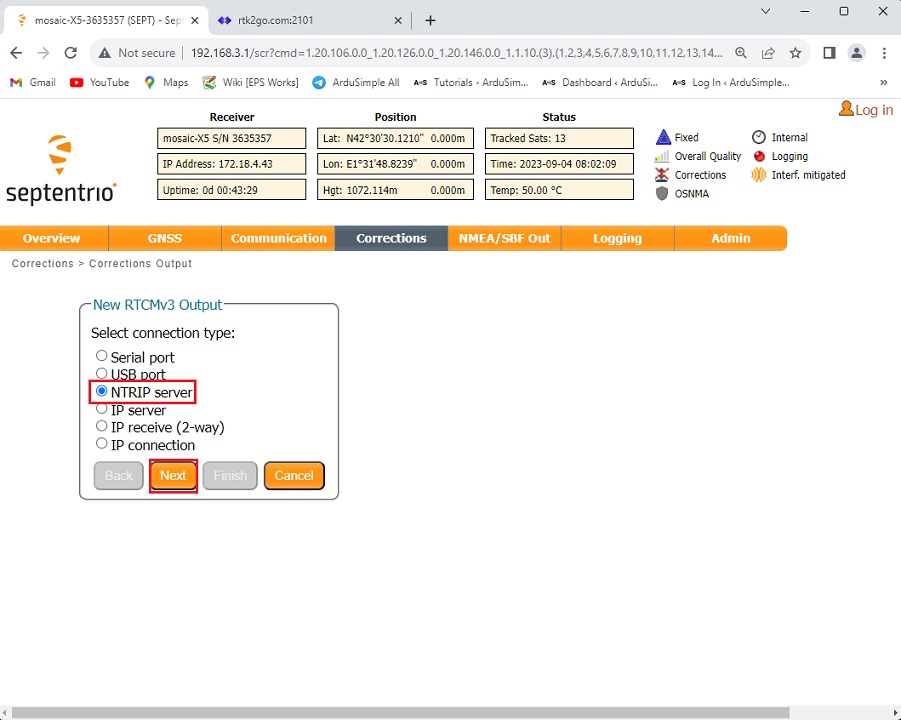
- Select NTRIP server. Press Next.
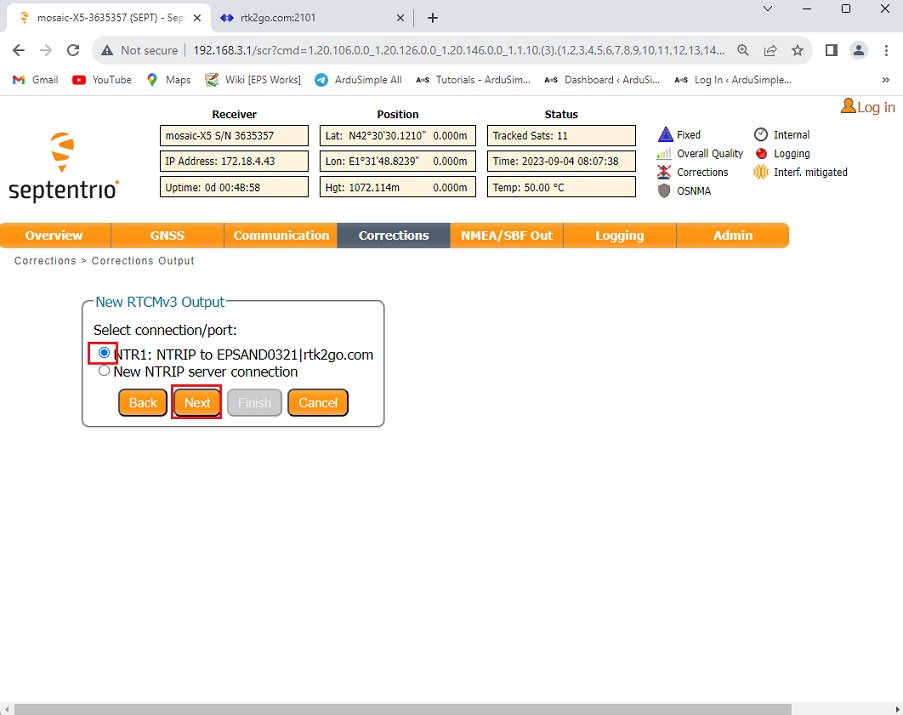
- Choose NTRIP to mount point|rtk2go.com.
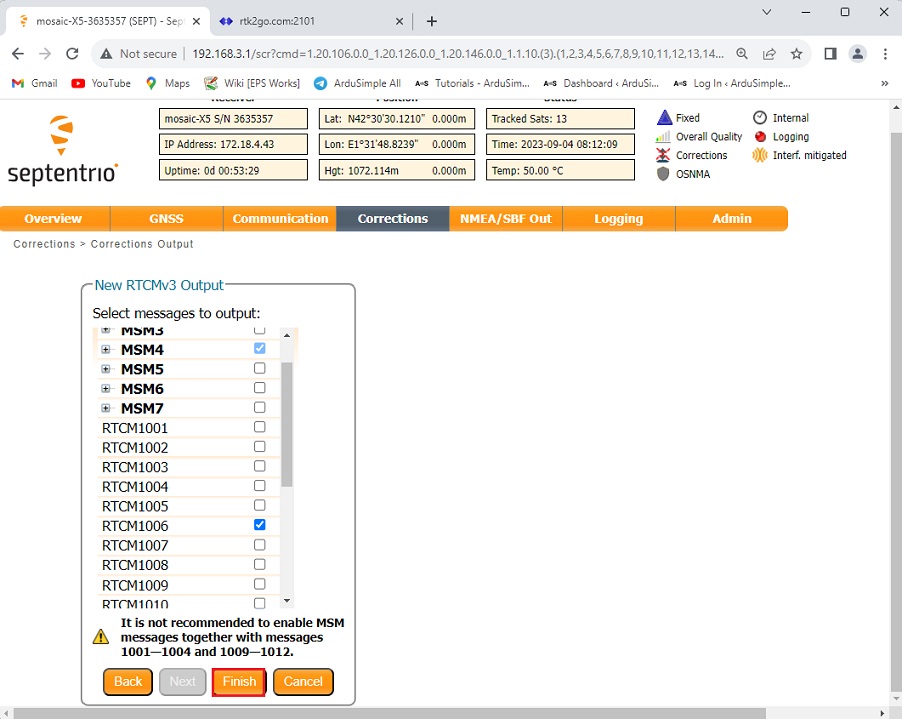
- Select RTCMv3 Output, and the default selection including MSM4, 1006, 1033 and 1230 is already quite good and compatible with most of the systems. If you have special needs you can also set them here. Press Finish and Save configuration.
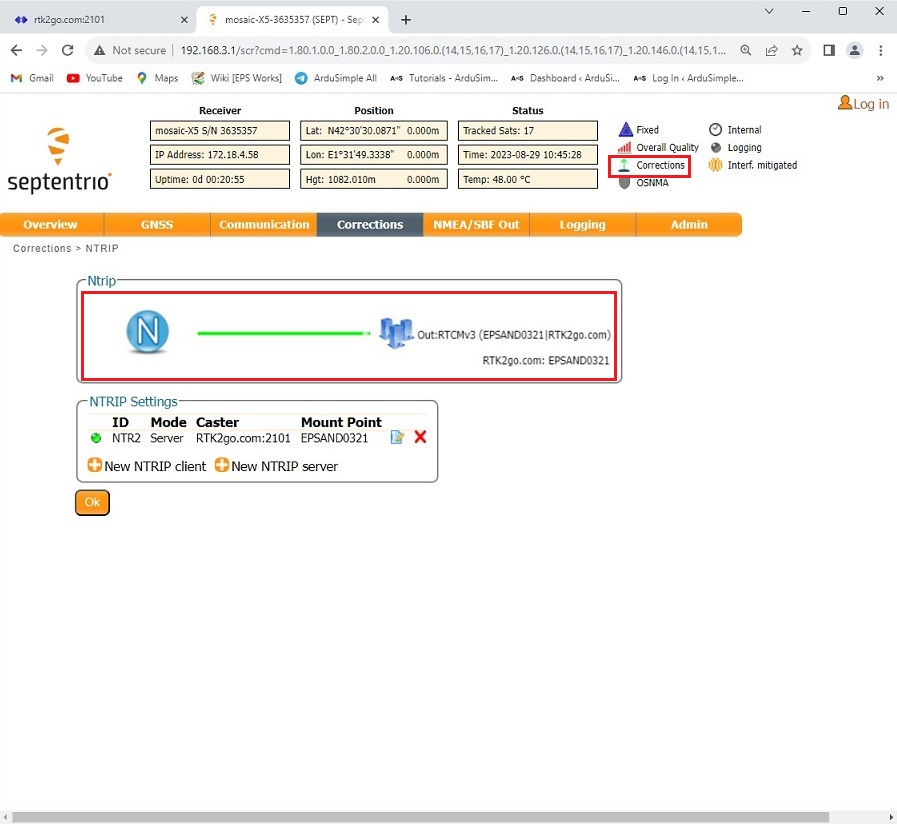
- You can see it is sending RTCM messages to your mount point on RTK2go. On the up-right corner of the screen, you can see the green arrow indicating data flow next to Corrections.
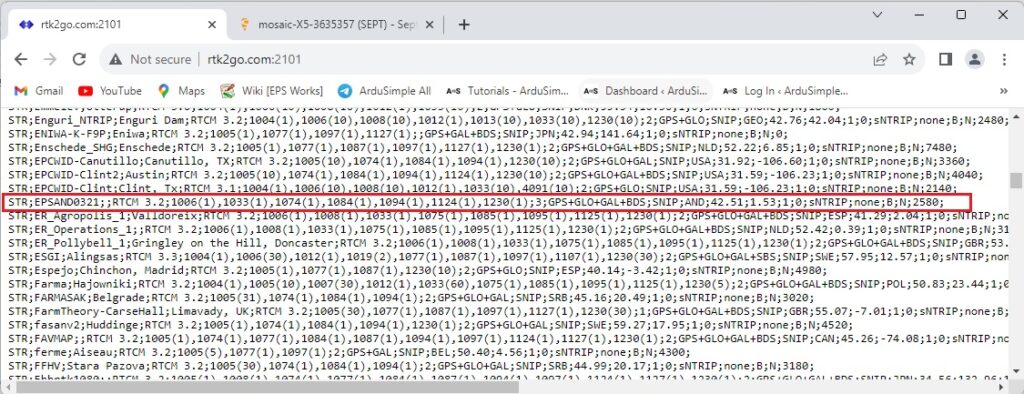
- You can go to RTK2go.com to check if everything works well.
Now you can use any NTRIP Client to connect to your mountpoint.
If you want to do this tutorial, we have all the products in stock and ready to be shipped:
 and
and 

